Claude Code notifications hook: Easy macOS desktop alerts guide
Claude Code notifications hook: Simple macOS desktop alerts that actually help
Claude Code is often running while you are doing something else: Reading docs, reviewing tickets, or coding in another window. The friction is not the run itself. The friction is missing the moment when Claude Code needs your attention and having to keep checking the terminal. This guide covers the simplest setup to implement a Claude Code notifications hook for desktop alerts. You will get a minimal configuration, the right file locations, a working macOS example, and quick fixes for the setup issues that usually waste the most time.
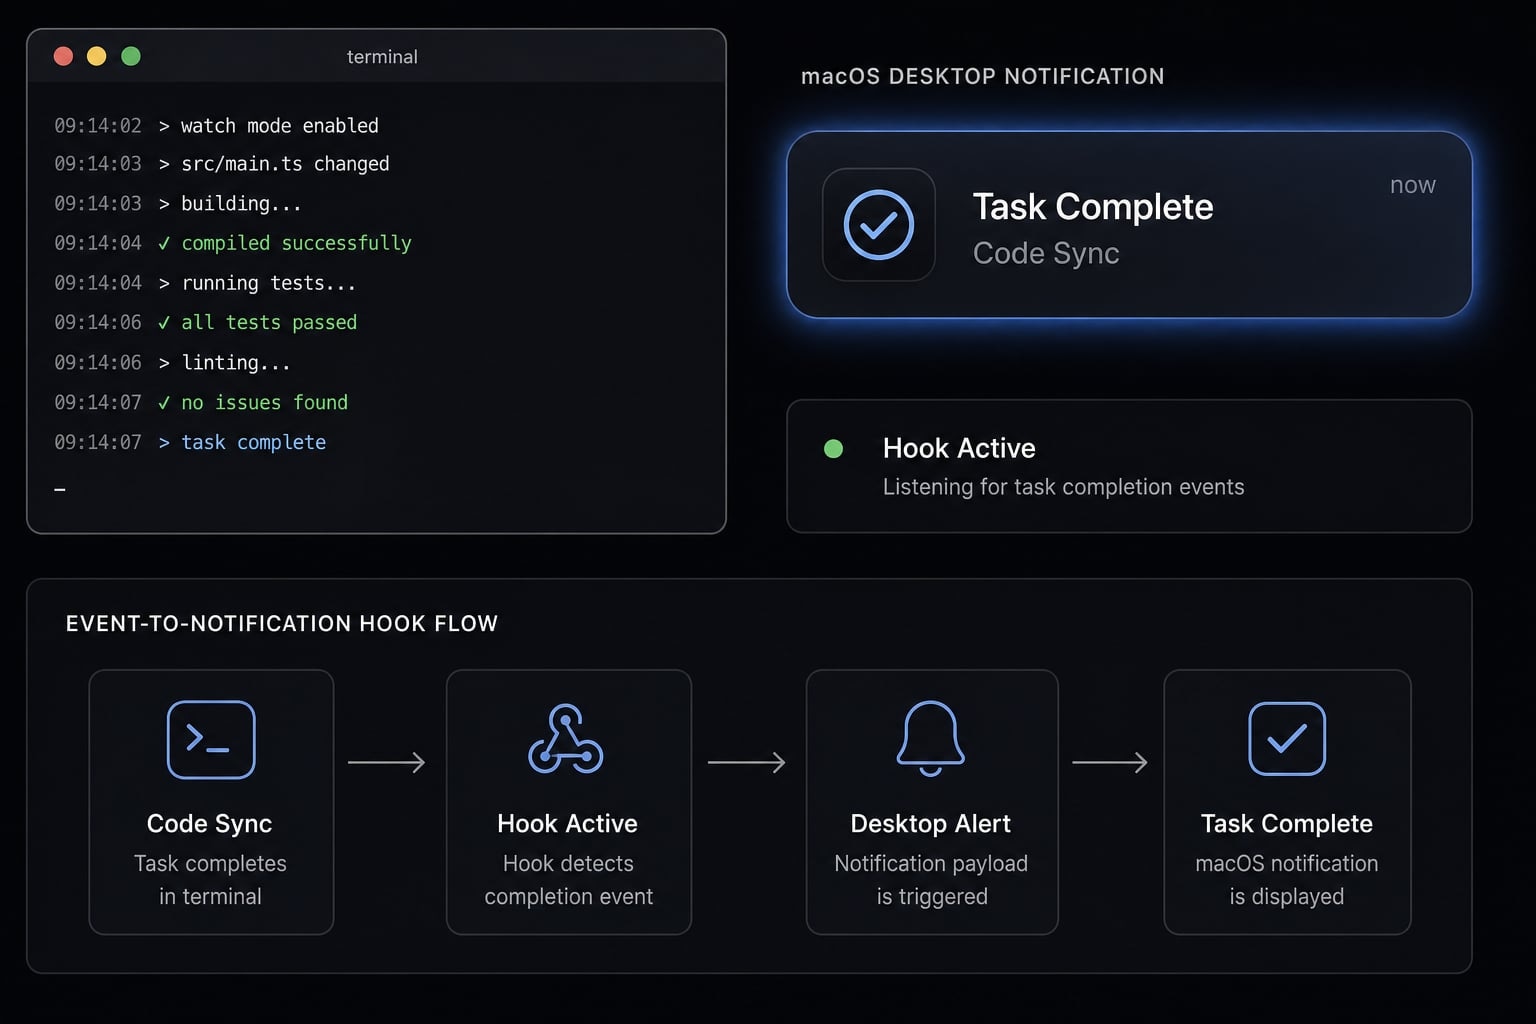
What Claude Code notification hooks actually do
Claude Code notification hooks are commands that run automatically when specific events happen. Instead of watching the terminal, you let Claude Code trigger a small script that sends a desktop alert when it needs your input.
This is best understood as lightweight CLI workflow automation, not a complex automation system. The goal is simple: Reduce terminal babysitting during normal development work.
How the hook flow works
- Claude Code reaches an event during its workflow.
- Your settings.json configuration is checked for a matching hook.
- The configured command runs and sends the notification.
That is the core workflow: the event triggers, the match is found, and the command executes. Claude Code passes a small payload to the command, which your script can read and turn into a useful alert.
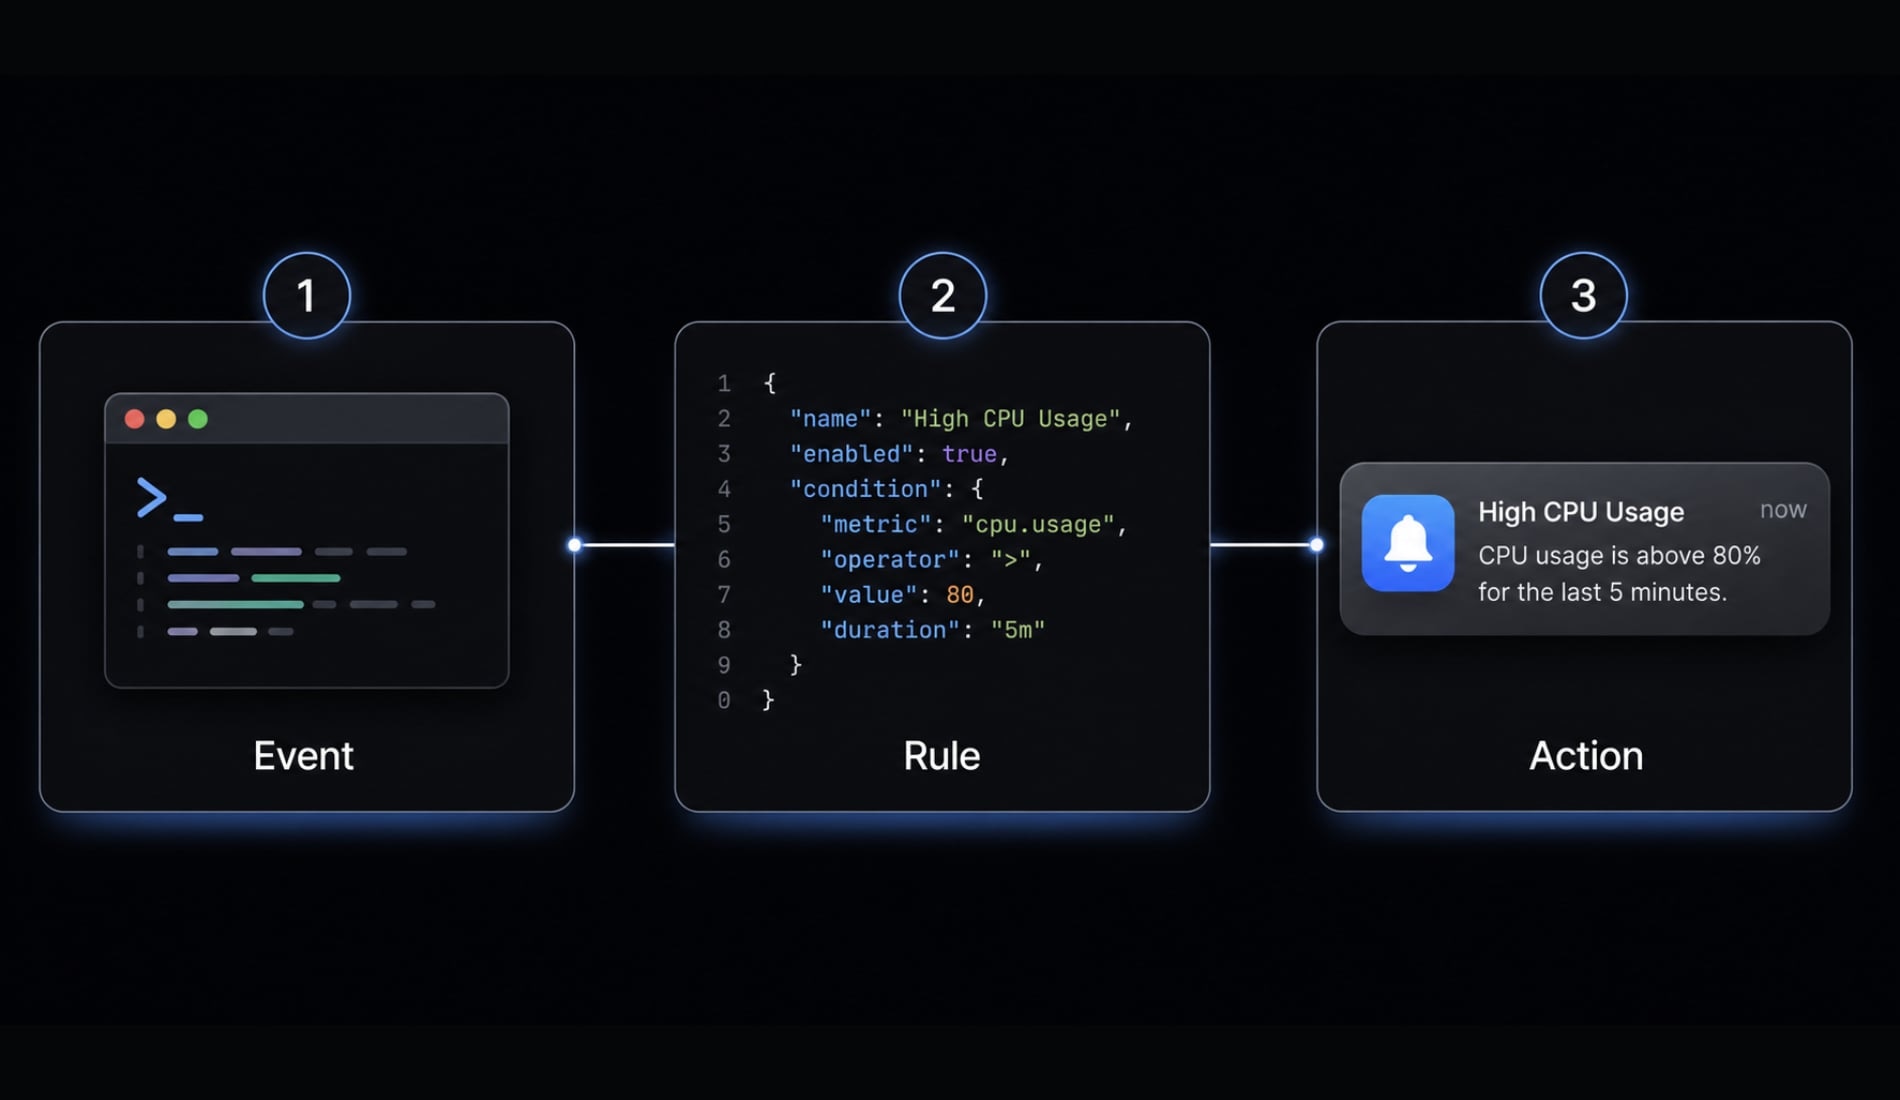
Which Claude Code notification hook events matter most
For a first setup, two Claude Code hooks matter most:
permission_prompt: Claude Code needs your approval before continuing.idle_prompt: Claude Code is waiting for your next input.
These are the most practical notification hooks because they map directly to moments when you actually need to come back. If you have ever lost time glancing at the terminal every few minutes, this is where Claude Code hooks become useful. They improve workflow control without turning your local setup into an overbuilt event-driven system.
The simplest Claude Code notification setup
The fastest working baseline is a small settings.json configuration plus one notification script. Start with the minimal version first. If that works, you can add nicer alerts later.
Quick start
- Create a
.claude/hooksfolder in your project. - Add a minimal notification script inside that folder.
- Put the hook config in
.claude/settings.json. - Match
permission_prompt|idle_promptso both events trigger alerts. - Test the command manually before relying on the hook.
- Confirm macOS notification permissions if nothing appears.
Copy-paste hook configuration
Create or edit .claude/settings.json and add:
{ "hooks": { "Notification": [ { "matcher": "permission_prompt|idle_prompt", "hooks": [ { "type": "command", "command": "bash \"$CLAUDE_PROJECT_DIR/.claude/hooks/notification.sh\"", "timeout": 5 } ] } ] }}
This settings.json configuration tells Claude Code to run your script whenever either notification event appears. Using $CLAUDE_PROJECT_DIR keeps the path stable because it resolves to the current project root.
What each config field means
matcher: Defines which events should trigger the hook. In this case,permission_prompt|idle_promptmatches both beginner-friendly notification events.command: The shell command Claude Code runs when the match happens. Here it calls your project-level notification script.timeout: Limits how long the hook can run. A short timeout like 5 seconds is a safe default and helps prevent hanging behavior.
A few practical notes matter here:
- Use
.claude/settings.jsonwhen you want a repo-level setup. - Keep the command path simple.
- Always make sure the command works manually before debugging the hook itself.
That last point saves the most time. Many hook issues are not hook issues at all. They are just script path or notification permission problems.
Where to put the settings and script
Use project-specific settings when the workflow should stay with the repo. Use global settings when notifications are only a personal preference on your machine. That is the cleanest decision rule.
Project-level vs global setup:
Setup option | Best for | Pros | Trade-offs |
|---|---|---|---|
| Shared repos, repeatable team workflows | Easy to keep with the project, works well with CLAUDE_PROJECT_DIR, supports consistent project-level setup | May not suit every teammate if personal notifications are not agreed |
| Personal machine preferences | Good for a private global setup, no repo changes required | Does not travel with the project, harder to share as a team standard |
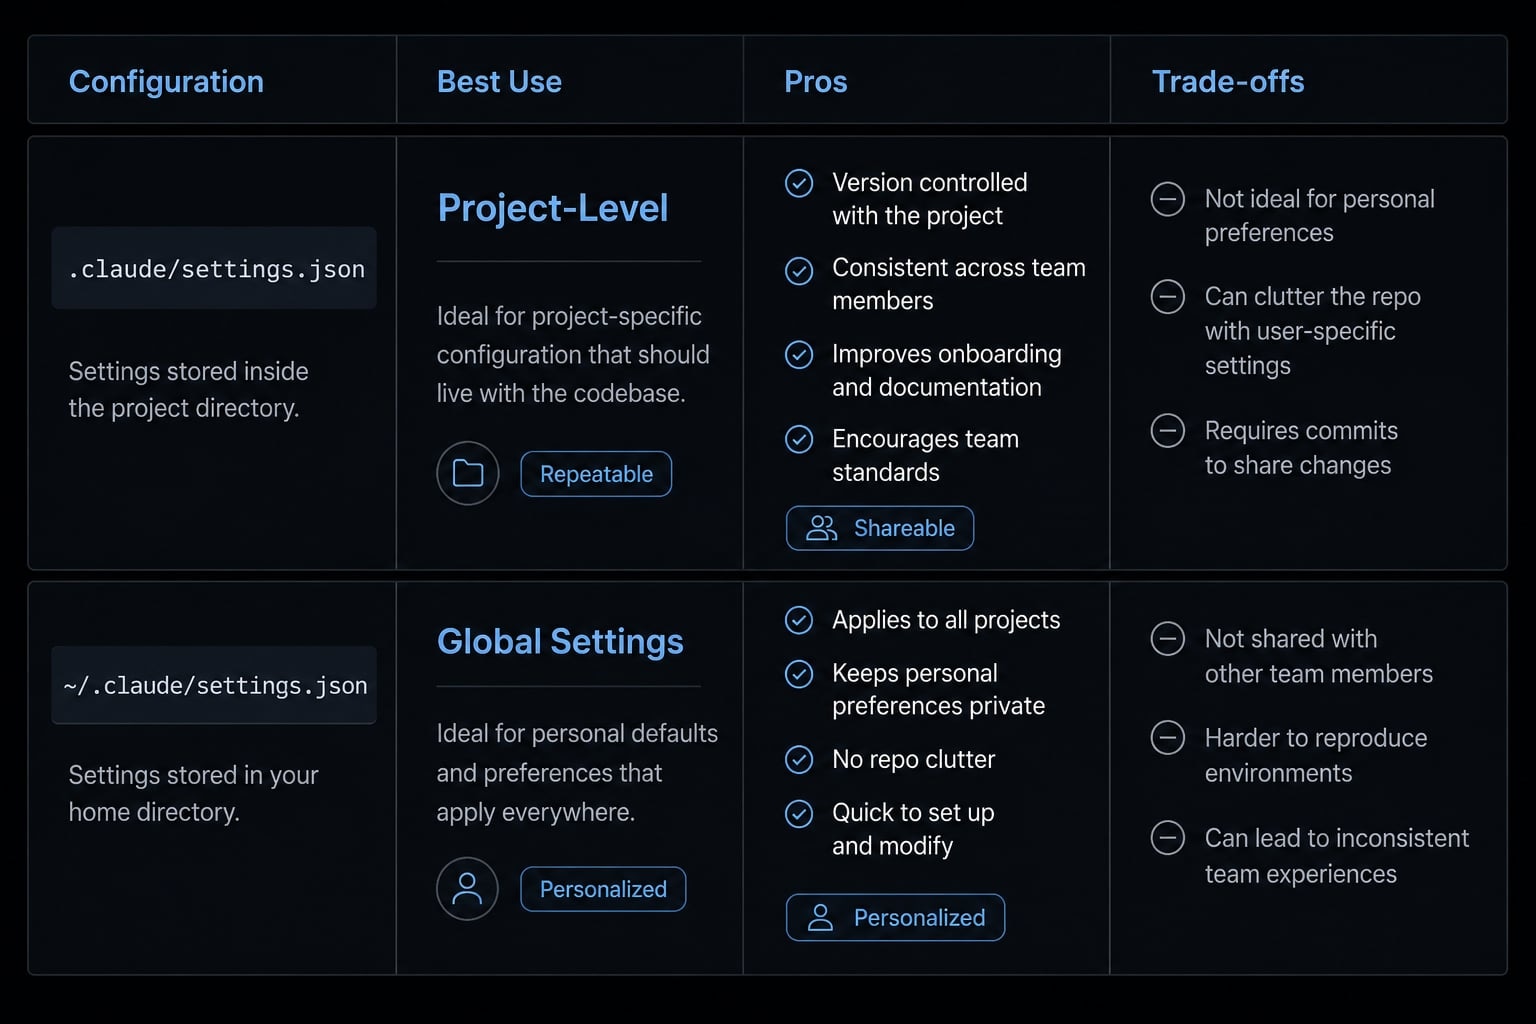
For the script location, keep it predictable:
- In a project-specific settings model, place the script at
.claude/hooks/notification.sh - In a global settings model, place it in a stable personal path you control
For most users starting out, a project-level setup is easier to understand because the config and script live together. But teams should not force personal notification behavior into version control unless that convention is discussed and accepted. A shared repo should optimize for maintainability, not surprise.
A working macOS desktop notification script
For a first version, use osascript. It is built into macOS, needs no extra package, and is the simplest path to working macOS notifications.
Example script
Create .claude/hooks/notification.sh:
#!/bin/bashinput=$(cat)if echo "$input" | grep -q '"notification_type":"permission_prompt"'; then osascript -e 'display notification "Claude Code needs your permission to continue." with title "Claude Code"'elif echo "$input" | grep -q '"notification_type":"idle_prompt"'; then osascript -e 'display notification "Claude Code is waiting for your input." with title "Claude Code"'fi
If needed, make it executable:
chmod +x .claude/hooks/notification.sh
This notification script is intentionally minimal. It uses osascript to send a system notification and avoids unnecessary dependencies. It also stays focused on permission_prompt and idle_prompt, which is enough for a practical baseline.
What this script is doing
- It reads stdin, which is where Claude Code sends the hook payload
- It checks which notification event appears in that input
- It uses osascript to send simple desktop alerts
That is enough for basic macOS notifications. Start here before you add anything more advanced. If the basic version fails, adding complex tools will complicate debugging. Stick to simplicity first.
To validate the script quickly, run the notification command manually in Terminal:
osascript -e 'display notification "Test notification" with title "Claude Code"'
If no alert appears, the issue is not your hook logic. It is almost always macOS notification permission or system-level notification settings.
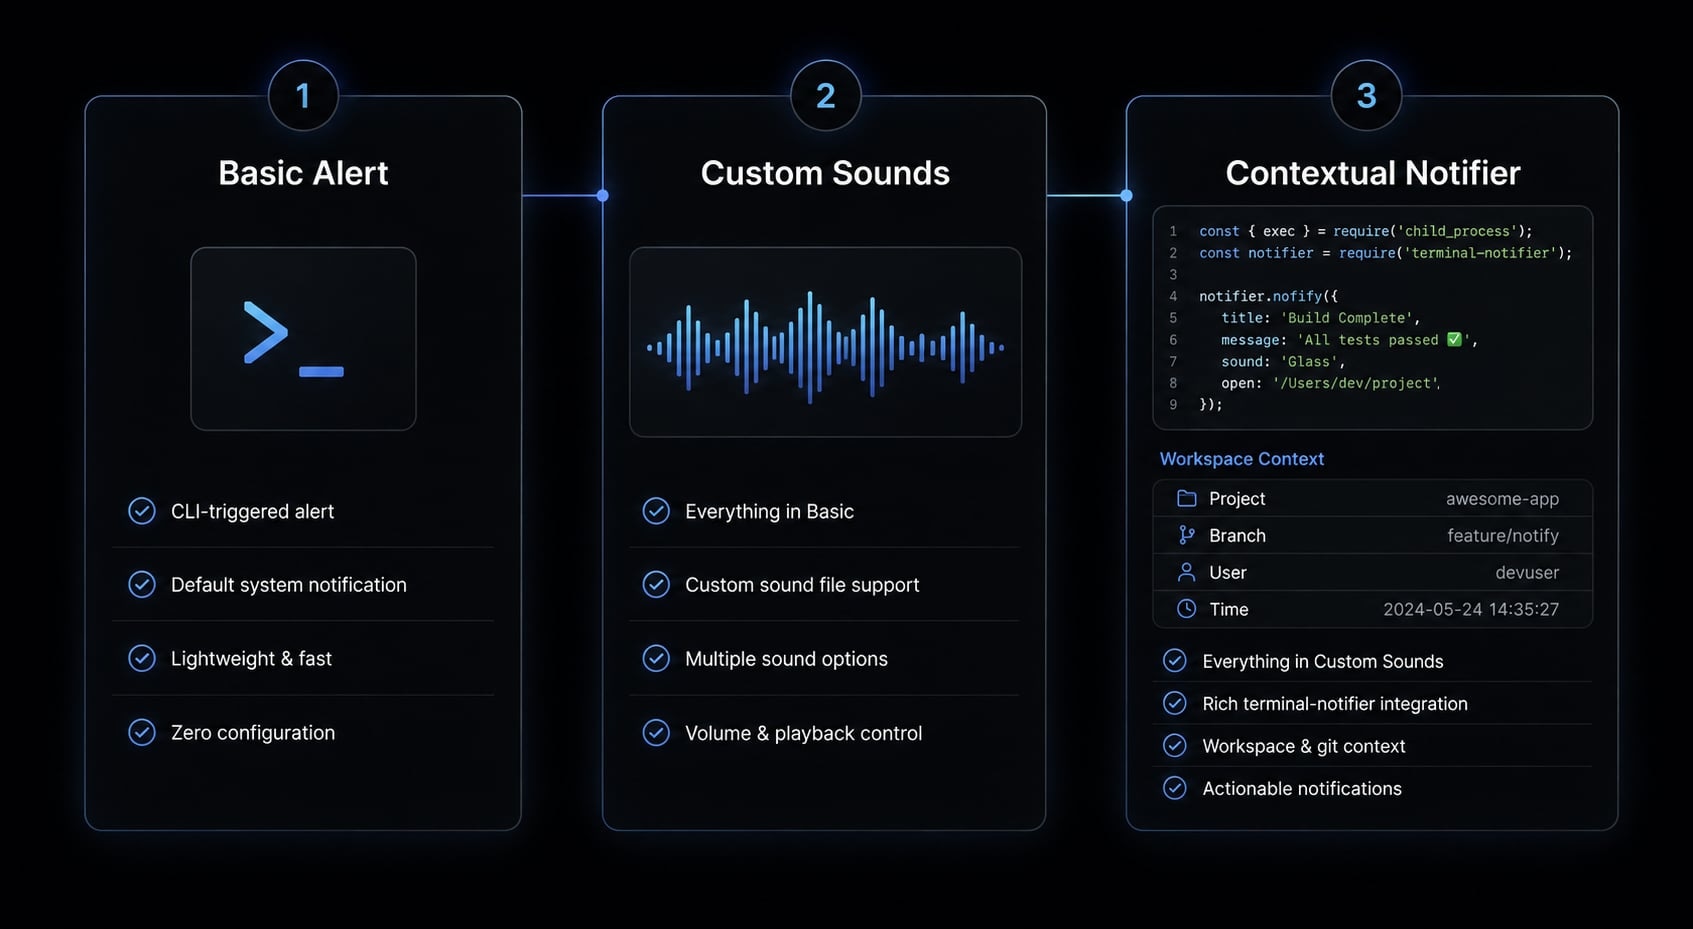
Optional upgrades if the basic setup works
Only upgrade after the default setup is confirmed. A reliable basic desktop alert is more useful than a sophisticated setup you cannot trust. Useful upgrade path:
- Basic desktop alert: Stay with osascript first. This proves the hook, path, and permission chain works.
- Different sounds for event types: Add custom sounds if you want a clearer distinction between “needs approval” and “waiting for input.” This can help when you use AI coding agent alerts during longer runs.
- Add repo/workspace context: If you run multiple sessions, add the repo name or workspace context so the alert tells you which project needs attention. This is where tools like terminal-notifier can become useful because they can provide richer context and more polished notifications.
terminal-notifier is a reasonable next step if you want richer context, better formatting, or more control over presentation. But it should stay optional. Most users do not need it to get value from Claude Code notification hooks.
Common issues and quick fixes
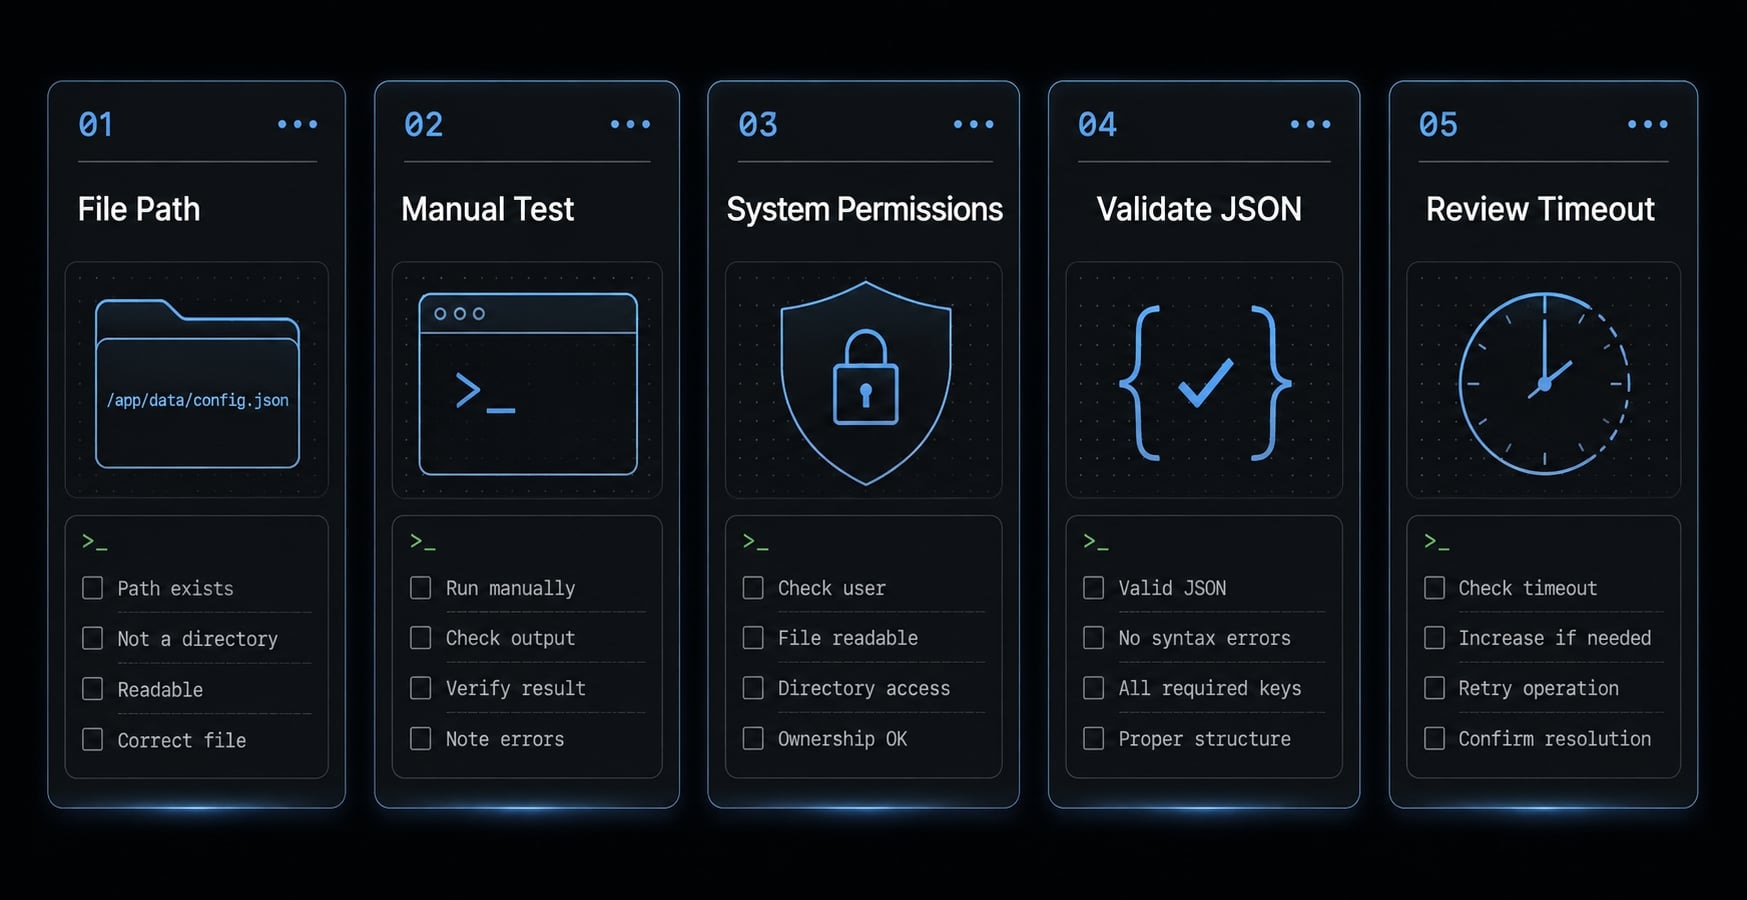
Most failures are simple and easy to isolate. In practice, the common causes are the same every time: Wrong file path, invalid JSON, missing notification permission, a bad script path, or a hook timeout that cuts things off too early.
Quick troubleshooting checklist:
- Confirm the settings file location: Make sure you edited the file you intended:
.claude/settings.jsonfor project use or~/.claude/settings.jsonfor personal use. - Run the command manually: Verify the script or notification command works outside Claude Code. If the command works manually, the problem is usually configuration-related.
- Check macOS notification permissions: If the script runs but nothing appears, review system notification settings for Terminal or the app executing the script.
- Validate JSON formatting: A single missing comma can break the hook. Always validate JSON formatting if the config is ignored.
- Review timeout and script path: Confirm the script path exists and the timeout is not unrealistically short.
A few plain failure patterns are worth calling out:
- Script not running often means the path in
commandis wrong. - Invalid JSON often means Claude Code never reaches the hook definition.
- Missing notification permission means the script may run correctly but no alert is shown.
If you only remember one debugging rule, remember this one: Test the notification command manually first.
When notification hooks are most useful in real workflow
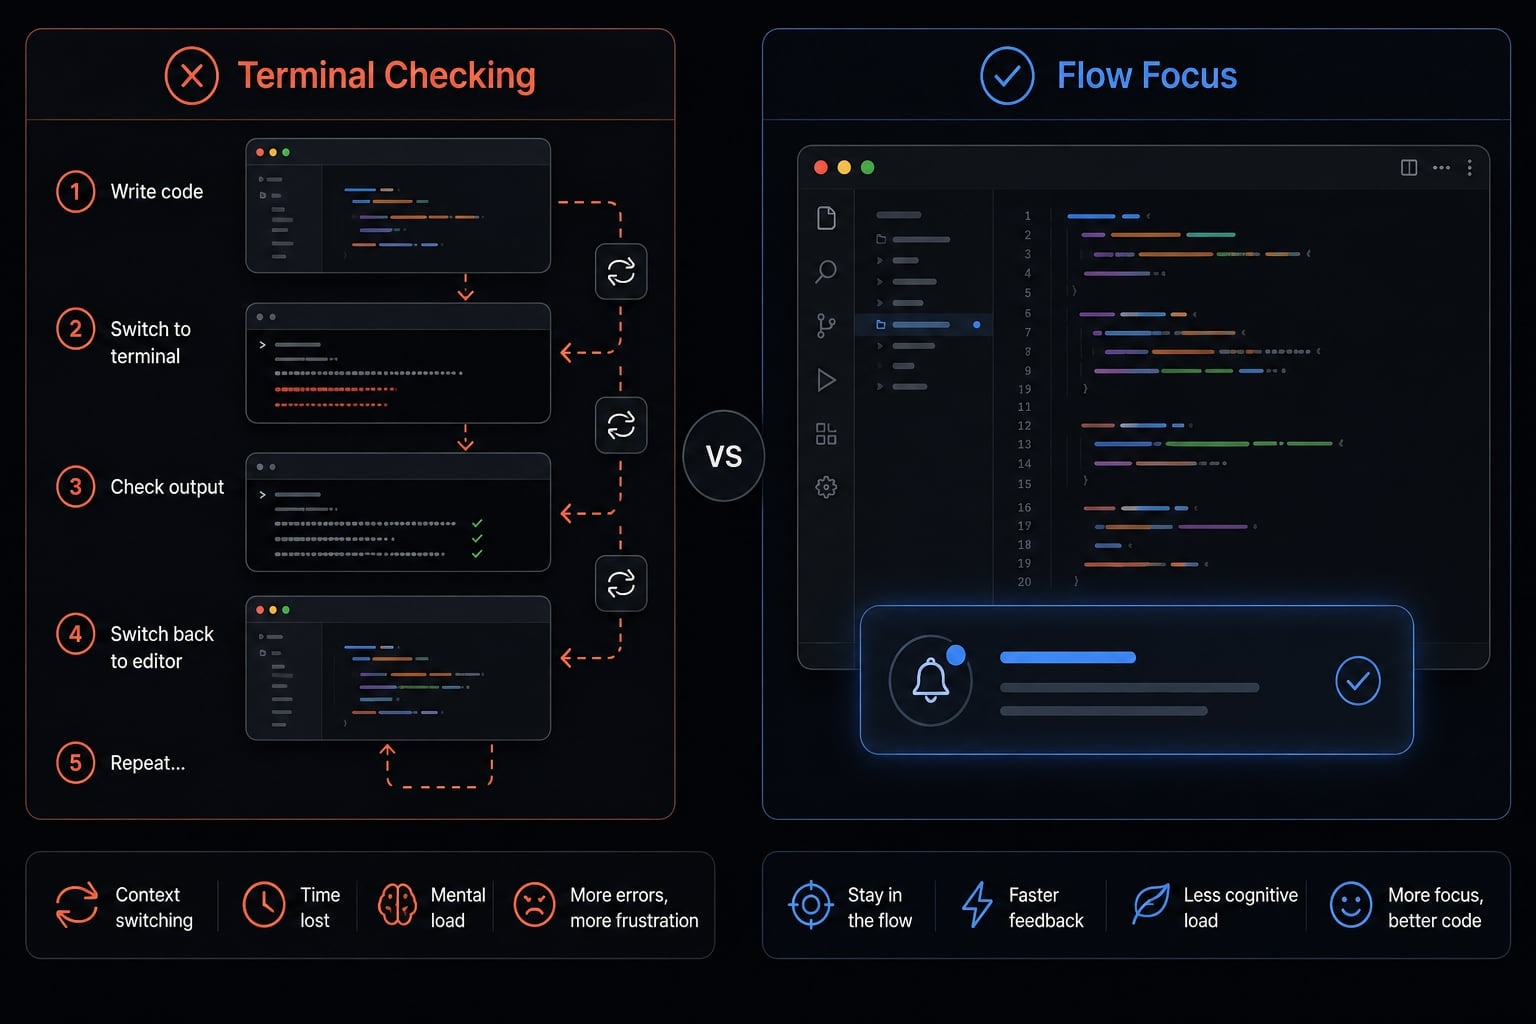
Notification hooks are most useful when they reduce unnecessary checking without demanding a bigger system around them. The value is modest but real: Context switching reduction, better workflow control, and fewer interruptions while Claude Code runs in the background.
Practical use cases:
- Working in another editor tab while Claude Code processes a task.
- Reviewing docs, tickets, or pull requests during longer runs.
- Catching background task notifications when you step away from the terminal.
- Managing multiple local Claude sessions without guessing which one is waiting.
- Building small, reusable AI workflows that stay local and easy to maintain.
This is not about dramatic developer productivity claims. It is about removing a low-grade annoyance that repeats all day. If Claude Code frequently runs beside your normal work, notification hooks are one of the easiest quality-of-life improvements you can add.
Frequently asked questions
What are Claude Code notification hooks?
Claude Code notification hooks are lightweight, event-driven commands that run automatically when specific lifecycle events occur, such as when Claude requires input. They allow you to receive desktop alerts, enabling you to focus on other tasks without constantly monitoring the terminal for prompts.
How do I set up Claude Code notification hooks?
- Create a
.claude/hooksdirectory in your project. - Add a notification script to that folder.
- Define the hook configuration in
.claude/settings.json. - Use a
matcherto targetpermission_promptoridle_prompt. - Test the command manually in your terminal to ensure it fires correctly.
Where should I store my notification settings?
Use project-specific settings (.claude/settings.json) if you want the workflow to travel with your repository and be shared with your team. Use global settings (~/.claude/settings.json) if the notification behavior is a personal preference that should apply to all your local Claude Code sessions.
Why are my notifications not working?
If your notifications fail, check these common issues: ensure the file path in your settings.json is correct, validate your JSON formatting, confirm that your notification script has execution permissions, and verify that your macOS system settings allow notifications for the application triggering the alert.
Can I upgrade my notifications after the basic setup?
Yes, but only after confirming the basic setup works. Once you have a functional alert, you can integrate advanced tools like terminal-notifier for better icons, play custom sounds to distinguish between event types, or add logic to display the current repository name or workspace context.
Are these hooks better than checking the terminal?
Yes, they reduce context switching. Instead of manually checking the terminal every few minutes, you can work in another editor tab or review documentation. The notification system pulls your attention back to the terminal only when Claude Code explicitly requires your permission or input.
Read more:
- Claude Code tutorial: Set up and master your AI coding agent
- Statusline Claude Code: Fast setup for workflow productivity
- Claude Code slash commands: Essential shortcuts for CLI flow
Conclusion
A good Claude Code notifications hook setup does not need to be elaborate. The best starting point is a small project-level config, a built-in osascript script, and support for permission_prompt and idle_prompt.
Start with the minimal path first. Confirm the command works manually, make sure notifications appear in macOS, and only then add upgrades like sounds or richer context. That order keeps the setup reliable and easy to debug.
If you are building more repeatable local agent workflows, explore the related Claude Code setup guides and reusable workflow templates on agentkit.best.