Claude Code custom commands: Create reusable slash commands
Claude Code custom commands: How to create reusable slash commands that actually save time
Claude Code custom commands eliminate repetitive prompting by turning frequent tasks - like PR reviews or test generation - into simple slash commands. This guide covers what custom commands are, how project commands differ from user commands, how to create your first command, how $ARGUMENTS works, five practical starter examples, and the most common mistakes to avoid.
What Claude Code custom commands are
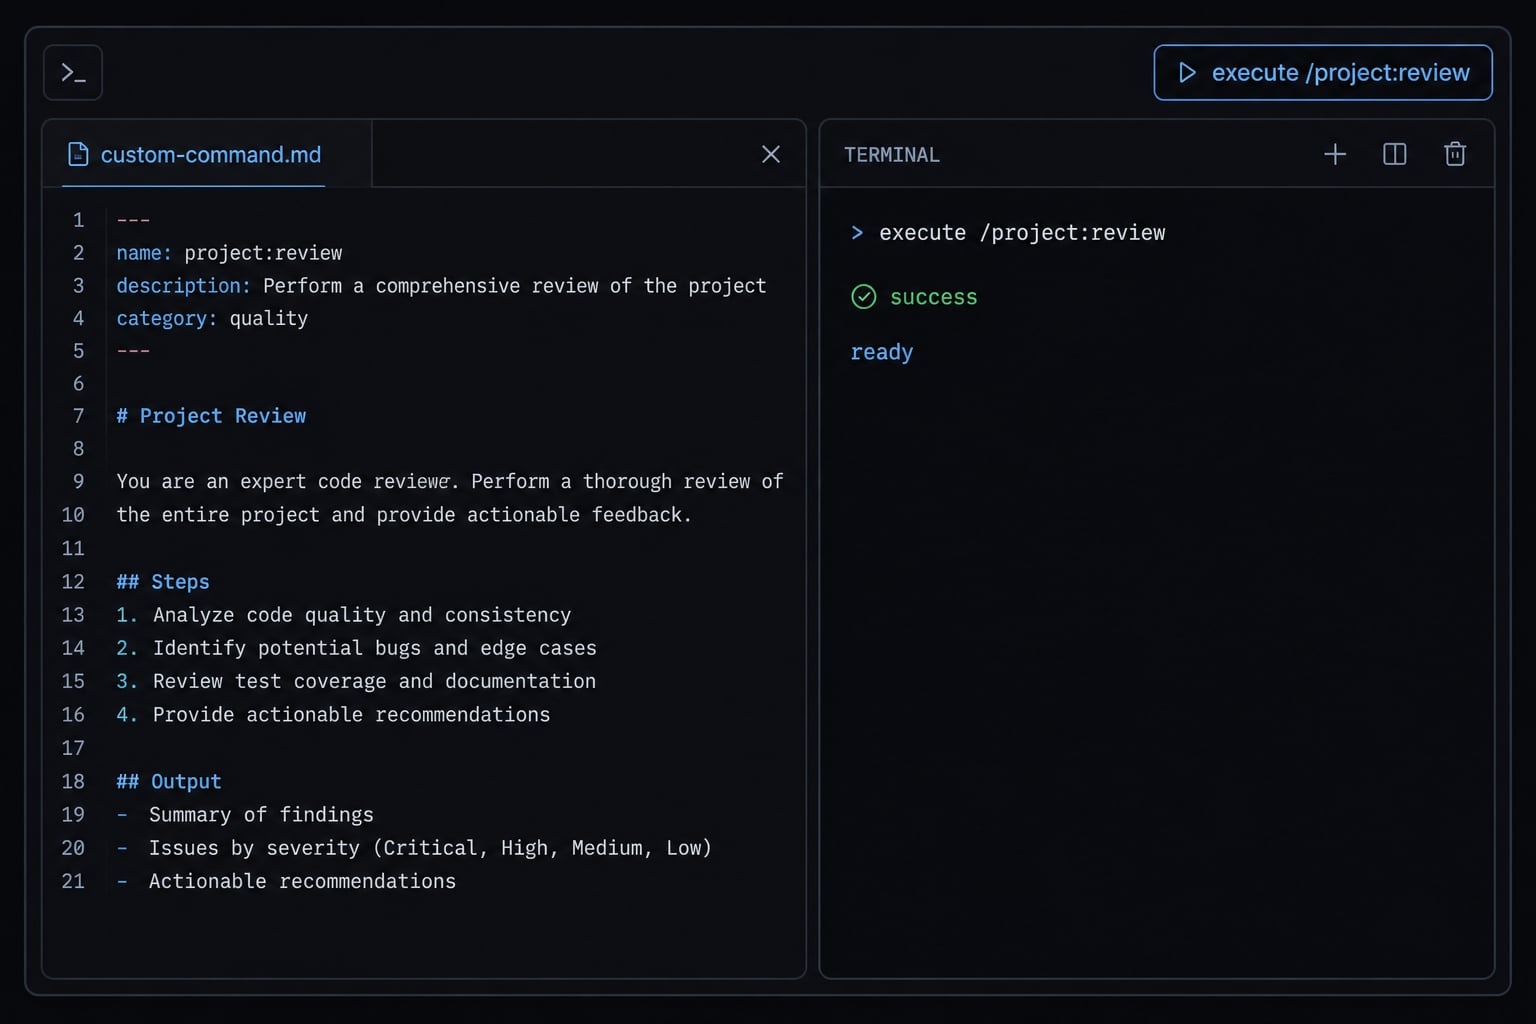
Claude Code custom commands are reusable, markdown-based instructions that you save as files and trigger with slash commands inside Claude Code. They are useful for recurring tasks with predictable structure, such as PR review, release prep, documentation updates, and test-related workflows.
In practical terms, custom commands let you turn a prompt you use repeatedly into a saved workflow. Instead of rewriting instructions every time, you create one command file, store it in the right folder, and run it on demand. That usually leads to less repetition, more consistent outputs, and cleaner team standards for repeatable repo tasks.
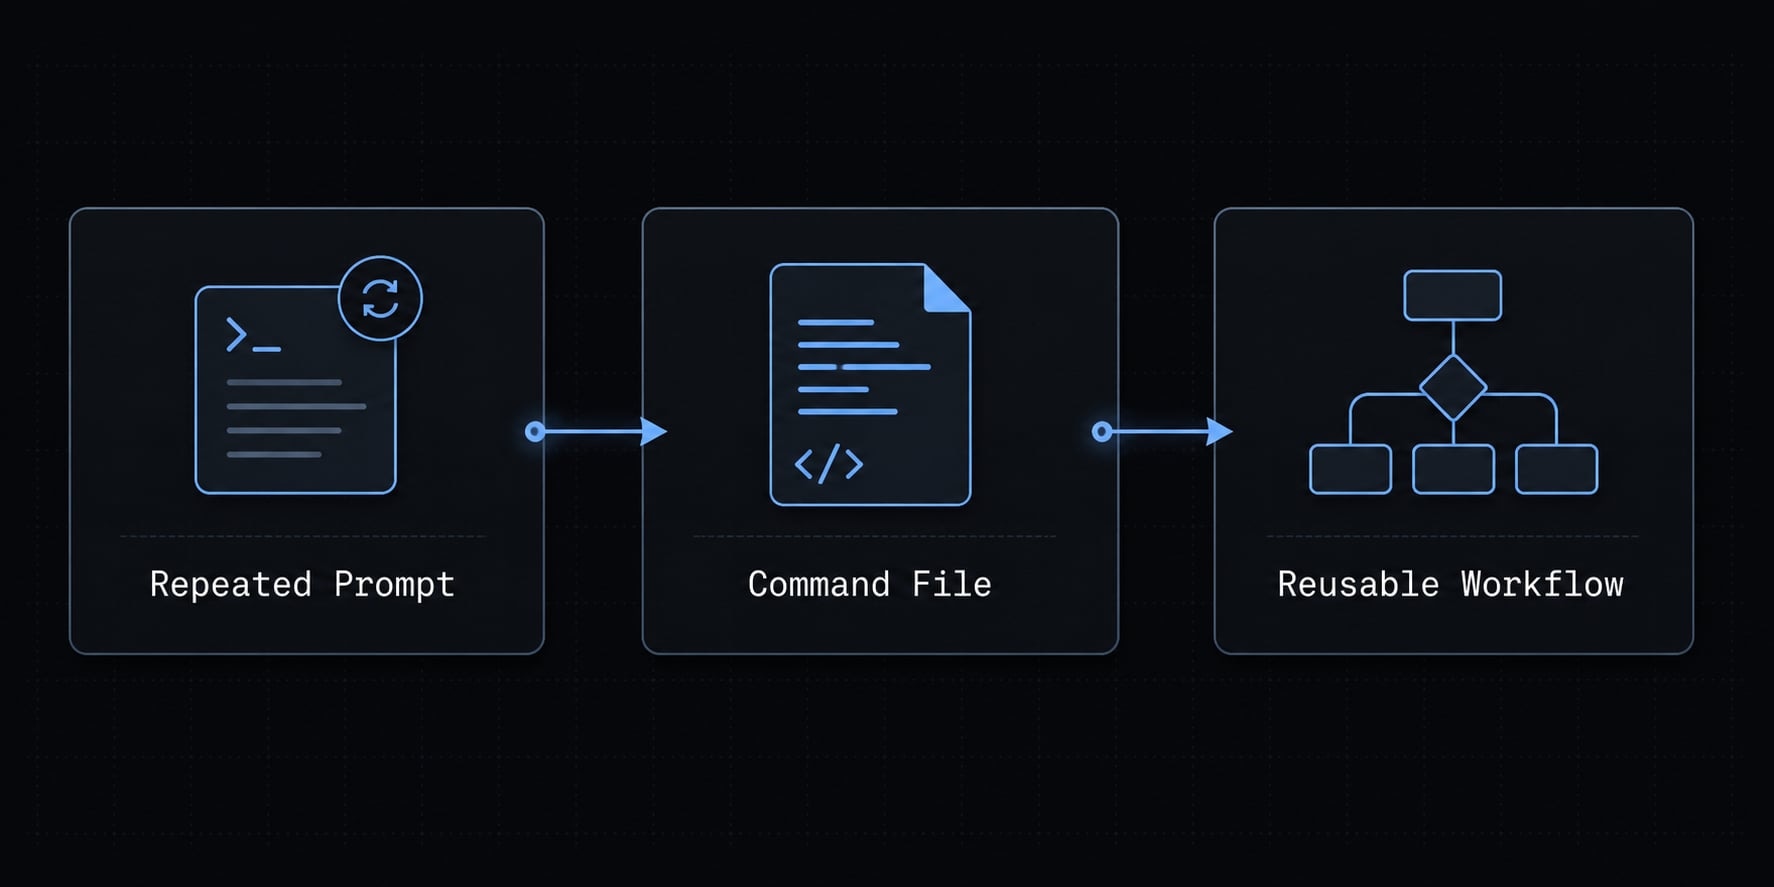
Custom commands are useful because they standardize work. They are not a full scripting framework, and they do not replace every interactive conversation with Claude Code. They work best when the task is repeated often and the output format is reasonably predictable.
What problem they solve
- Rewriting the same prompts wastes time across PR reviews, commit drafting, test generation, and docs updates.
- Prompt wording often changes from run to run, which creates inconsistent outputs.
- Saved slash commands help create stable, reusable workflows for common developer tasks.
- Teams can use shared command files to apply the same repo-level standards more consistently.
When custom commands are worth creating
Create one when:
- The task happens often.
- The structure is predictable.
- Consistency matters.
- You already know what “good output” looks like.
- The task is narrow enough to describe clearly.
A good first use case is usually something small: Review a PR for bugs, update a README after shipping a feature, or prepare a release note. That is where Claude Code custom commands tend to provide immediate value without adding unnecessary complexity.
Project commands vs user commands: Which one should you use?
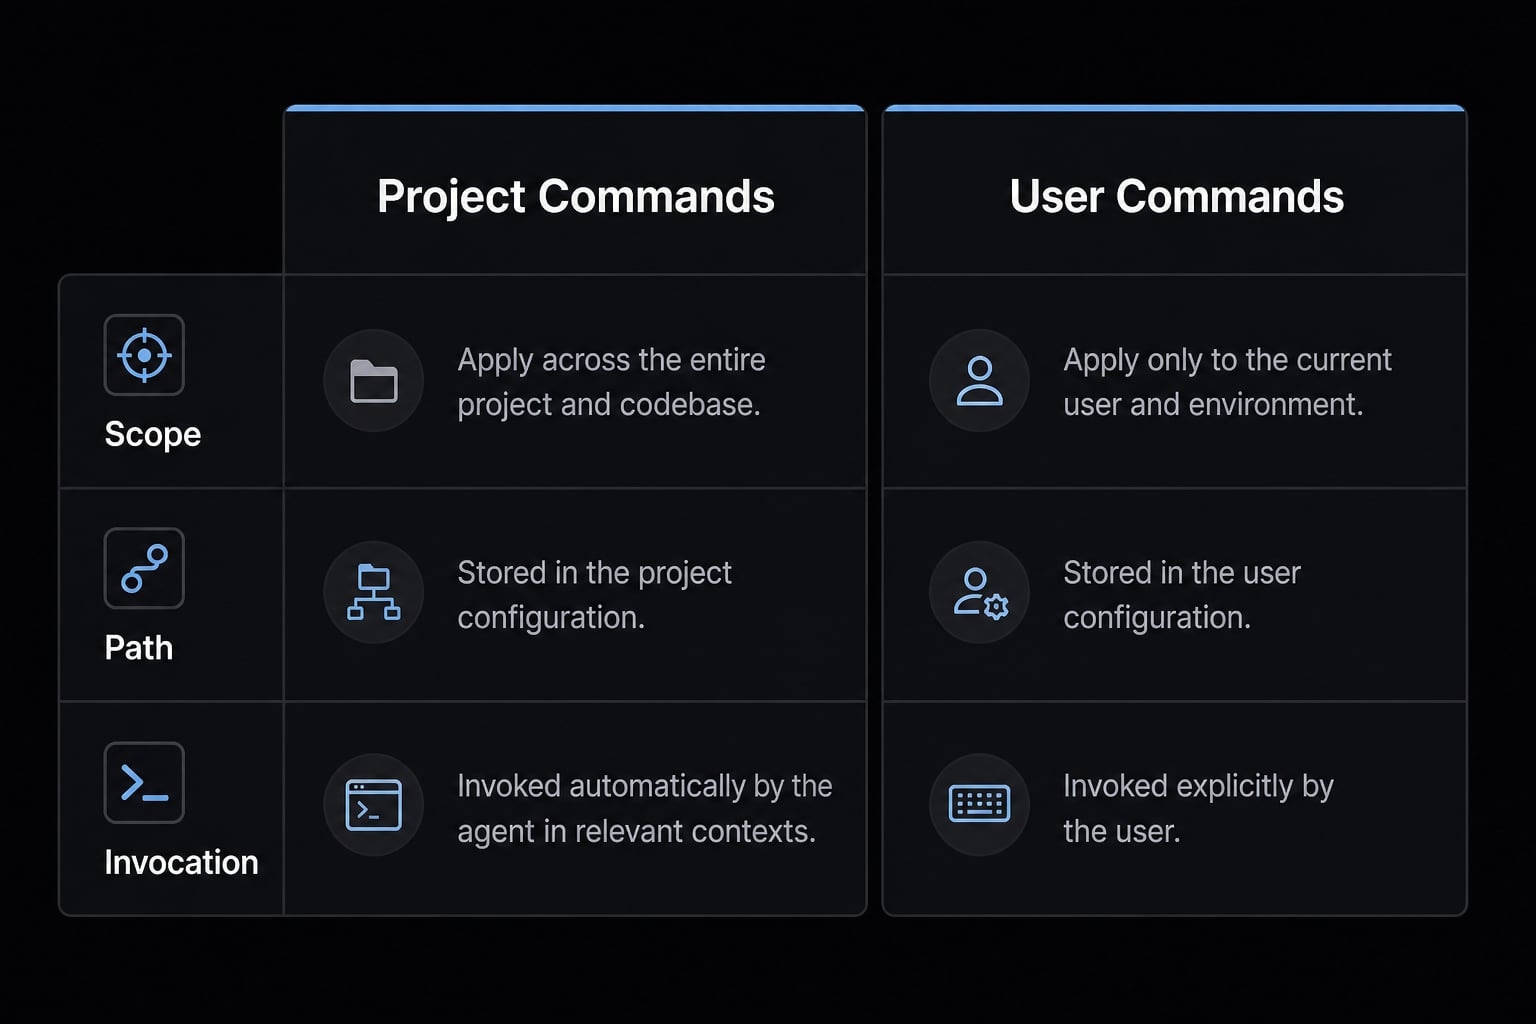
The main difference is scope. In Claude Code, the place where you save a command determines where you can use it and whether it belongs to a shared repo workflow or a personal habit.
Criteria | Project Commands | User Commands |
|---|---|---|
Storage location |
|
|
Invocation format |
|
|
Scope | Current repository | Available across your projects |
Best use case | Shared team workflows, repo standards, release routines | Personal habits, cross-project helpers, individual writing patterns |
Sharing / version control | Can live in the repo and be shared with the team | Private to your local environment unless manually shared |
Example |
|
|
Where project commands live
Project-specific commands live in .claude/commands/ inside the repository. You run them with the /project:... prefix.
For example:
/project:review-pr/project:update-readme/project:release-version patch
Use project commands when the workflow belongs to the repo itself. Common examples include team PR review rules, release checklists, docs update conventions, and test expectations tied to that codebase.
Where user commands live
User-level commands live in ~/.claude/commands/ in your home directory. You run them with the /user:... prefix.
For example:
/user:write-commit-message/user:summarize-diff
Use these when the workflow reflects a personal habit you want in every project. Good examples include your preferred commit message format, your usual review style, or a personal way of summarizing staged changes before committing.
Quick decision rule
Use this simple rule:
- If the command belongs to a repo or team standard, save it as a project command.
- If it reflects a personal habit you want across projects, save it as a user command.
That is the easiest way to think about Claude Code project-specific vs user-level commands. Do not overcomplicate it.
How to create your first Claude Code custom command
Creating custom slash commands in Claude Code is file-based and simple: make the commands folder, add a markdown file, write clear instructions, and run the command by filename.
Here is the short version:
- Create the commands folder
- Add a markdown file
- Write the instruction inside it
- Run it from Claude Code
Step 1: Create the commands folder
For a repo-level command, create:
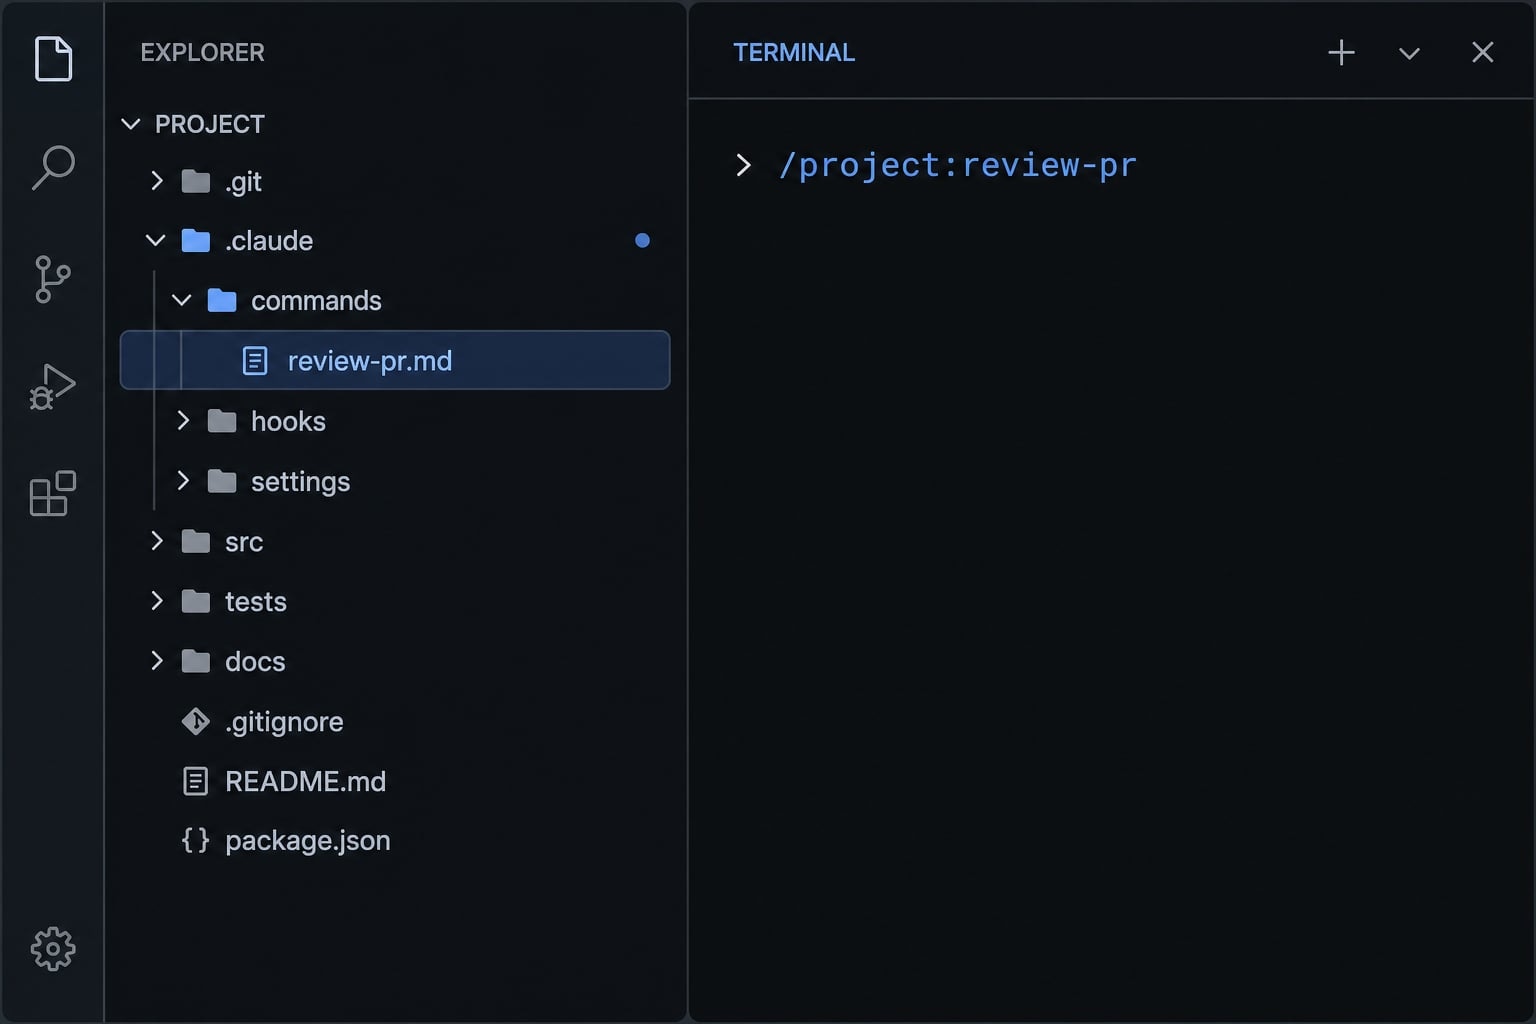
.claude/commands/
For a personal command, create:
~/.claude/commands/
That is the basic .claude/commands structure you need. You do not need a complicated setup to get started.
Step 2: Add a markdown file
Create a markdown file inside that folder. For a first command, use something narrow and realistic such as:
.claude/commands/review-pr.md
The filename becomes the command name. That means:
review-pr.mdbecomes/project:review-pr- A file in your home-level commands folder would become
/user:review-pr
Use action-oriented names. Good names are usually clear and narrow:
review-pr.mdupdate-readme.mdtest-component.mdrelease-version.md
Step 3: Write a simple command prompt
Inside review-pr.md, write small, direct instructions. For example:
Review the current pull request changes.Focus on:- bugs- risky edge cases- missing tests- unclear logicReturn:1. Issues found2. Severity3. Suggested fixesBe concise.
This works because it tells Claude Code:
- what to do
- what to focus on
- how to format the answer
That is enough for a useful first command file. You do not need a giant prompt library to make custom commands in Claude Code useful.
Step 4: Run the command
In Claude Code, invoke the command using the filename without .md. If it is saved in the project folder:
/project:review-pr
If it is saved in the user folder:
/user:review-pr
That is the full setup flow for creating claude code custom commands. Start with one narrow command only. In practice, smaller commands are easier to trust, easier to refine, and much easier to reuse than broad “do everything” commands.
How $ARGUMENTS works and why it makes commands reusable
$ARGUMENTS is a placeholder that lets a Claude Code custom command accept variable input when you run it. The command structure stays the same, but part of the instruction changes at runtime based on what you type after the command.
This is what makes one command reusable across multiple similar tasks. Instead of saving five separate commands, you save one command and pass in the changing detail when needed.
Simple example with $ARGUMENTS
Suppose you create this file:
Generate or review tests for the component: $ARGUMENTSFocus on:- core behavior- edge cases- missing assertionsReturn a concise test plan first.
You could then run:
/project:test-component login-form
In this example, login-form is the changing input. The command stays fixed, but the component name changes based on what you need that time.
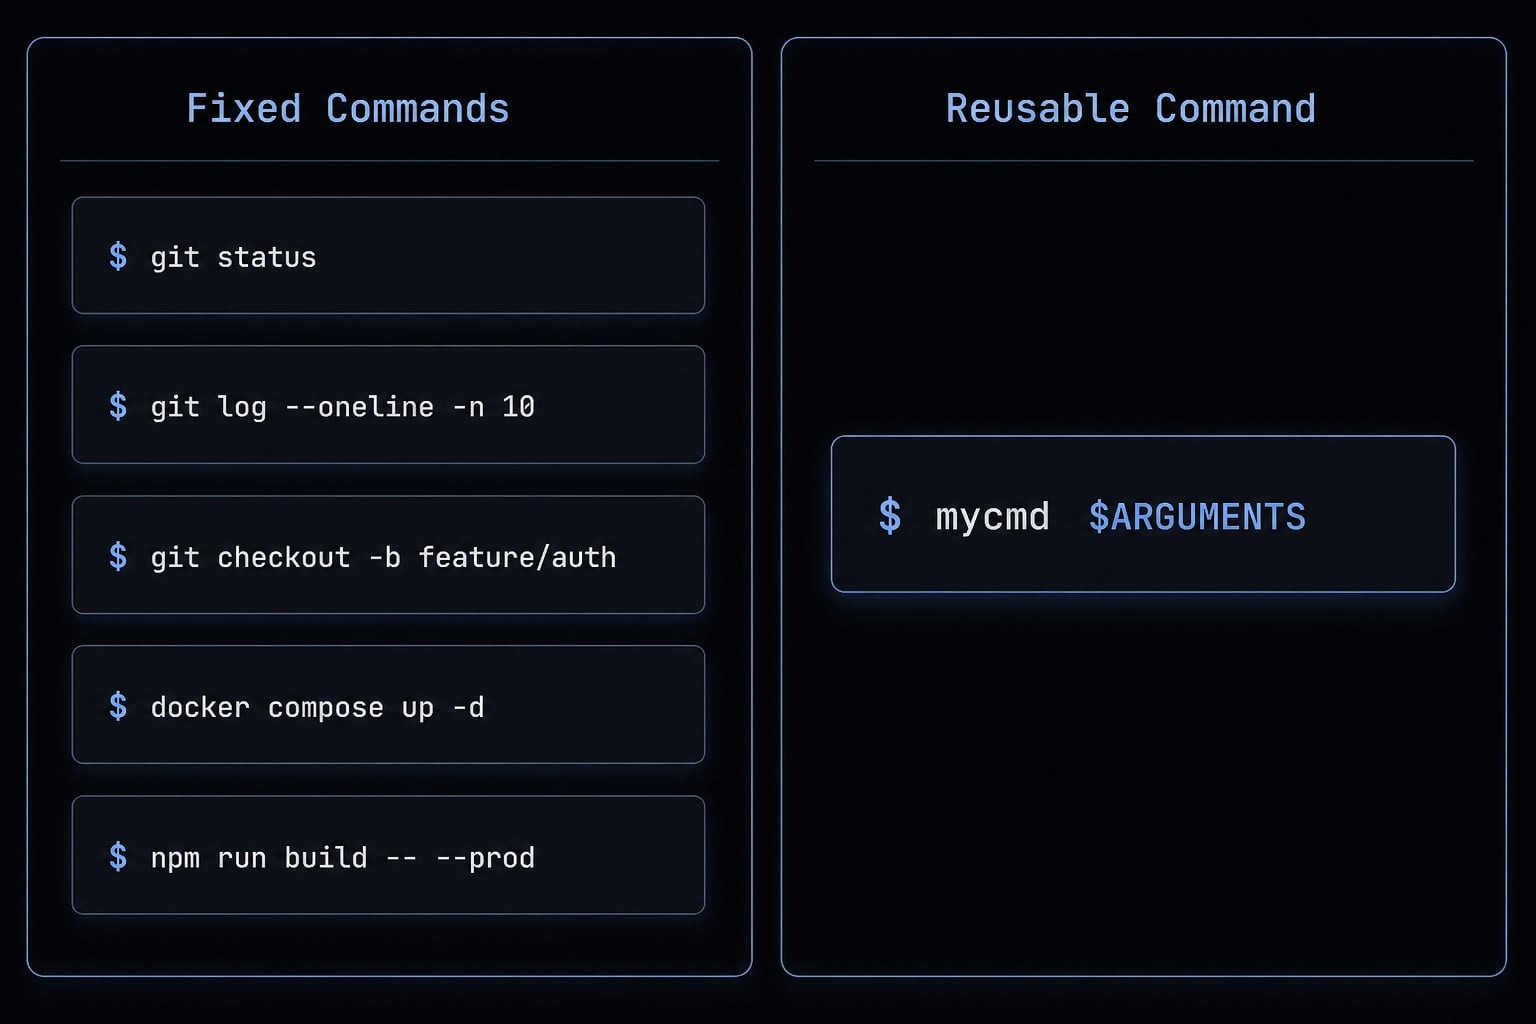
The right mental model is simple:
- The command defines the structure.
$ARGUMENTSsupplies the variable part.- Reusability comes from fixed instructions plus dynamic inputs.
Good uses of $ARGUMENTS
Using $ARGUMENTS in Claude Code custom commands works well for:
- File names or component names.
- Review focus areas.
- Test scenarios.
- Release labels such as patch, minor, major, or current.
- Documentation targets.
- Named modules or services inside the repo.
What $ARGUMENTS does not do is fix vague writing. If the base instruction is unclear, adding dynamic inputs will not suddenly make the output reliable. Reuse depends on good command design, not just variable input support.
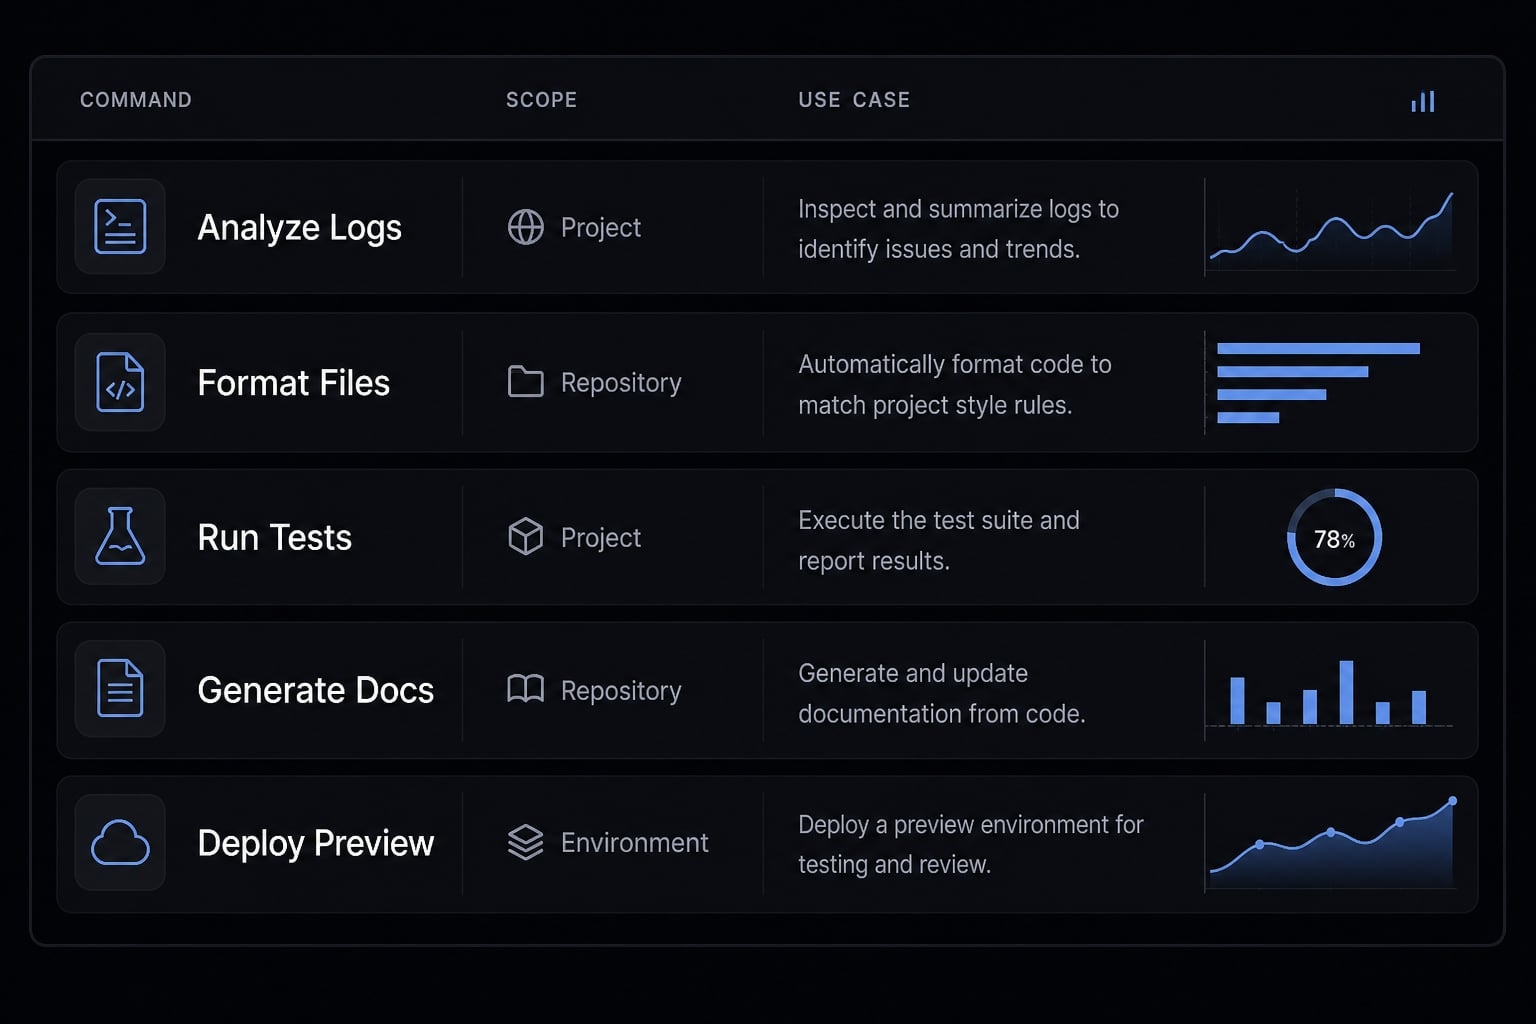
5 practical Claude Code custom command examples you can copy
The best starter commands map directly to real developer routines. Narrow commands are usually more valuable than large, overloaded prompts because they are easier to predict, easier to maintain, and easier to share across Git workflows.
Example 1: /project:review-pr
Review the current PR changes.Focus on:- bugs- risky edge cases- missing tests- breaking changesReturn:1. Issue2. Why it matters3. Suggested fixKeep the review concise.
- What it does: Runs a repeatable pre-PR quality check.
- Best use case: Before opening or merging a pull request.
- Why save it: PR review is one of the most repeated prompts in development, so reusable structure matters.
This is often the first command teams benefit from because code review standards are usually shared, not personal.
Example 2: /project:update-readme
Update the README based on the latest project changes.Focus on:- setup steps- new features- changed commands- removed outdated notesReturn updated README sections only.
- What it does: Refreshes docs after new features or workflow changes.
- Best use case: After shipping something that changes setup, usage, or architecture notes.
- Why save it: Documentation work is repetitive, easy to defer, and benefits from a fixed checklist.
README maintenance is a strong command candidate because the task is structured and often tied to repeatable release moments.
Example 3: /project:test-component $ARGUMENTS
Generate or review tests for: $ARGUMENTSFocus on:- expected behavior- edge cases- failure states- missing assertionsReturn a short test plan, then suggested tests.
Example invocation:
/project:test-component login-form
- What it does: Generates or reviews tests for a named component or module.
- Best use case: When you want a repeatable testing workflow for UI components or service units.
- Why save it: The structure stays the same, while the component name changes through
$ARGUMENTS.
This is a practical example of reusable prompts done well: Fixed intent, variable target.
Example 4: /user:write-commit-message
Write a concise commit message based on the current staged changes.Use:- clear summary line- optional short body if neededPrefer practical wording over generic wording.
- What it does: Summarizes staged changes into a usable commit message.
- Best use case: When you want a consistent personal commit-writing style across projects.
- Why save it: This belongs at the user level because it reflects a personal habit, not a repo rule.
This is one of the most useful user-level commands because commit phrasing is often repeated across every repository you touch.
Example 5: /project:release-version $ARGUMENTS
Prepare a release update using this input: $ARGUMENTSSupported inputs:- current- patch- minor- majorReturn:1. Intended version action2. Files likely affected3. Release checklist4. Suggested tag/message format
Example invocations:
/project:release-version patch/project:release-version current
- What it does: Supports release prep using simple version-related inputs.
- Best use case: Repo workflows that follow a lightweight semantic versioning routine.
- Why save it: Release work is structured, repetitive, and a strong fit for dynamic inputs.
This is where $ARGUMENTS fits naturally: one command, multiple version actions, consistent output format.
Best practices for writing better custom commands
Reliable commands come from clear writing, not from adding more words. In most cases, unstable output is a command design problem: the task is too broad, the constraints are too loose, or the expected answer is not defined clearly enough.
A simple command-writing formula
Use this five-part structure when writing commands:
- Task: State exactly what Claude Code should do.
- Scope: Define what part of the repo, diff, file, or workflow it should focus on.
- Inputs: Specify any variable input, including
$ARGUMENTSif needed. - Constraints: Set boundaries such as tone, length, exclusions, or focus areas.
- Expected output: Tell Claude how to format the answer so the result is easier to use.
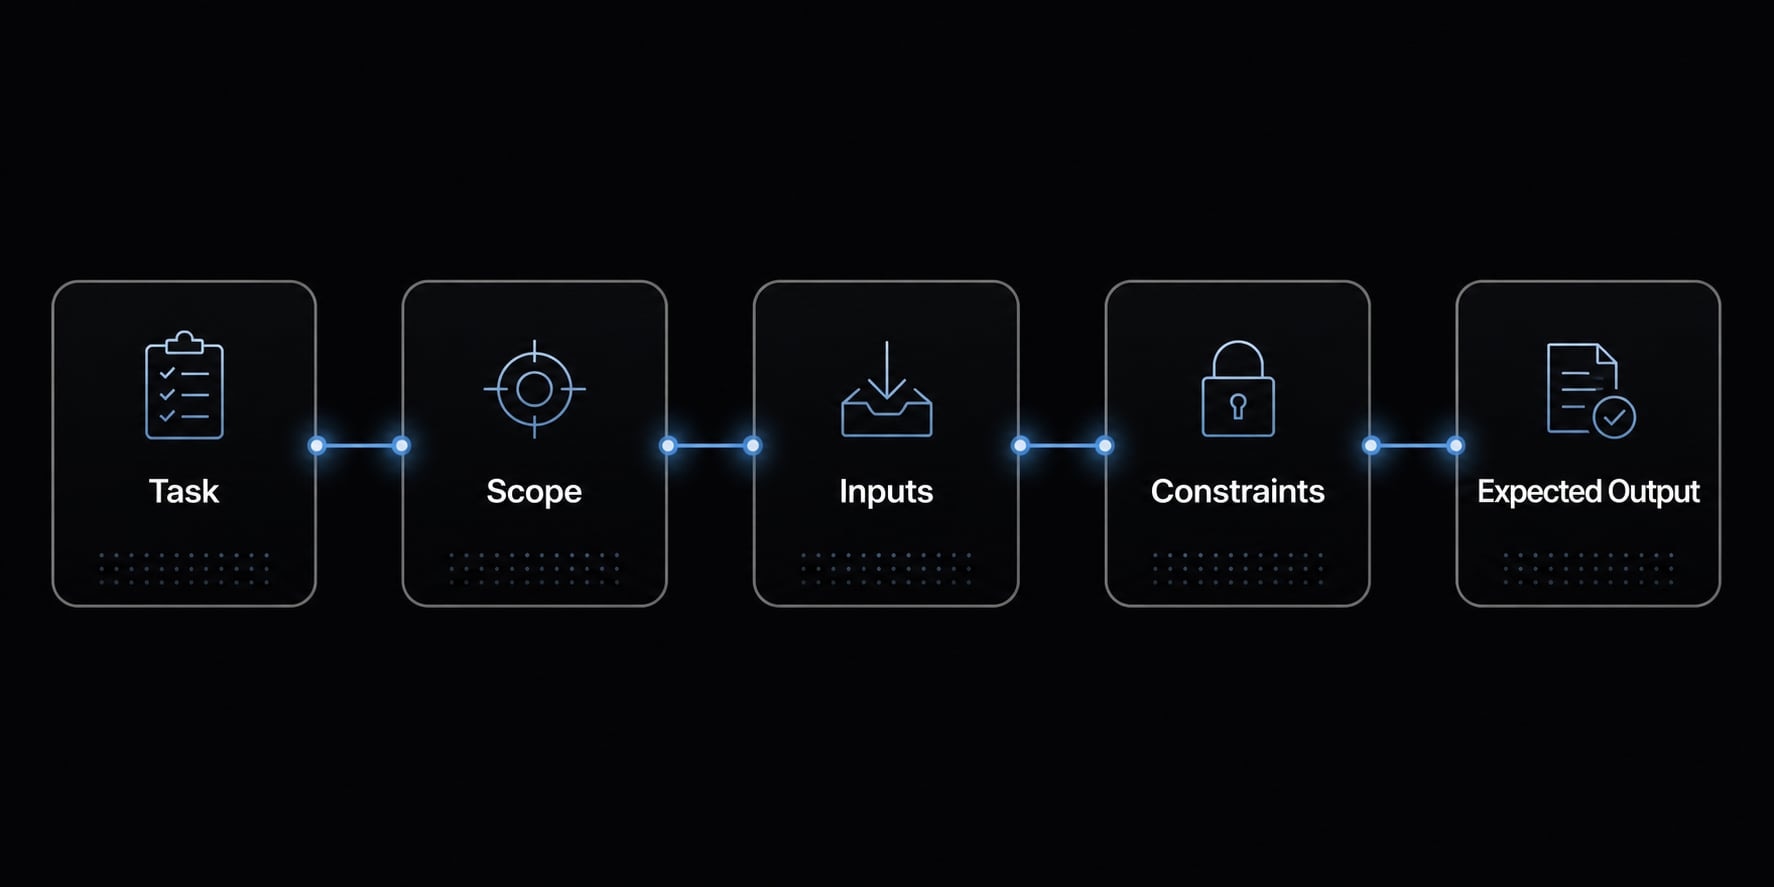
This is lightweight prompt engineering, but the goal is operational clarity, not prompt complexity. Better command design usually means narrower instructions, clearer scope, and more stable outcomes.
Naming and maintenance tips
- Use obvious filenames that match the job.
- Keep one job per command.
- Update commands as workflows evolve.
- Delete stale commands that no longer reflect the repo.
- Avoid giant all-purpose commands.
- Review shared commands occasionally for drift or outdated assumptions.
A common mistake is trying to automate too much too early. Start with two or three dependable commands. That usually creates more value than building ten commands nobody trusts.
Common mistakes and troubleshooting tips
Most troubleshooting issues with custom commands come from vague prompts, oversized scope, or weak output instructions. In other words, the problem is usually in the command itself, not in some hidden Claude Code behavior.
Signs a command needs rewriting
- The output changes too much between runs.
- The command solves the wrong problem.
- It tries to do too many things at once.
- The expected output format is missing.
- Key constraints are not stated.
- The input is too ambiguous.
Common mistakes beginners make:
- Writing broad instructions like “review everything and improve it”.
- Mixing multiple jobs into one command.
- Saving one-off tasks as commands instead of using normal prompts.
- Forgetting that
$ARGUMENTSonly passes input; it does not add clarity by itself.
Optional quick fix checklist:
- Is the task narrow?
- Is the scope obvious?
- Is the output format defined?
- Are the constraints clear?
- Does this need a command at all?
When not to use a custom command
Do not use a custom command for:
- One-off exploratory work.
- Unclear tasks.
- Highly situational debugging.
- Back-and-forth investigation that needs clarification.
- Problems where you do not yet know the right output shape.
Custom commands work best when the workflow is repeatable. If the task is still fluid, interactive prompting is usually the better tool.
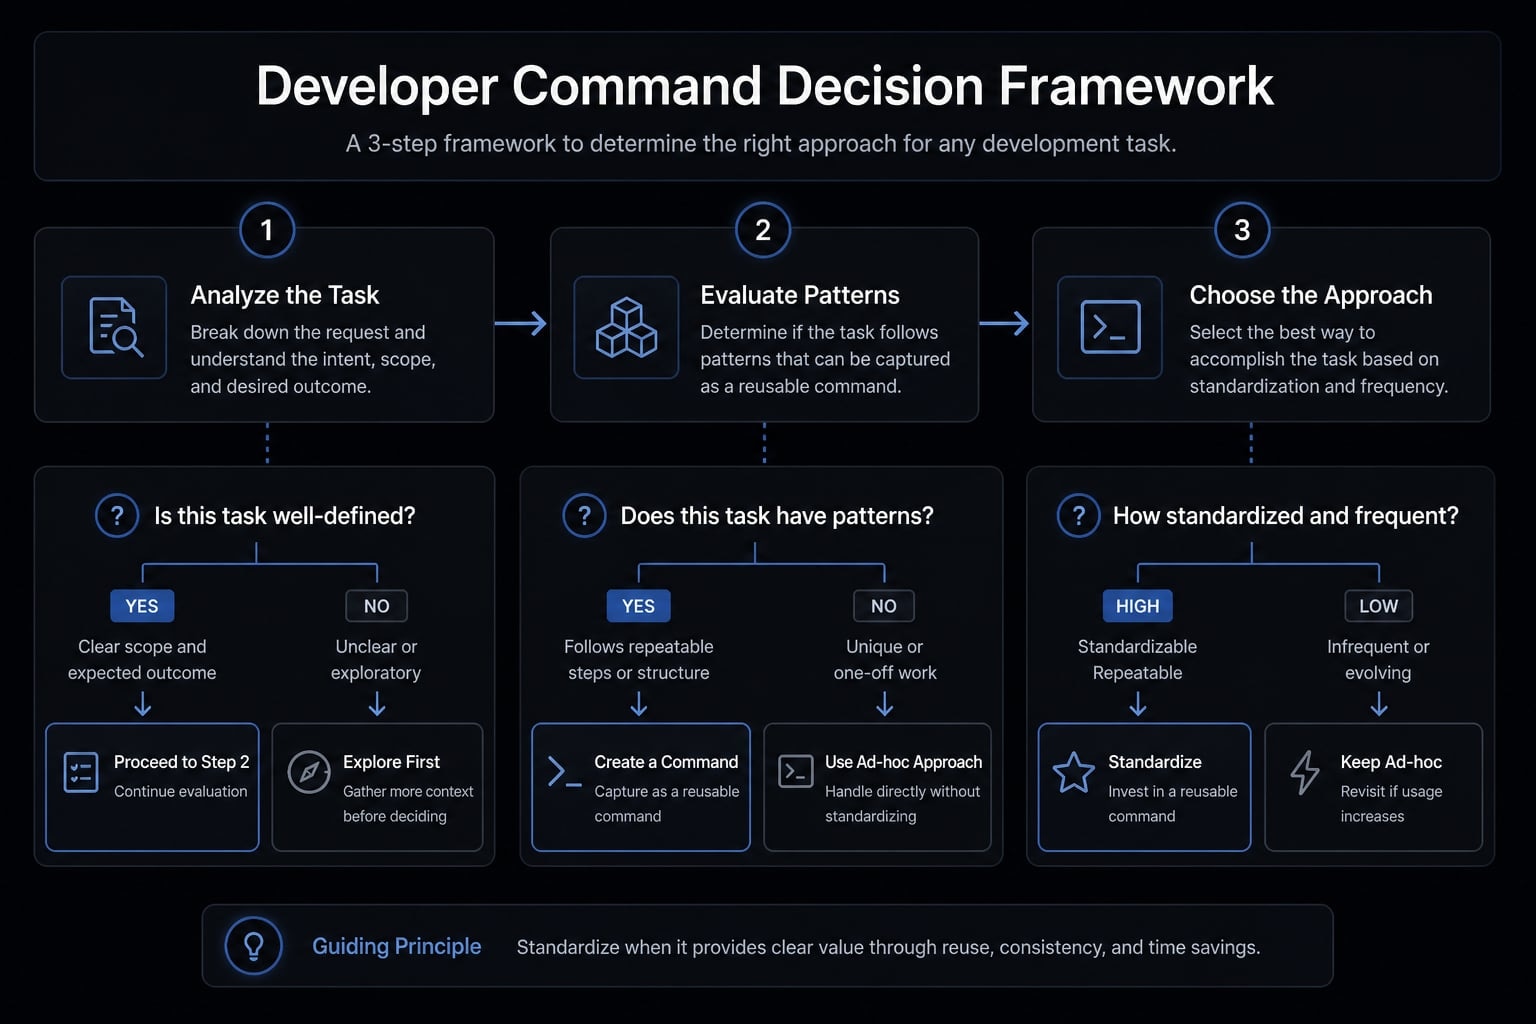
A simple framework for deciding what to turn into a command
Not every prompt should become a saved workflow. The best candidates are repeated, structured tasks where consistency improves the result and reduces prompt-writing overhead.
If you are just starting, aim for only 2 - 3 commands. That is usually enough to identify what fits your workflow without overbuilding.
Turn a task into a command if the answer to most of these is “yes”:
- Do you perform it often enough to justify saving it?
- Is the task structured and standardizable?
- Would consistency improve the output?
- Does it remove repeated prompt-writing overhead?
- Would a teammate benefit from the same command?
- Can you describe the expected output clearly?
Keep it as a normal prompt if the answer is mostly “no.”
This filter helps you build reusable workflows around structured tasks, not around every idea that happens to pass through Claude Code. In practice, that restraint matters. Premature task automation often creates clutter, while a small set of dependable commands becomes part of the workflow very quickly.
Frequently asked questions
What are Claude Code custom commands?
Claude Code custom commands are reusable, markdown-based instructions that allow you to automate repetitive development tasks. By saving specific prompts in your project or user directories, you can trigger complex workflows using simple slash commands, ensuring consistent results without retyping instructions.
How do I create a custom command in Claude Code?
To create a custom command, navigate to your .claude/commands/ (project-specific) or ~/.claude/commands/ (user-wide) folder, create a new Markdown file named after your desired command (e.g., review-pr.md), and write your instructions inside. You can then invoke it using /project:review-pr or /user:review-pr.
What is the difference between project commands and user commands?
Project commands are saved in a specific repository and triggered with /project:, making them ideal for team standards. User commands are saved in your home directory, triggered with /user:, and are available across all your projects for your personal recurring workflows.
How does the $ARGUMENTS placeholder work?
The $ARGUMENTS placeholder allows you to pass dynamic input into your custom command at runtime. When you run a command like /project:test-component login-form, the string login-form replaces the $ARGUMENTS placeholder within your markdown instruction, making a single command flexible enough for multiple use cases.
Should I use custom commands for exploratory debugging?
No. Custom commands are best suited for predictable, repeatable tasks like PR reviews or release preparation. For one-off exploratory work or debugging sessions where the requirements are unclear, it is more effective to use standard interactive prompting to maintain flexibility.
Can I share my custom commands with my team?
Yes. By placing your command files in the .claude/commands/ directory of a shared Git repository, every team member can access the same standard workflows. This ensures consistent output formats and automated processes across the entire development team.
Read more:
- Claude Code /skills guide: Master reusable developer workflows
- Claude Code tutorial: Set up and master your AI coding agent
- Claude Code CLAUDE.md guide: Best practices and 3 templates
Conclusion
Claude Code custom commands are most useful when they capture repeatable tasks, not when they try to replace every interaction. Start with one project command for a shared repo workflow, one user command for a personal habit, and one example that uses $ARGUMENTS for changing input.
That gives you the full mental model: save repeatable work as commands, choose scope based on where the workflow belongs, and use variable input only when the structure stays stable. If you want a next step, build review-pr.md, add a personal commit-message command, and test one release or test-related command with $ARGUMENTS.