How to use Claude Code with Shopify: Setup, examples and safety
How to use Claude Code with Shopify: Setup, examples and safety guide
Using Claude Code for Shopify theme development involves coordinating Liquid files, the Shopify CLI, and local previews - starting with a local project rather than a broad-permission agent. This guide walks through a safe, controlled workflow: Building a wholesale banner, inspecting changes, and previewing before release. While connected tools can expand Claude Code's capabilities, always keep production publication under human control and never test directly on your live store.
What Claude Code can and cannot do with Shopify
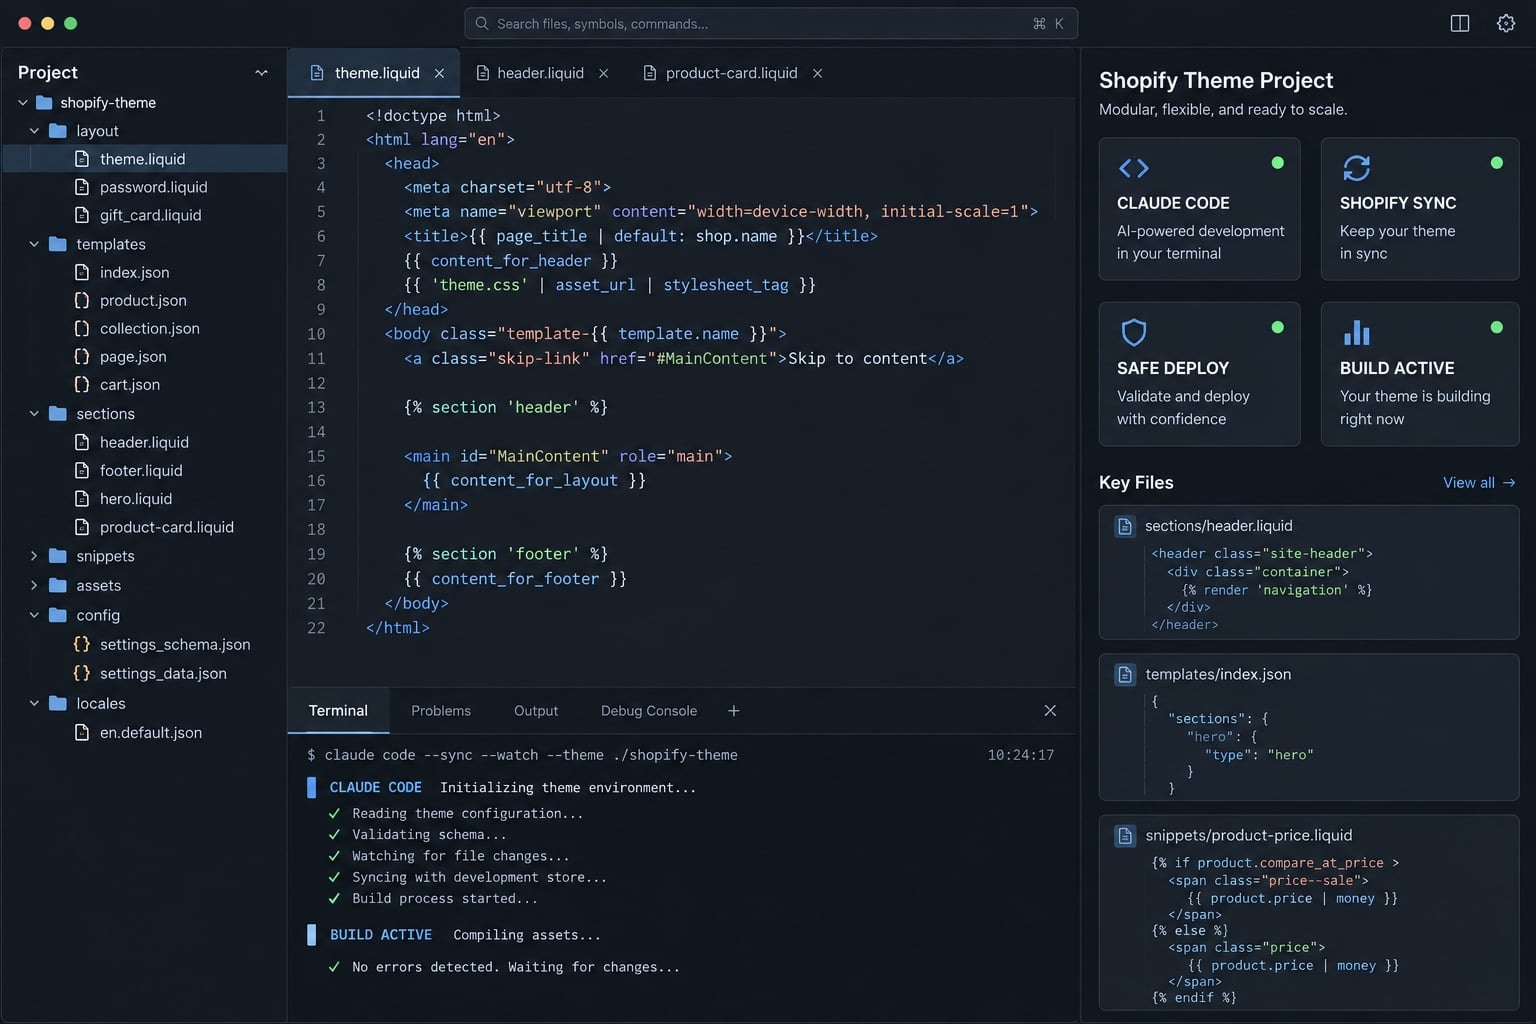
A Claude Code Shopify integration is a permission-controlled workflow in which Claude Code edits accessible local repositories and can invoke Shopify CLI, Git, and optional authorized tools. Its reach depends on filesystem access, command permissions, and credentials. It can assist with themes or apps; this guide covers theme development only.
Capability boundaries
Task | Local files sufficient? | Additional access or control |
|---|---|---|
Edit Liquid, CSS, or JavaScript | Yes, with filesystem permission | Review changes before synchronization |
Preview a theme | No, for Shopify-hosted previews | Authorized Shopify CLI session and confirmed target |
Validate API operations | Sometimes, for offline schema checks | Executing operations requires separate authorization |
Update products or metafields | No | Shopify Admin API access and appropriate scopes |
Access orders or customers | No | Relevant scopes and applicable data-access approval |
Publish a theme | No | Authorized publishing access and human approval |
Note: Customer and order access can involve protected-customer-data requirements and order-history restrictions beyond ordinary scope selection.
Claude Code vs. Claude Chat vs. Claude API
- Claude Code: Works within a development environment using accessible files and tools.
- Claude chat: Provides conversational interaction; capabilities depend on connected tools.
- Claude API: Provides programmable model access for applications.
- Zapier/Make: Automate events between systems; they do not replace local theme development.
Choose the right Claude Code - Shopify connection method
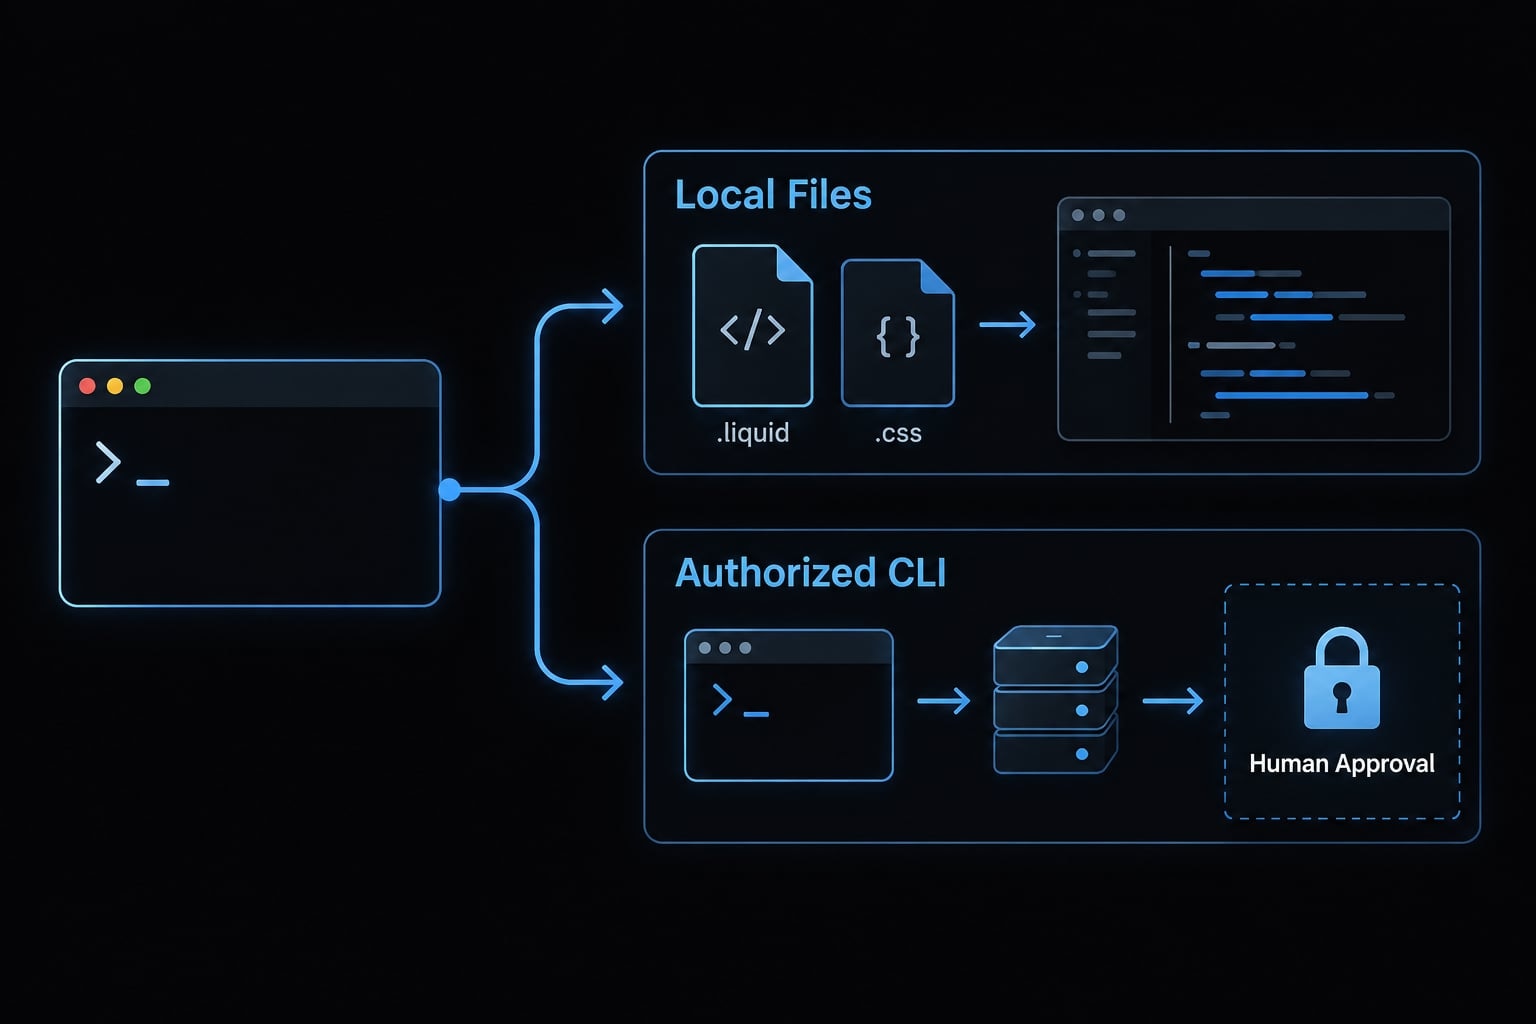
Start with Claude Code, Shopify CLI, and Git. Theme customization does not require product, customer, or order API permissions.
Connection method decision table
These tools are complementary layers, not interchangeable connection options.
Goal | Tool or method | Access required | Relative risk |
|---|---|---|---|
Theme editing | Local files and Shopify CLI | Filesystem and theme permissions | Moderate when remote synchronization is enabled |
Collaboration | Git; optional GitHub hosting | Repository access | Depends on visibility, integrations, and deployment automation |
Documentation lookup | Official documentation; optional documentation MCP server | Documentation tools | Lower if genuinely read-only |
GraphQL validation | Schema-aware validator | Schema access; credentials only for execution | Lower offline; higher for mutations |
App development | Development tools and authorized app configuration | App-specific permissions | Broader scope; outside this tutorial |
Product/metafield updates | Shopify Admin API | Resource-specific scopes | High for bulk writes |
Order/customer operations | Shopify Admin API | Scopes and applicable data approval | High due to sensitive data |
Marketing-event automation | Authorized connectors or custom integration | Event-specific access | Depends on downstream actions and data exposure |
MCP server risk depends on its source, exposed tools, and permissions. GitHub is optional repository hosting; Git itself runs locally.
Recommended path
- Create or obtain a local theme project.
- Authenticate Shopify CLI to an approved store.
- Confirm the development or unpublished target.
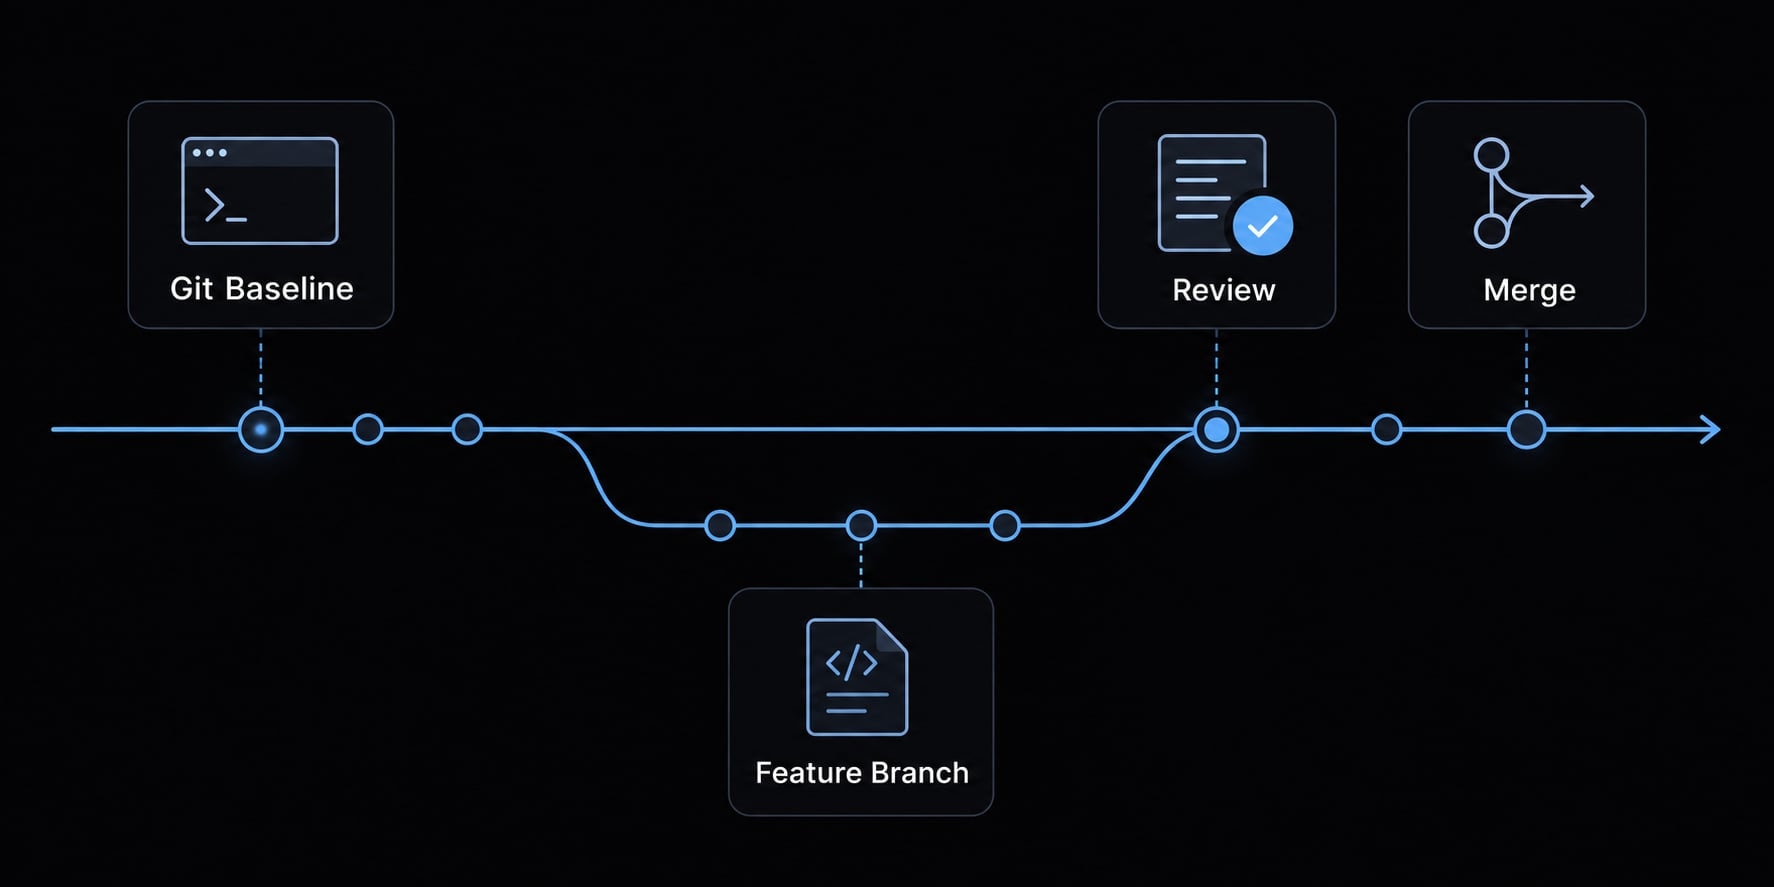
- Establish Git history before agent changes.
- Add integrations only for a defined additional need.
An unpublished theme reduces accidental publication risk, but its preview can still interact with shared store data. This distinction matters throughout the Claude Code Shopify development workflow.
Prepare a safe Shopify development environment
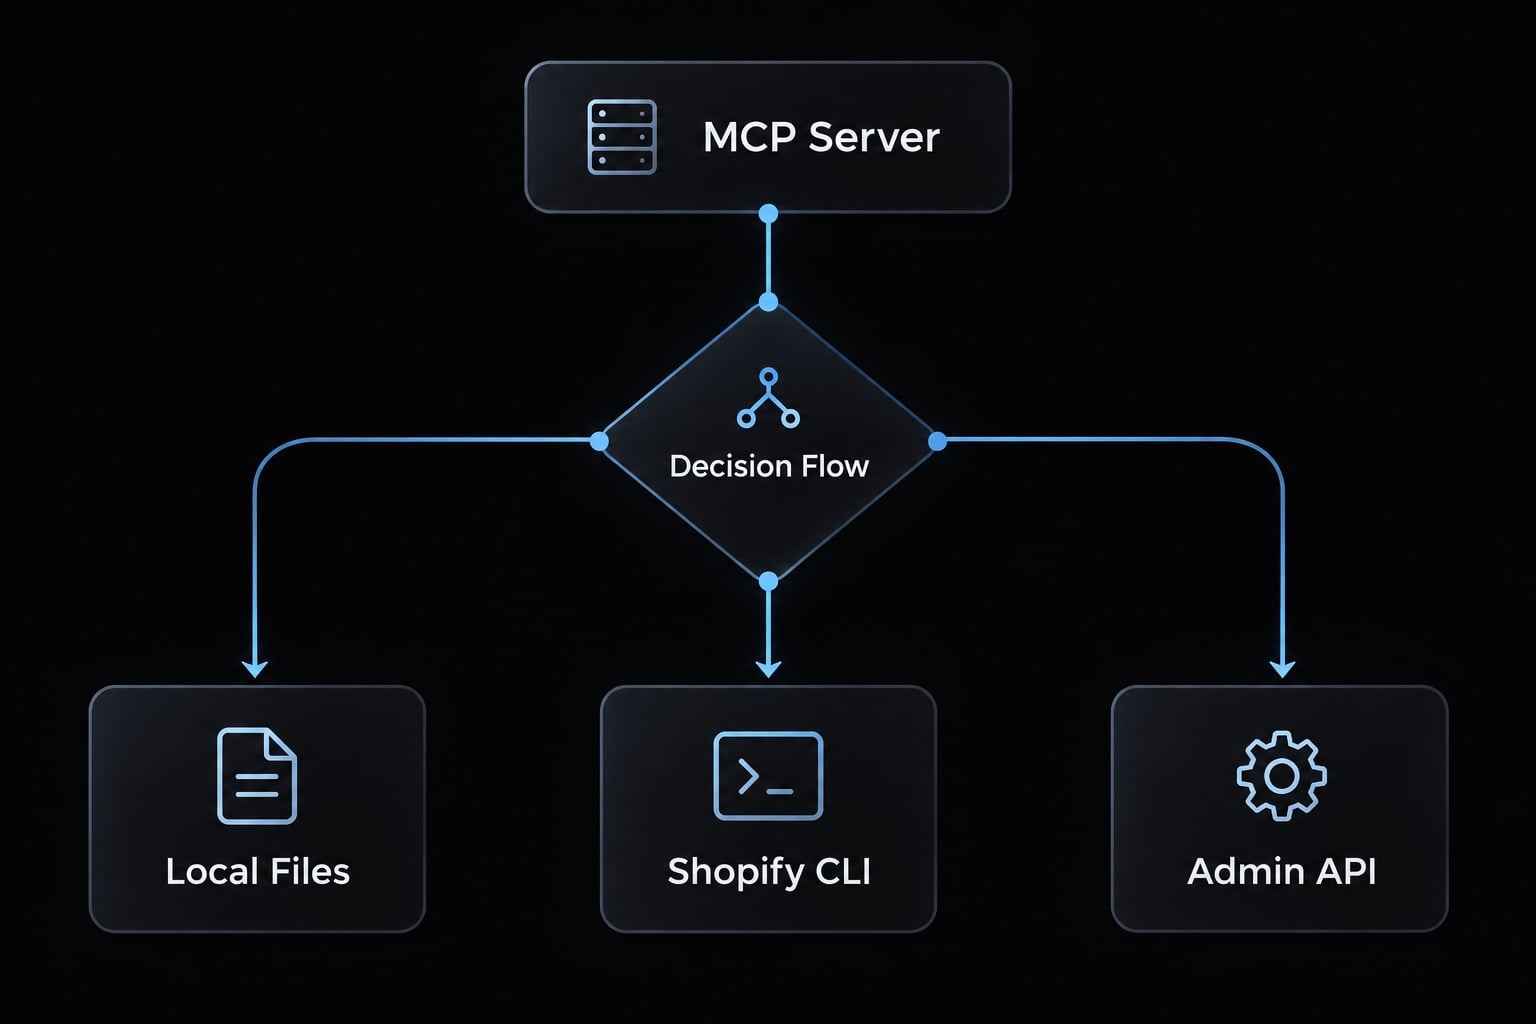
Verify tools, authorization, and target selection before giving the agent editing access.
Prerequisites
- A Node.js version supported by your installed Shopify CLI.
- Shopify CLI installed using Shopify’s installation instructions.
- Claude Code installed and authenticated.
- Git installed.
- Approved store access with the required theme permissions.
- A confirmed development or unpublished theme target.
- An editor or diff viewer.
Node.js requirements for Shopify CLI should not be confused with requirements for every Claude Code installation method.
Create or download the theme project
Replace uppercase placeholders with your own values; do not enter placeholder text literally.
Path A: Start a fresh theme. Run from the parent directory where the project should live:
shopify theme init wholesale-themecd wholesale-theme
Path B: Download an approved unpublished theme. Run from a new, empty directory:
mkdir wholesale-themecd wholesale-themeshopify theme list --store STORE.myshopify.comshopify theme pull --store STORE.myshopify.com --theme UNPUBLISHED_THEME_ID
The main folder structure:
sections/ Configurable page componentssnippets/ Reusable Liquid fragmentstemplates/ Page compositionassets/ CSS, JavaScript, and other assetsconfig/ Theme settings definitions and saved configuration
Create the Git safety baseline
Inspect existing repository history and uncommitted work first. For a project without Git, initialize it from the theme root:
git initgit status --short
Before staging, configure .gitignore, inspect files for secrets, and exclude local credentials and unnecessary generated files.
Stage only reviewed paths. For a standard theme project, these may include:
git add sections snippets templates assets config layout localesgit diff --cachedgit commit -m "Record reviewed theme baseline"git switch -c feat/wholesale-banner
Minimum security rules
Use least-privilege access: only the permissions needed for the task. Keep tokens out of prompts, tracked files, and screenshots. Require manual confirmation for remote writes or destructive actions. Never target the published theme for testing.
Connect Claude Code to the Shopify theme project
Open Claude Code inside the theme repository. This supplies project context; it does not create a separate unrestricted store connection.
- Confirm the approved store and preview target.
- Confirm the Git baseline and feature branch.
- Review available credentials and command permissions.
- Open Claude Code from the theme root.
- Request inspection and a file-level plan.
- Approve the plan before implementation.
Launch Claude Code in the theme directory
From the local theme root:
claude
This starts an interactive session in the project. Launching it does not itself publish anything, but subsequent permitted commands may perform remote actions.
Ask it to inspect theme architecture, similar sections, reusable snippets, settings conventions, and existing design tokens. Design tokens are shared values such as spacing, colors, and typography.
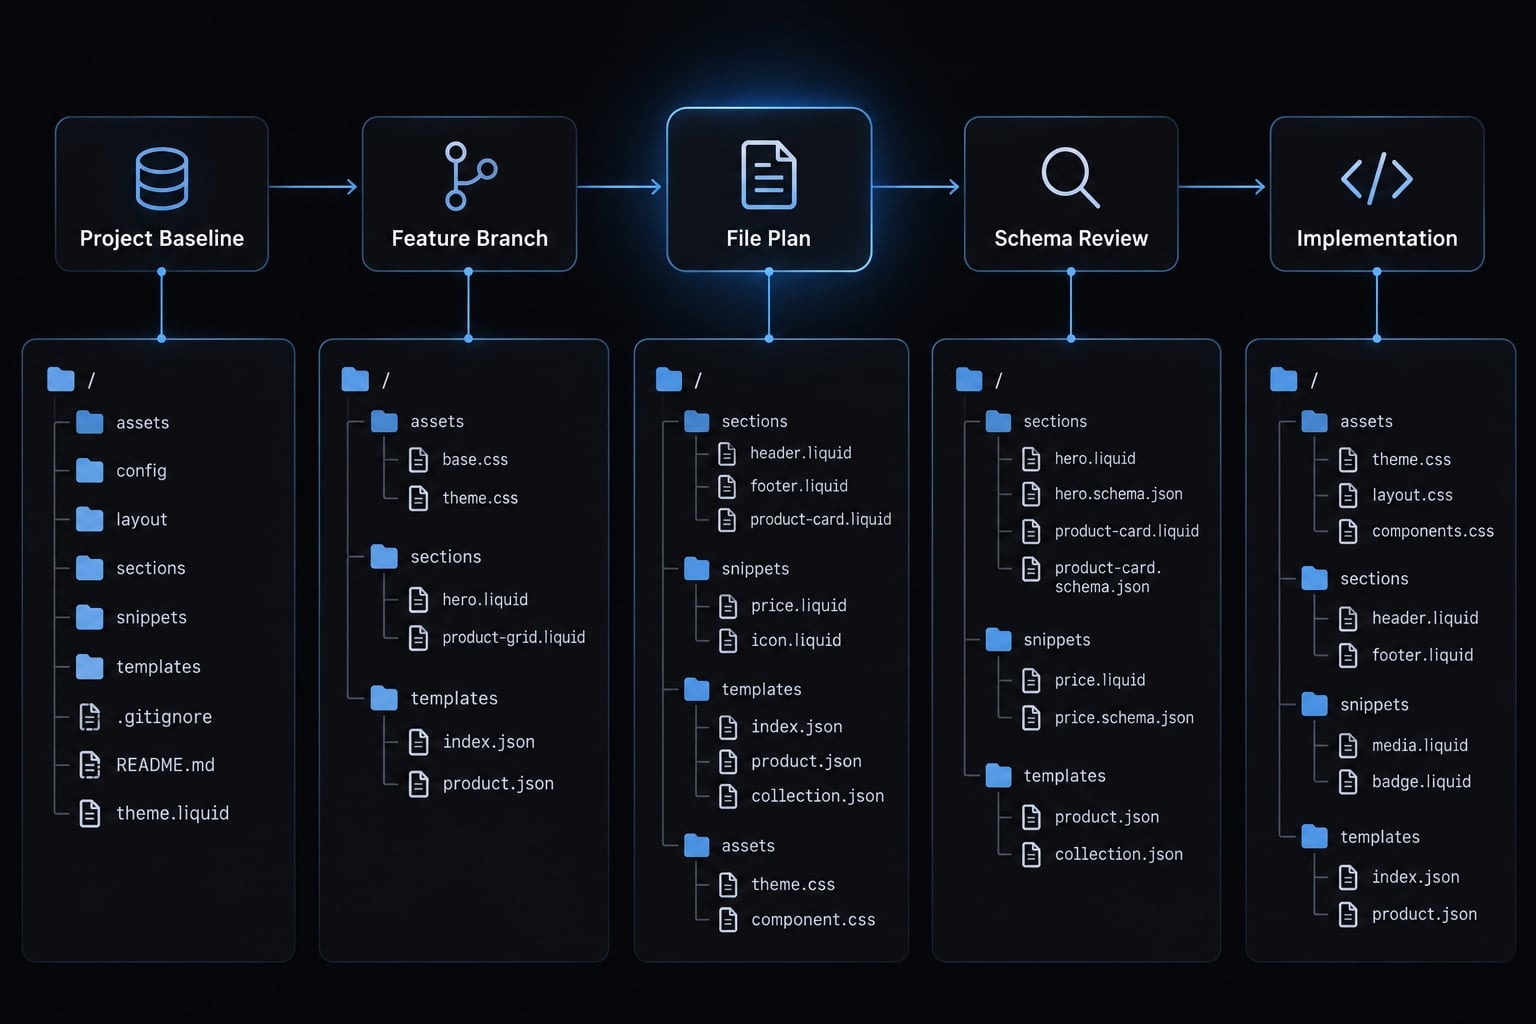
The first deliverable should be a plan naming the proposed files - not immediate edits.
Add project instructions
Use CLAUDE.md for Claude Code project instructions, following Anthropic’s Claude Code memory documentation. Do not assume another agent’s instruction filename is loaded automatically; check your installed version’s documented behavior.
Follow existing Shopify Liquid and CSS conventions.Reuse existing components, snippets, and design tokens.Keep section settings merchant-editable.Avoid unapproved dependencies and unrelated changes.Do not access, print, or expose credentials.Show validation commands, actual results, and remaining manual checks.Never publish automatically.Stop for approval before expanding scope or taking remote actions.
Establish an approval gate
Use three separate gates:
- A human approves the file-level plan.
- Implementation stays within that plan.
- A human reviews validation evidence and separately approves remote actions.
Instruction files express policy. Configured permissions and environment restrictions enforce access. Neither a prompt nor CLAUDE.md makes an unauthorized action technically impossible.
Practical example: Build a custom Shopify promotional banner
Build one configurable banner that directs business buyers to trade-account or bulk-order information. Keep it presentation-only: it must not implement wholesale pricing, account authorization, discounts, or order logic.
Use this sequence:
- Define requirements.
- Inspect similar sections.
- Approve the file plan.
- Generate the section.
- Review every changed file.
- Validate and preview.
- Test merchant controls and accessibility.
Define the feature
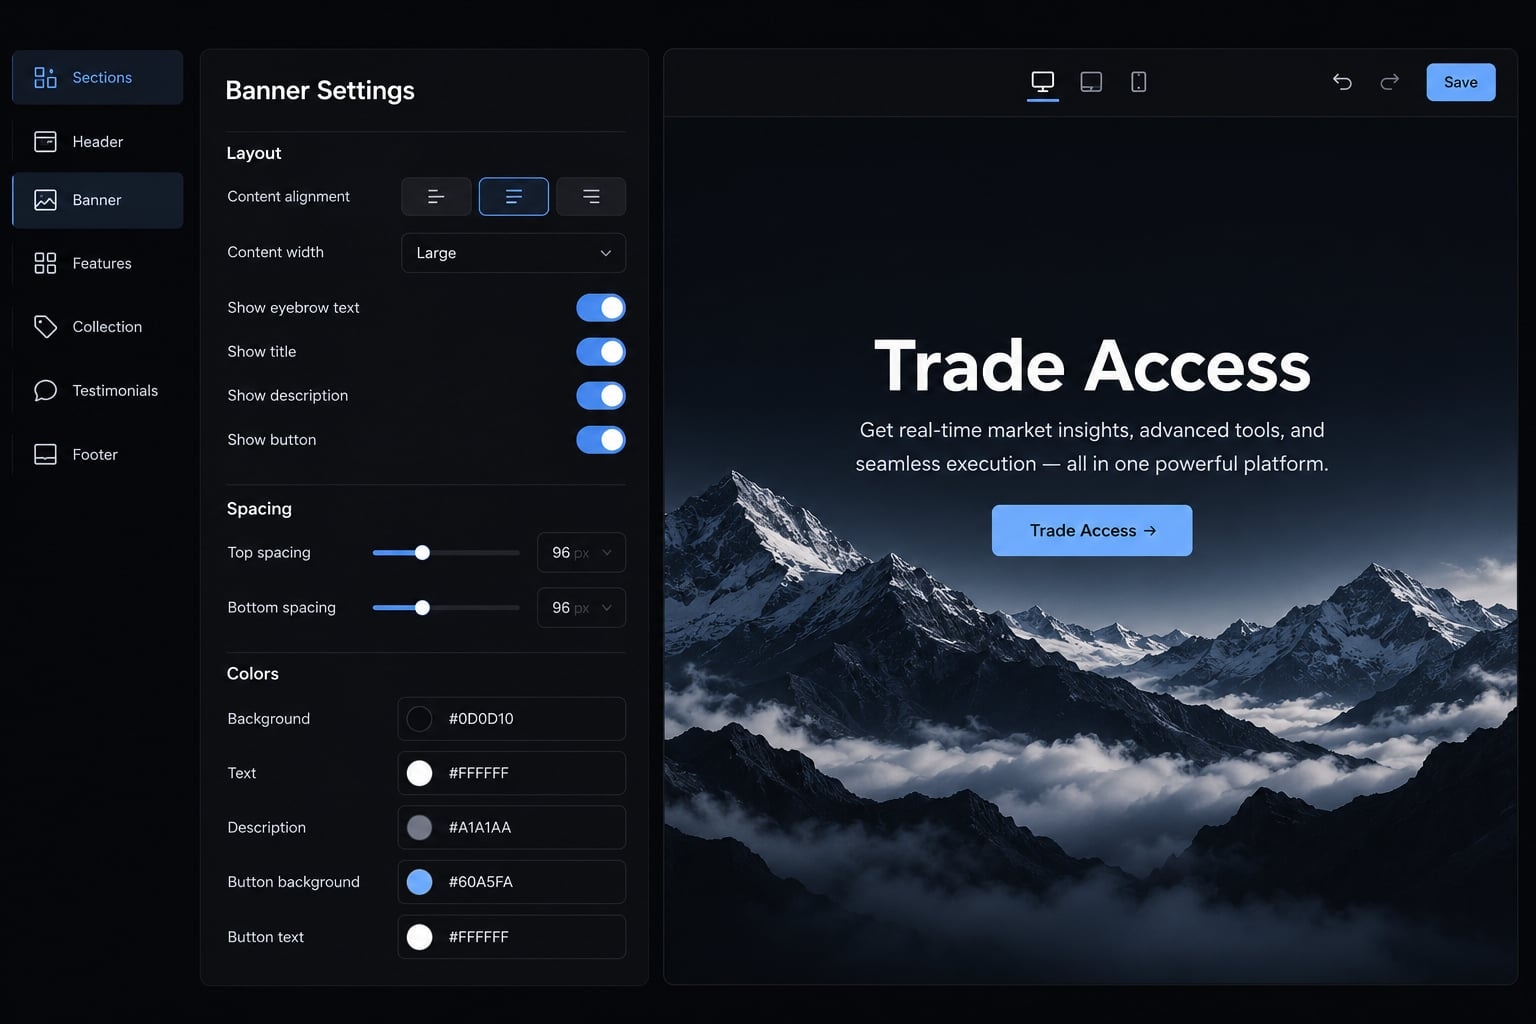
The Shopify Liquid section should provide:
- Editable heading and supporting text.
- Optional CTA (call-to-action) label and destination.
- Configurable foreground and background colors.
- Responsive spacing.
- Usable empty states.
- Keyboard-visible focus.
- No external JavaScript dependency.
- Controls a nontechnical operator can edit.
Configurable colors do not automatically guarantee accessible contrast. Test the combinations merchants will use.
Use a structured Claude Code prompt
Inspect this theme’s existing sections, snippets, settings, and CSS conventions.Plan a configurable wholesale information banner linking to trade-accountor bulk-order information. Include editable heading and supporting text,optional CTA label and URL, foreground/background colors, responsive spacing,sensible empty states, and visible keyboard focus. Reuse theme patterns;add no external JavaScript dependency. Present a file-level plan before editsand wait for approval. Use valid section schema and an appropriate presetso merchants can add it to supported templates. Keep changes scoped.After implementation, show actual validation commands and output, plusremaining manual tests. Do not push, publish, access credentials, or implementpricing, authorization, discounts, or order logic.
Review generated files
Check that the Shopify Liquid section sits in sections/. Review schema validation, valid JSON, supported setting types, and identifiers unique within their applicable scope.
Confirm that:
- Plain-text output uses appropriate contextual escaping.
- Rich-text output follows the theme’s rendering conventions.
- The CTA disappears when its required label or destination is missing.
- Responsive CSS remains scoped to the component.
- No unexpected dependencies or unrelated changes appear.
From the theme root:
git status --shortgit diff
These commands inspect local changes. Plain git diff does not display untracked new files. Open new files directly, then stage only approved files and inspect them with:
git diff --cached
Test in the theme editor
After the target and remote action are approved, run from the theme root:
shopify theme dev --store STORE.myshopify.com
This starts Shopify’s development preview workflow and synchronizes local files to a development theme. It is a remote write, not a local-only browser server. Confirm the store and development target shown by the CLI.
Use the editor access provided by the workflow. Add the section to a supported template and test:
- Empty, short, and long content.
- Missing CTA labels or URLs.
- Desktop and mobile layouts.
- Keyboard focus and contrast.
- Saved merchant settings.
- Multiple instances, if supported.
A schema preset enables editor addability where supported; template and section availability restrictions still apply.
Validate, preview, deploy and roll back safely
Use this release architecture:
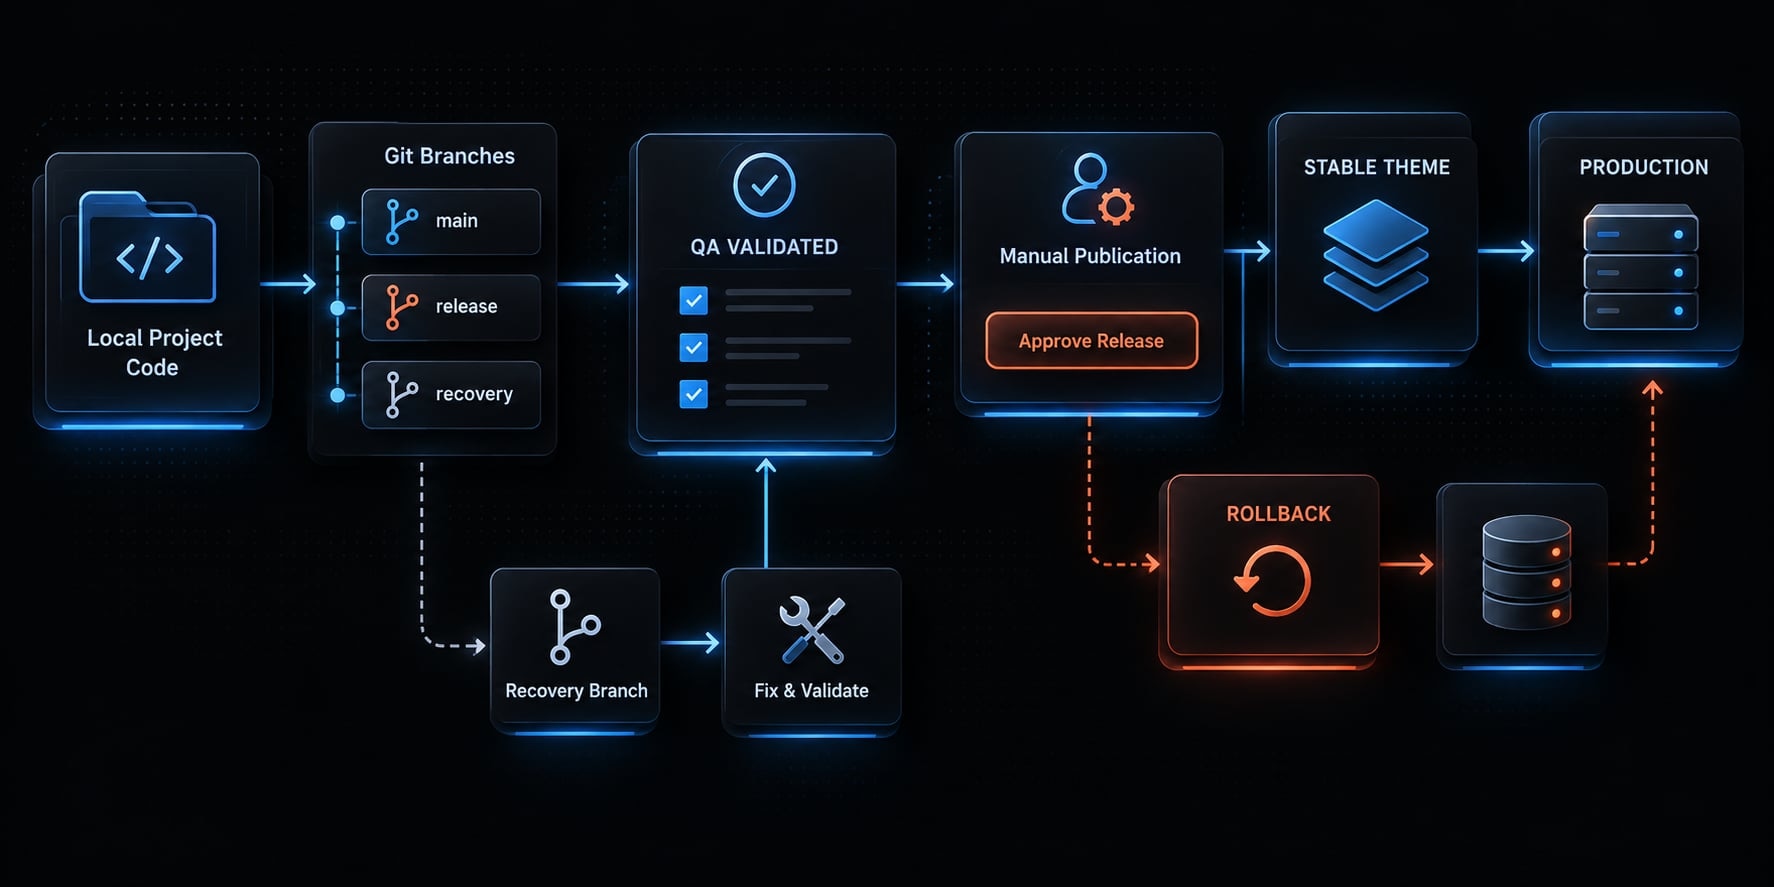
Local project → Git branch → development/unpublished preview → QA → approved unpublished release theme → manual publication → monitoring and rollback readiness.
Run automated checks
From the local theme root:
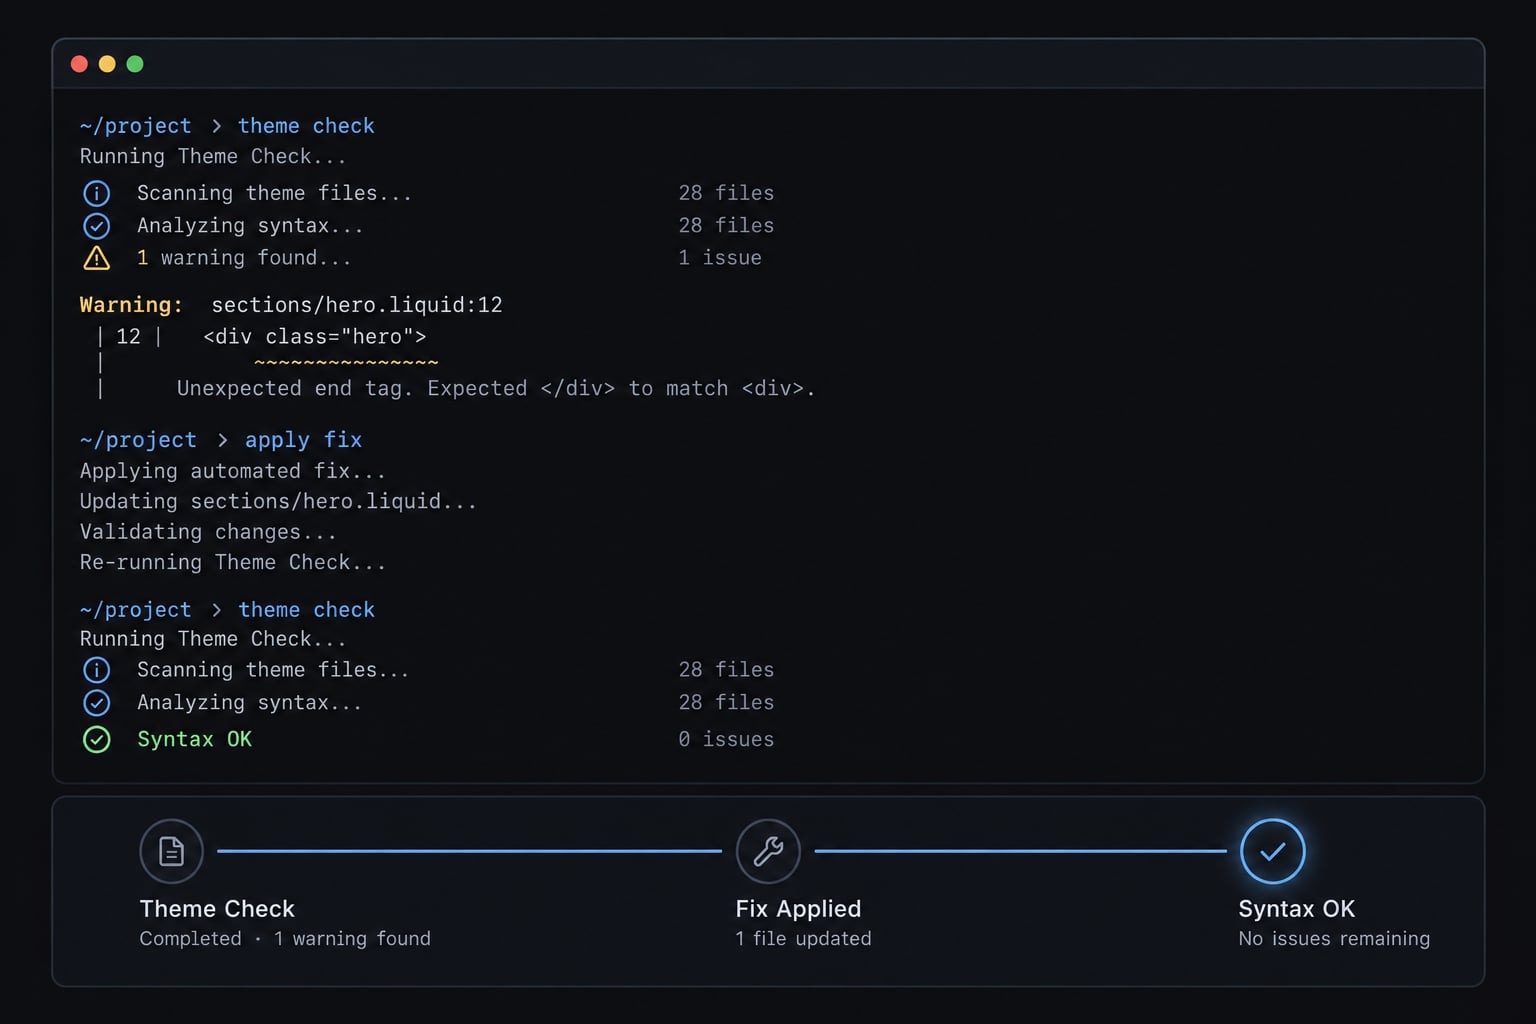
shopify theme check
This runs Shopify theme check against the project; it does not publish changes.
Inspect the actual terminal output and capture the exit status immediately afterward. In Bash or Zsh:
echo $?
In PowerShell:
$LASTEXITCODE
Review warnings as well as errors. Record the command, output, tool version, and unresolved findings - not just the agent’s summary.
Theme check performs static analysis for supported issues. It does not prove every asset reference, runtime interaction, accessibility requirement, or security property is correct. Investigate additional schema errors using current Shopify documentation and editor feedback.
Perform human QA
Test area | Required observation |
|---|---|
Layout | No overflow at tested viewports |
Content | Empty and long states remain usable |
Editor | Settings save and render correctly |
Accessibility | Keyboard access, visible focus, acceptable contrast |
Regression | Shared navigation, product forms, and cart work where affected |
Also inspect browser-console errors. A preview is not a fully isolated data sandbox. Avoid real customer data, unintended transactions, and actions that trigger live integrations.
Push only to an unpublished theme
Before uploading, reconcile local files with remote merchant edits. Theme-editor configuration can be overwritten by file synchronization.
From the theme root:
shopify theme list --store STORE.myshopify.com
Verify the release target is still unpublished. After explicit approval:
shopify theme push --store STORE.myshopify.com --theme UNPUBLISHED_THEME_ID
This writes files to the selected remote theme. It does not publish the theme. Stop if the target is wrong; never bypass live-theme protections.
Record stakeholder approval, the reviewed preview link, the deployment window, and the actual names of the publishing and rollback owners. The publishing owner manually publishes through Shopify Admin and immediately checks storefront behavior.
Roll back if the change fails
- Code recovery: Revert the feature, validate, and redeploy through the same controlled process.
- Production recovery: Republish a retained known-good theme when appropriate, then verify storefront behavior.
Retain the stable theme and required settings state before release. Git does not back up all Shopify data or remote theme-editor settings.
MCP, admin API access, common errors and practical limits
Add access only when the local theme workflow cannot meet a specific requirement.
When to add MCP or API access
MCP (Model Context Protocol) lets a client use tools and context exposed by a server. It does not automatically authorize Shopify access or make store operations safe.
Need | Access required | Safeguard |
|---|---|---|
Documentation lookup | Documentation source or read-only MCP tool | Verify publisher and exposed tools |
Schema inspection | Relevant API schema | Match the intended API version |
Product/metafield operations | Scoped Shopify Admin API credentials | Review a small sample before writes |
Order information | Appropriate scopes and data approval | Minimize fields and retained data |
Bulk catalog changes | Relevant write scopes | Dry run, batching, and recovery plan |
Marketing events | Authorized event connector | Check consent and downstream effects |
Documentation access is not store-data access. Clearly distinguish official tooling from community servers, and inspect permissions before installation.
Common errors and fixes
Use troubleshooting to restore control not to broaden permissions indiscriminately.
Symptom | Checks and corrective action |
|---|---|
CLI cannot access store | Verify authentication, store identity, account permissions, and supported access method. |
Preview fails | Inspect the actual error, selected target, and CLI session. There is no universal cause. |
Section absent from editor | Check schema, presets, template support, and section availability restrictions. |
Liquid error | Inspect the exact file and error; run Theme Check and consult current Liquid documentation. |
Unrelated edits | Stop. Inspect all changes, preserve legitimate work, and revert only unintended edits. |
GraphQL failure | Distinguish schema/API-version mismatch from authorization failure. Offline validation does not prove execution permission. |
MCP not recognized | Check client configuration, server compatibility, and the installation source’s trustworthiness. |
Secret committed | Revoke or rotate first. Investigate exposure, then coordinate history cleanup and secret scanning. |
Avoid blanket resets or history rewriting without accounting for uncommitted work and collaborators. Removing a secret from the latest file does not invalidate the exposed credential.
Frequently asked questions
Can Claude Code manage my live Shopify store directly?
No. Claude Code is a development tool intended for theme files and code-based operations. It should never be run against a live, published theme. All agent-generated changes must be applied to an unpublished duplicate theme, previewed, and QA-tested before manual publication.
Do I need coding experience to use Claude Code with Shopify?
While Claude Code generates Liquid and CSS code, you must be comfortable managing a terminal environment, using Git, and performing manual QA. You need to review the agent's plan, verify its file-level changes, and ensure the generated sections align with merchant requirements.
Is it safe to use Claude Code for Shopify theme development?
It is safe if you maintain strict development boundaries. Always use an unpublished theme, establish a Git baseline before starting, and manually approve every file-level plan. Never hardcode credentials and use integrated validation tools like shopify theme check to catch errors before deployment.
How does Claude Code handle configuration and instructions?
Claude Code primarily looks for CLAUDE.md to guide its behavior. However, following the 2026 industry standardization, it now supports AGENTS.md. Developers can configure their environment to evaluate both, ensuring consistent agent behavior across different tools like Cursor, VS Code, and terminal-based coding agents.
Does Claude Code replace the need for Shopify theme developers?
No. It acts as an accelerator for technical tasks but does not replace human oversight and production accountability. Developers remain responsible for code quality, accessibility, performance, and storefront impact.
Read more:
- Claude Code tutorial: Set up and master your AI coding agent
- Claude Code skills best practices: Build reusable AI workflows
- Connect GitHub MCP to Claude Code: Step-by-step guide
Conclusion
Using Claude Code with Shopify works best when each tool has a clear responsibility. Claude Code assists with the local project. Shopify CLI performs authorized theme operations. Git supports review and code recovery, but it is not a complete store backup.
Repeat the sequence: plan → branch → implement → review → validate → preview → approve. Keep the wholesale banner scoped, test its merchant controls, and separate automated checks from browser QA. Add MCP or Admin API access only when a defined task requires it. Production publication should remain manually approved, with a named owner and a retained recovery option. Save the security checklist and reusable project instructions above as the starting point for your next theme change.