Claude Code VS Code: Installation and setup guide 2026
Claude Code VS Code: How to install, sign in, choose permissions, and start using it
Searching for Claude Code VS Code usually means the same thing: you want a clear setup path, not scattered notes across docs, forums, and videos. This guide covers what Claude Code in VS Code actually does, what you need before installing it, how to sign in, which permission mode to choose, how to use it effectively in the first few minutes, and what to do when something does not work. The goal is simple: help you get from install to a working, reviewable workflow in one read, without overcomplicating the tool or overstating what it can do.
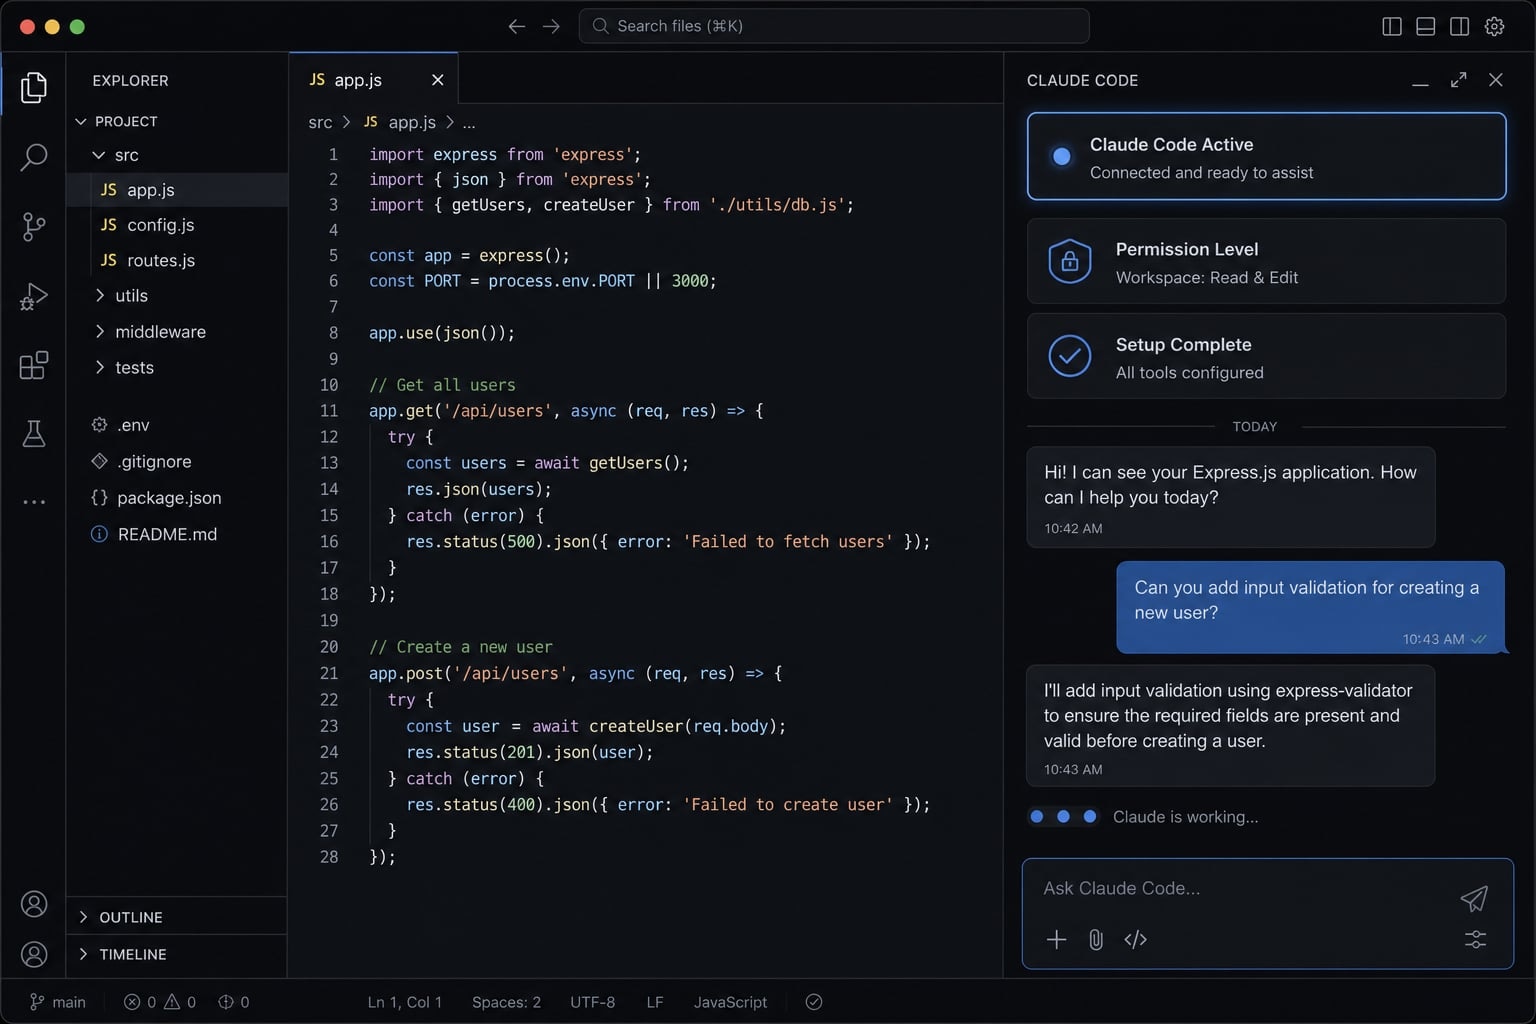
What Claude Code in VS Code actually does
Claude Code in VS Code is a native editor-based way to use Claude inside your IDE, so you can work with project files, reference code directly, review proposed edits in a visual diff, and continue sessions without constantly switching to a separate terminal or browser window.
In practical terms, the Claude Code VS Code extension turns Claude into an AI coding assistant in VS Code with tighter editor context. You can ask it to explain a file, inspect a function, propose a fix, or edit code while staying inside your project.
What makes this useful is not just chat. It is the workflow around that chat:
- You can reference files with @-mentions.
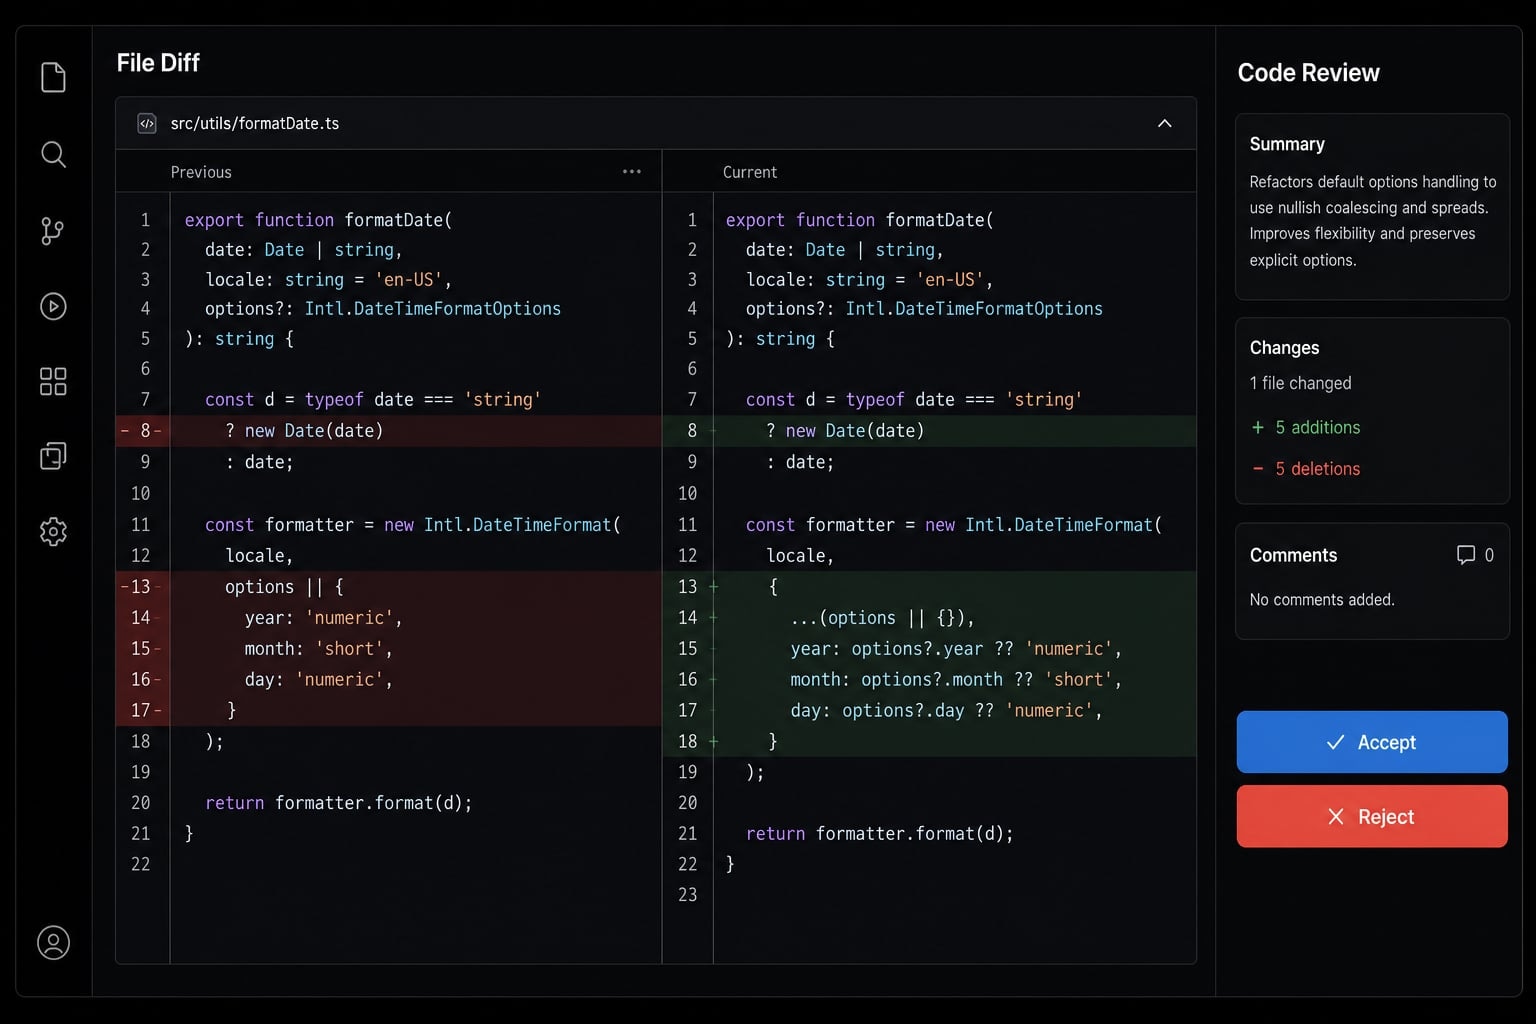
- You can review changes in diff view.
- You can keep cleaner session handling inside the IDE.
- You can work with project context without copying large chunks of code manually.
This is also where Anthropic Claude IDE integration feels different from a normal web chat. A browser chat can help with pasted code, but it does not fit naturally into file selection, edit review, or IDE navigation. The extension is also not identical to terminal-only usage, even if both connect to Claude Code.
Claude Code inside VS Code vs terminal-only usage
Workflow | Best for | Main advantage | Main trade-off |
|---|---|---|---|
VS Code extension | Most users starting out. | Easier visual review, lower context switching, faster editor access. | Slightly more UI-driven. |
Terminal-only | CLI-first users. | Lightweight, flexible, keyboard-centric flow. | Less visual for edit review. |
If you want less friction reviewing edits and working across files, VS Code is usually the better day-one choice. If you already prefer a terminal-first workflow, CLI usage can still make sense.
What the extension is best for on day one
Start with contained tasks you can validate quickly:
- Explain one file.
- Inspect one function.
- Fix a small bug.
- Refactor a contained method.
- Summarize what changed in a module.
That is where the extension usually proves value fastest.
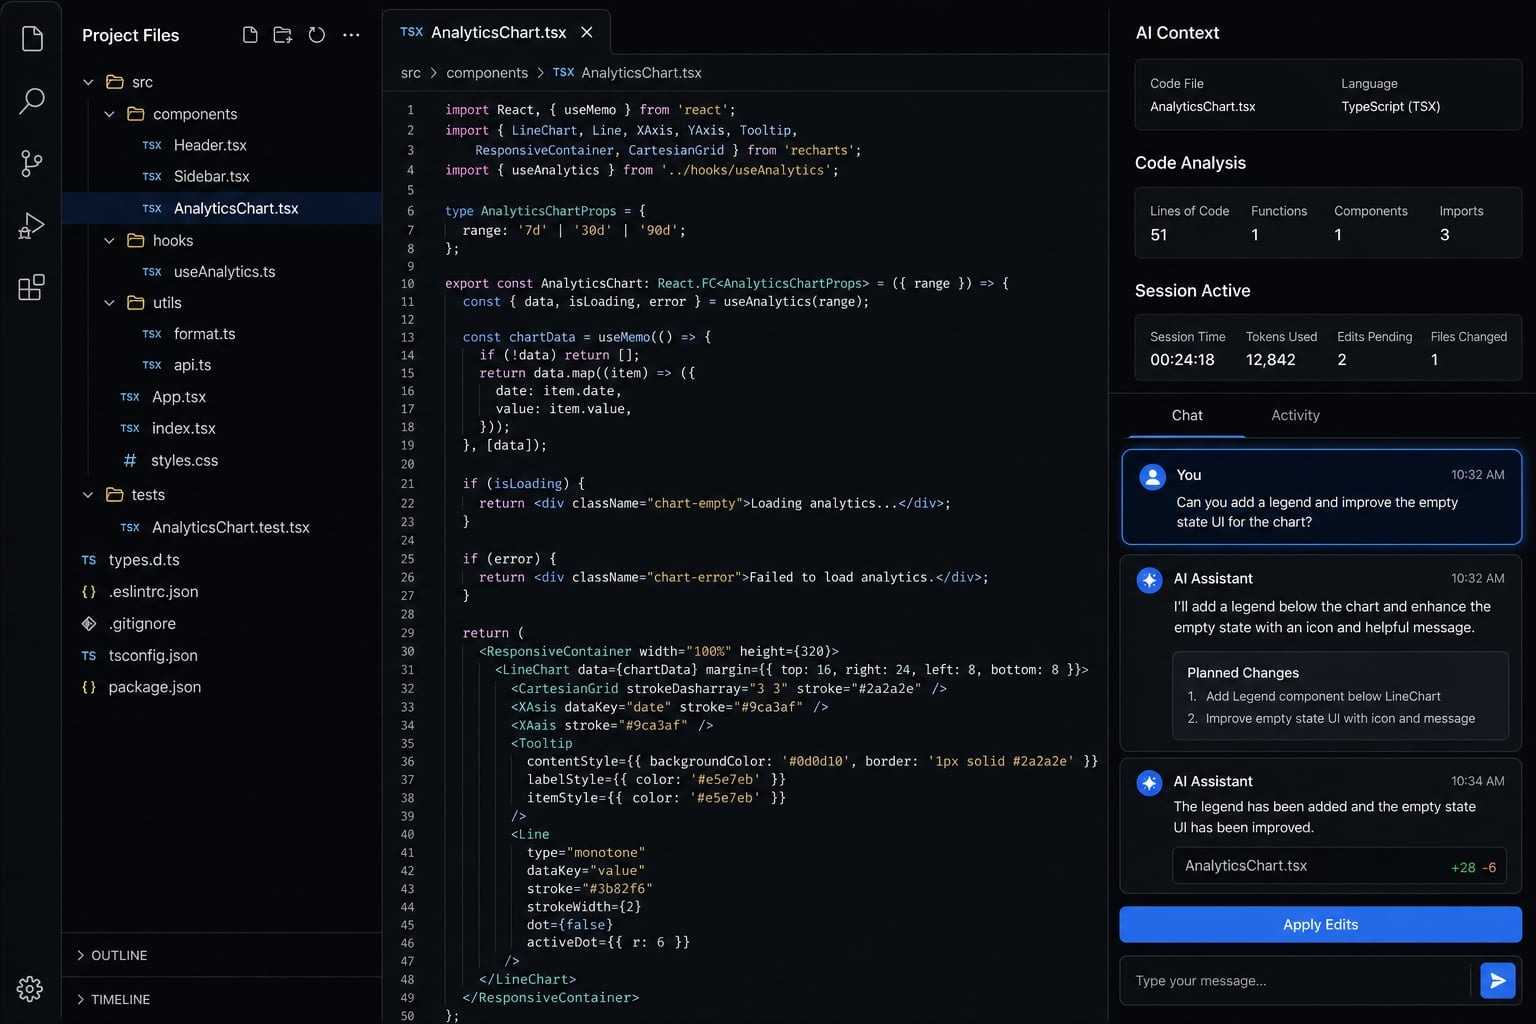
Prerequisites before you install Claude Code in VS Code
Before you install anything, confirm the basic setup. Most first-run issues come from version mismatch, account confusion, or trying to test the extension in an empty editor. You need only a few things, but they matter.
Minimum system and account requirements
- VS Code 1.94.0+.
- An Anthropic account.
- An eligible Claude subscription or supported Claude account path.
- A working internet connection.
- A browser available for sign-in authorization.
- A real project folder open in VS Code.
One trust point is worth stating clearly: Normal setup usually does not require manually pasting an API key. For most users, sign-in happens through browser-based authorization tied to the account.
You should also decide whether the folder you open is a trusted workspace. If the repo is unfamiliar or untrusted, use more conservative approval settings and review changes more carefully.
Quick readiness checklist
- VS Code is updated to 1.94.0 or higher.
- You can sign in to your Anthropic account in a browser.
- A real project folder is open in VS Code.
- Your internet connection is stable.
- You understand whether the workspace should be treated as trusted.
In practice, opening an actual working project before setup makes verification much easier. It gives Claude something concrete to inspect as soon as sign-in succeeds.
How to install and sign in to the Claude Code VS Code extension
If your goal is to install Claude Code extension in VS Code and confirm it works, the fastest approach is to follow the install, open, sign-in, and verification sequence without skipping the final test.
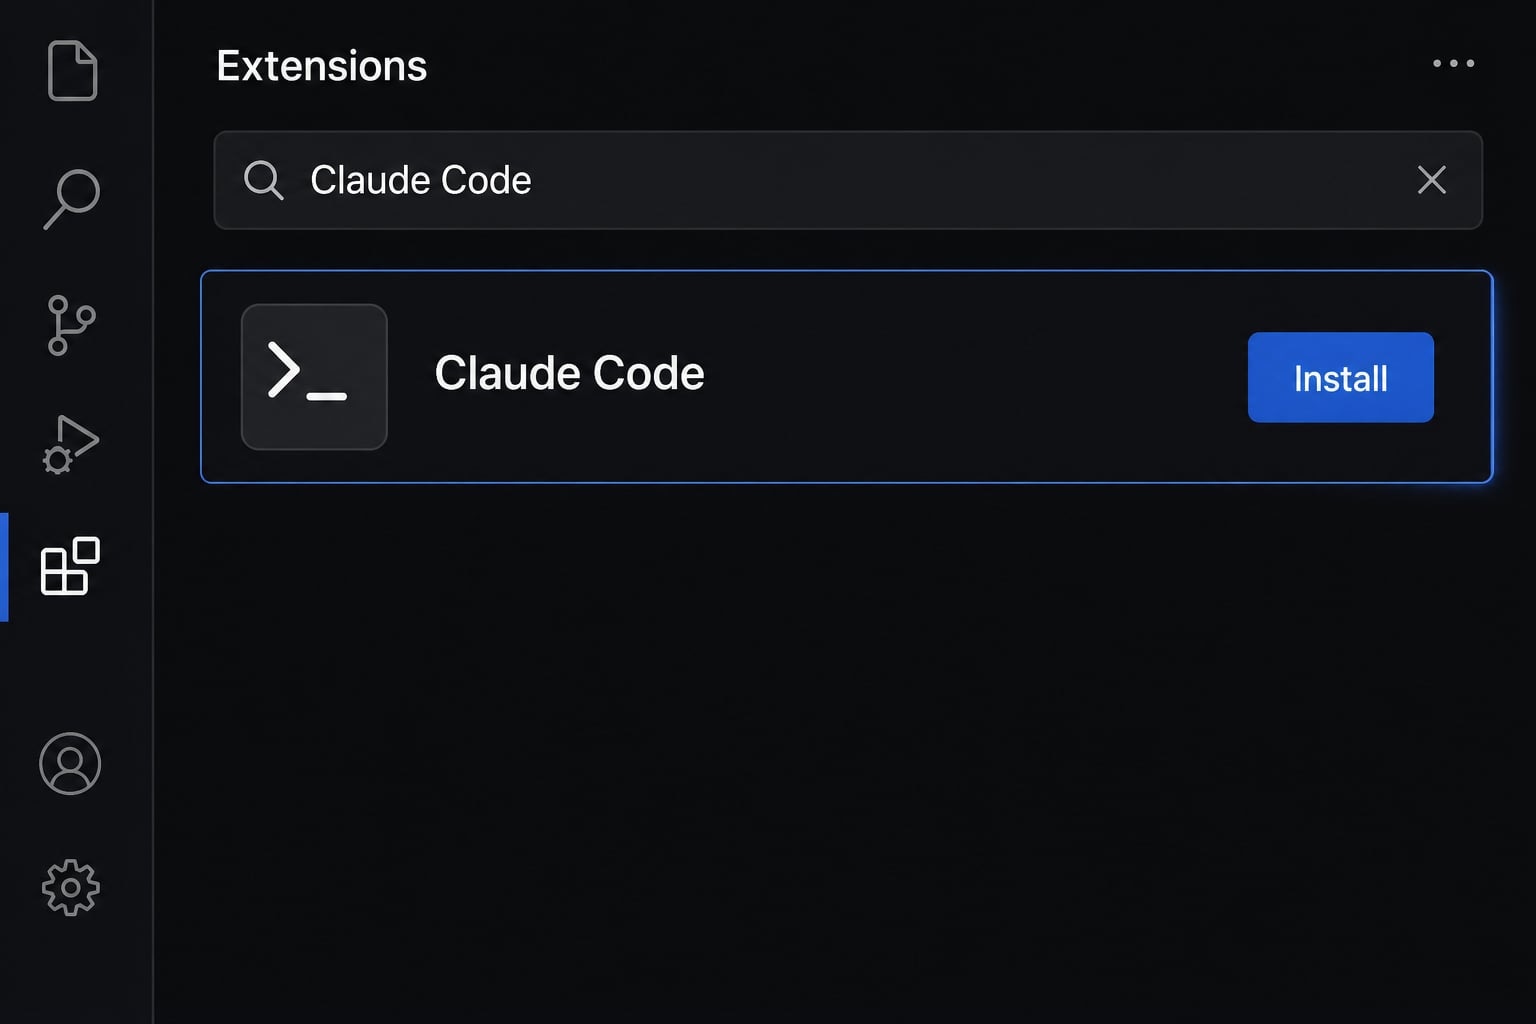
Step 1: Install the extension
- Open Extensions in VS Code.
- Mac:
Cmd + Shift + X - Windows/Linux:
Ctrl + Shift + X
- Mac:
- In the search field, type Claude Code
- Find the official Visual Studio Code extension
- Click Install
- If VS Code prompts you to reload, accept it
- If the extension does not appear immediately, run Reload Window
This is the cleanest path for most users. Avoid changing settings before the extension is installed and visible.
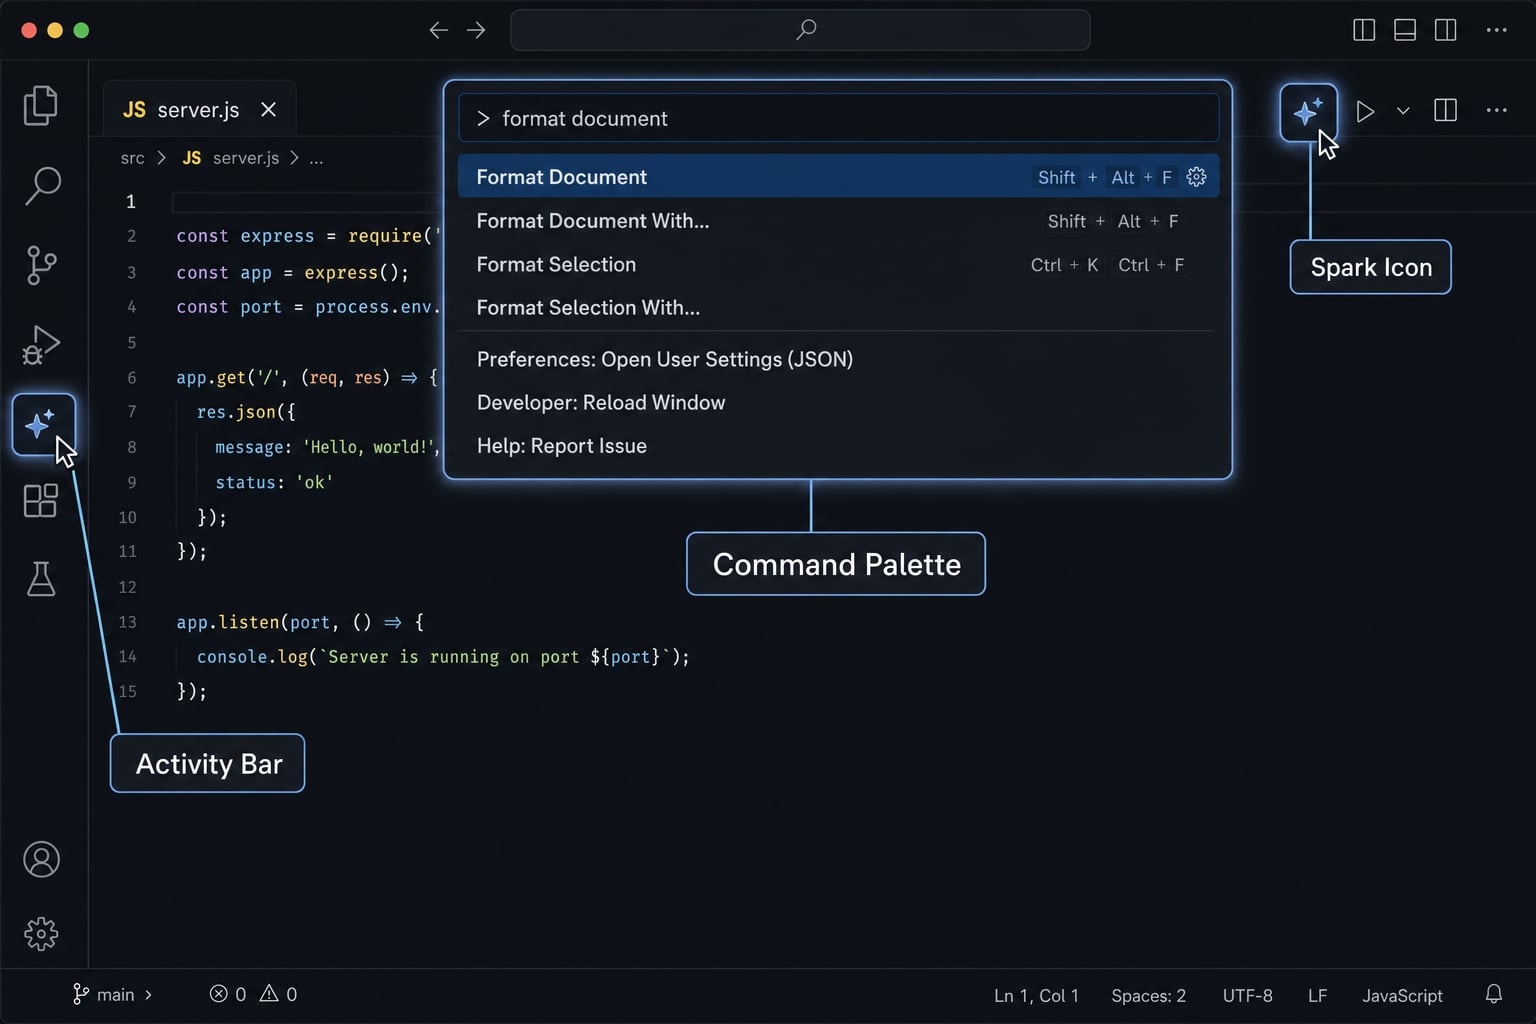
Step 2: Open the Claude Code panel
After install, there are several ways to open it:
- Click the Claude or Spark icon in the Activity Bar
- Open the Command Palette with
Cmd + Shift + PorCtrl + Shift + P, then search for Claude Code - Use the editor toolbar Spark icon if it appears while a file is open
- Use the status bar entry if available in your setup
If one entry point is not visible, do not assume the install failed. Try the Command Palette first, since it is the most reliable fallback.
Step 3: Sign in and confirm setup
The first time you open the panel, click Sign in. Claude Code should launch browser-based authorization in your default browser. Complete the sign-in flow, then return to VS Code. Do not stop there. Verify the extension actually works.
For a first test, keep the prompt small:
- “Explain this file.”
- “Summarize this function.”
- “Review
auth.tsand tell me what it does.”
If Claude responds inside the project panel and can see the selected file or context, setup succeeded. In practice, this verification step catches more issues than installation itself.
Your first 10 minutes: How to use Claude Code effectively in VS Code
The first goal is not automation. It is getting useful, reviewable output quickly. The easiest way to do that is to keep scope tight, give explicit context, and review changes before accepting them.
Start with a small, testable task
For a first run, do not ask Claude to rebuild a feature or rewrite your app. Start with one small task you can inspect in minutes.
Good first tasks:
- Explain one file.
- Fix a small bug.
- Refactor one contained function.
- Summarize a confusing module.
- Suggest a minimal change to remove an error.
Example first prompts:
- “Review
auth.tsand explain what this function does.” - “Look at
checkout.tsand suggest a minimal fix for this null error.” - “Summarize the validation flow in
form-handler.ts.”
This is the fastest way to validate quality when using Claude Code in VS Code.
Use @-mentions to improve context quality
One of the simplest upgrades is better context. Use @-mentions to point Claude to the exact file, folder, or selected code range that matters. Why this helps:
- It reduces vague answers.
- It keeps the request tied to real project structure.
- It lowers the chance of generic suggestions.
- It makes multi-file reasoning easier when the task is still contained.
If a response feels too broad, the fix is often not a new setting. It is better file context.
Review proposed edits before accepting
When Claude wants to change code, review it in diff view. This matters even for small edits. Use the review step to:
- Accept changes.
- Reject changes.
- Modify proposed edits manually.
- Check whether the output matches the original request.
This is effectively lightweight AI code review inside your editor. It is a quality step, not wasted friction.
Resume or split work across sessions
Use session history when you want to continue a related task. Start a new session when the next task is unrelated.
That separation helps because:
- Related sessions preserve useful context.
- Unrelated sessions stay cleaner.
- Responses become easier to validate.
- Token use and conversation drift are easier to manage.
A good rule is simple: One topic per session unless the tasks clearly belong together.
Which permission mode should you choose?
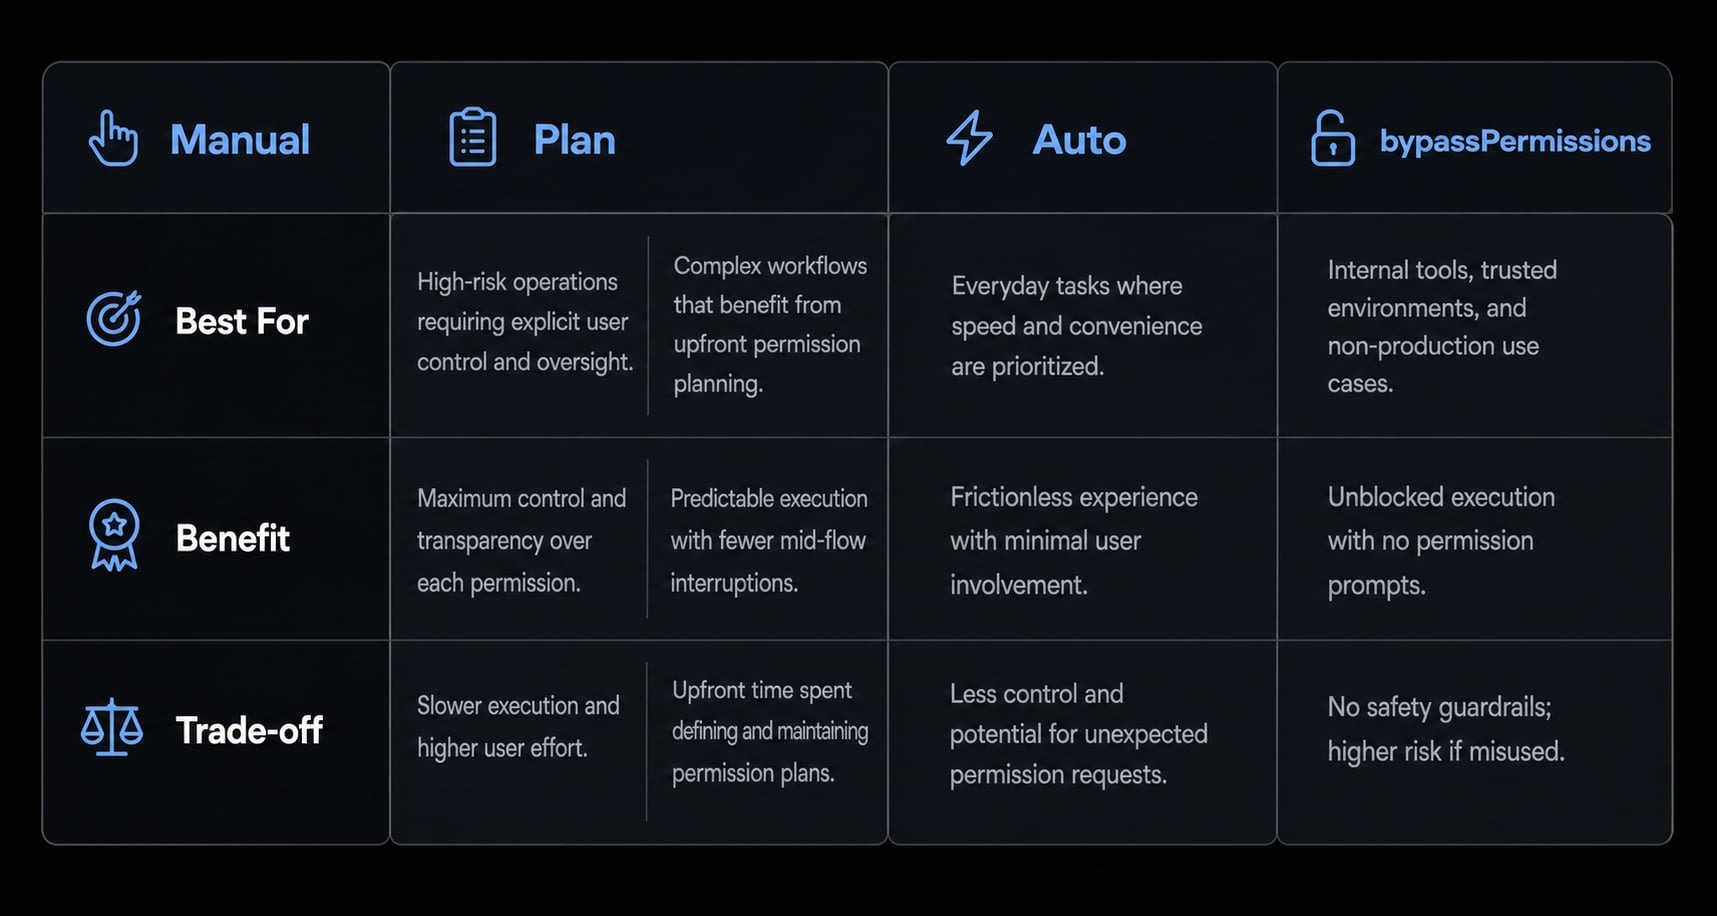
Claude Code permission modes control how much approval Claude needs before taking actions such as editing files or running commands. Lower-friction modes are faster, but they also increase the chance that changes happen before you have reviewed or approved them carefully.
For most users, this is a workflow and risk decision, not a “power user” badge. Choose based on repository sensitivity, not impatience.
Simple breakdown of each permission mode
- Manual: Highest control. Claude asks before actions. Best when you want to inspect each step closely.
- Plan: A strong middle ground. Claude outlines what it wants to do, then waits for approval before continuing.
- Auto: More permissive. Fewer interruptions, faster flow, but easier to miss something if you stop watching closely.
- bypassPermissions: High-risk option. Useful only when you fully understand the trade-off and the workspace is low risk or tightly controlled.
Recommended mode by user type
Mode | Best for | Main benefit | Main trade-off |
|---|---|---|---|
Manual | Beginners, sensitive repos, careful review | Maximum control | Slowest workflow |
Plan | Most users, structured editing | Good balance of speed and oversight | Still requires approvals |
Auto | Solo builders on low-risk tasks | Less interruption | Easier to miss unwanted changes |
bypassPermissions | Advanced users in very low-risk or disposable environments | Fastest flow | Highest chance of unnoticed or unwanted changes |
For most readers:
- Start with Manual or Plan.
- Consider Auto only after the workflow feels predictable.
- Treat bypassPermissions as an advanced option, not a default.
If you are working in a trusted workspace on a personal prototype, you may accept more automation. If you are in shared repositories, production-adjacent work, or regulated environments, be more conservative. More permissive permission modes can increase the chance of unnoticed edits or risky command execution.
Useful settings and workflow tips that improve Claude Code in VS Code
Most quality gains come from clearer requests and better context, not endless tweaking. Still, a few VS Code settings and habits can make the tool easier to use consistently.
Settings worth checking early
Look at these first:
- Panel placement: Move Claude Code where it is easiest to reference while coding.
- Access path: Make sure you know whether you prefer the Activity Bar or Command Palette.
- Session history access: Know where to reopen past work.
- Terminal-style option: If available, enable the terminal interface only if that matches how you prefer to work.
These are convenience choices. They matter less than context quality, but they reduce friction.
Habits that usually improve output quality
A few workflow habits make a noticeable difference:
- Keep task scope specific.
- Mention the exact file or folder involved.
- Start a fresh session for unrelated work.
- Review edits before applying them.
- Use CLAUDE.md for recurring project guidance.
Think of CLAUDE.md as a persistent project guidance file. It helps keep stable instructions available, such as coding conventions, preferred libraries, or review expectations. That is useful when you do not want to restate the same rules in every prompt.
The broader pattern is straightforward: Prompt specificity and file context usually improve output more than any hidden setting.
Common Claude Code VS Code issues and how to fix them
When something breaks, start with the simplest likely fix. Most VS Code troubleshooting cases are resolved with file context, reload, restart, or re-authentication rather than deeper system changes.
Problem: Spark icon does not appear
Try these steps in order:
- Open a file, not just an empty editor.
- Open an actual project folder.
- Confirm you are on VS Code 1.94.0+.
- Run Reload Window.
- Open Claude Code from the Command Palette instead.
A missing icon does not always mean a broken install. Often the UI element is context-dependent, especially when no file is open.
Problem: Claude Code does not respond
If Claude Code not responding is the issue, go through this ladder:
- Check your internet connection.
- Start a new conversation.
- Re-open the panel.
- Re-authenticate by signing in again.
- Restart VS Code.
- Try a fresh session if the current one seems stuck.
In practice, a stalled session is often easier to fix by starting fresh than by repeatedly resubmitting the same prompt.
Problem: Keyboard shortcut conflicts
Shortcut issues are common, especially on macOS or systems with overlay tools.
Try this:
- Open Keyboard Shortcuts.
- Search for the Claude Code command you want.
- Check whether the shortcut is already claimed.
- Rebind it to a clean combination.
- Check for OS-level conflicts if the shortcut still fails.
This is the fastest path when a command exists but does not fire correctly.
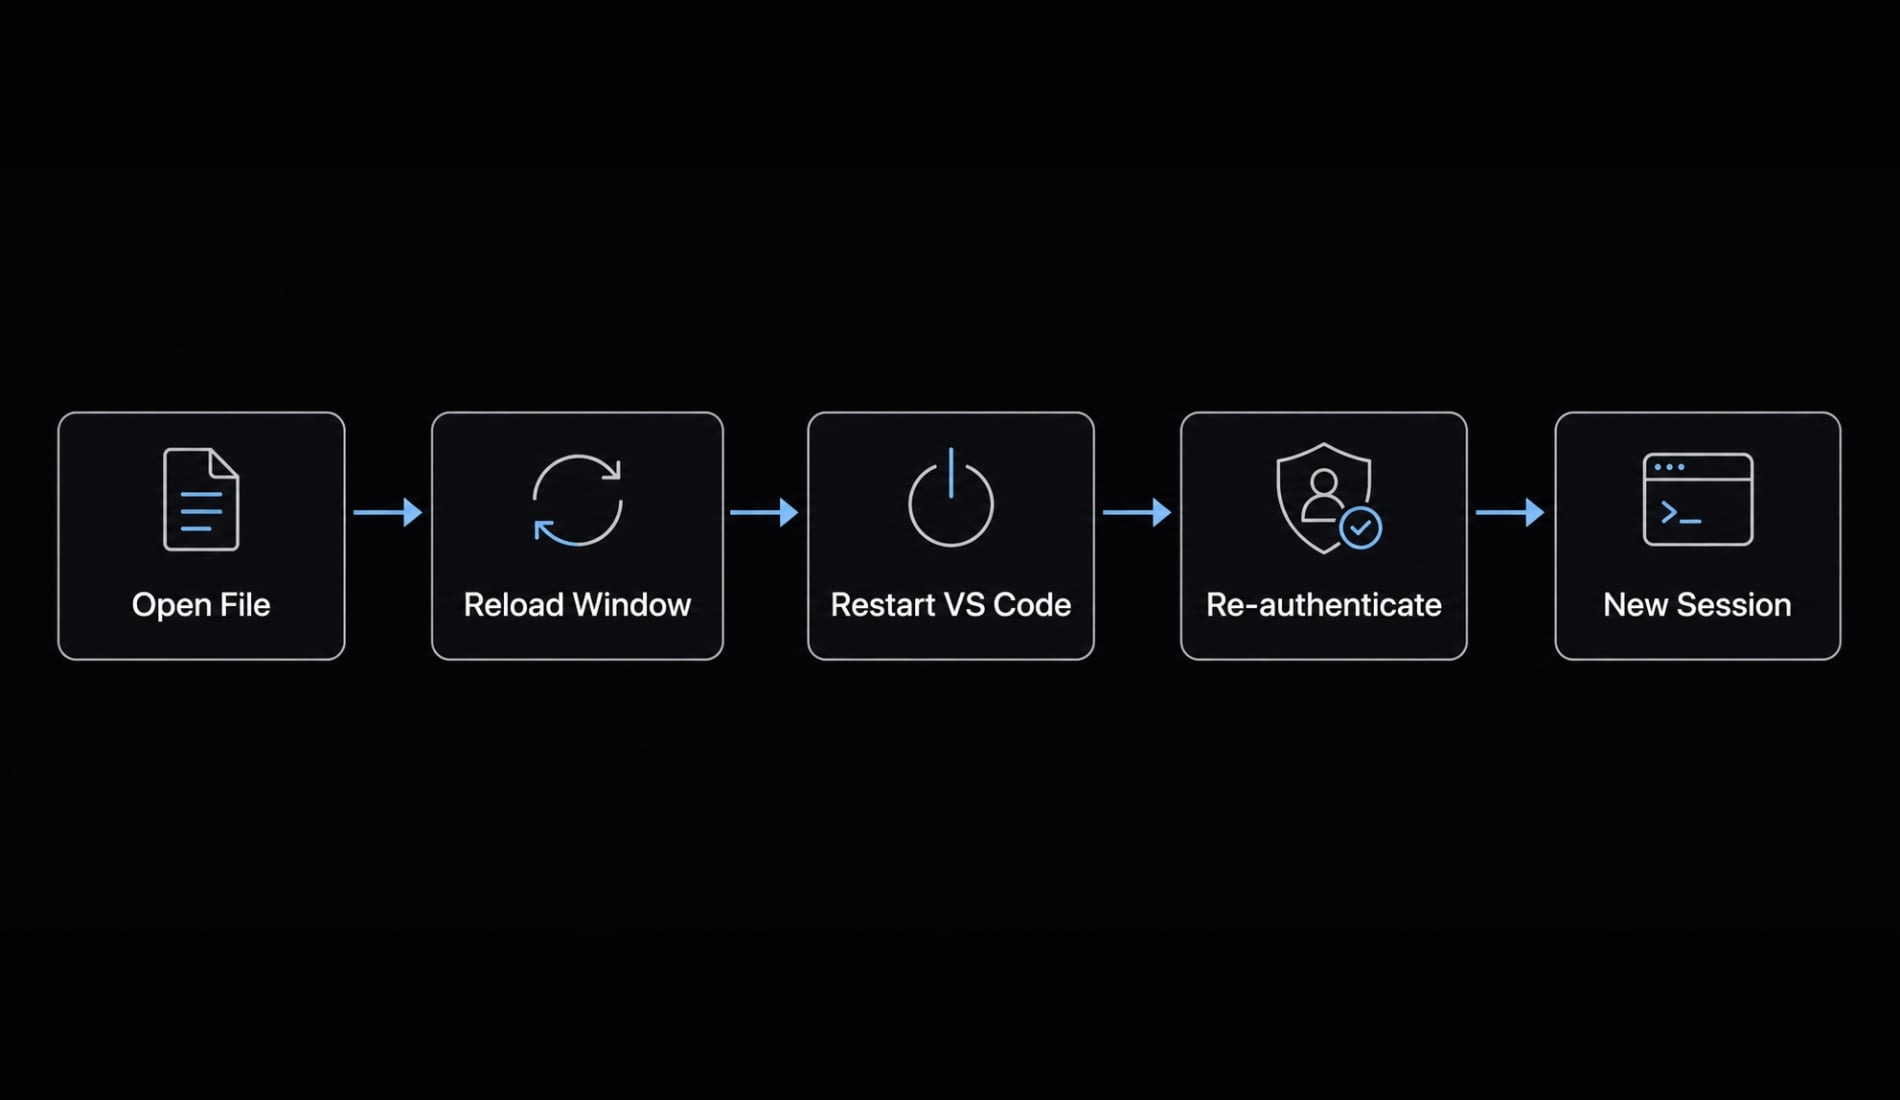
Quick escalation order
Use this order before assuming a larger Claude Code extension issue:
- Open file or project.
- Run Reload Window.
- Restart VS Code.
- Sign in again.
- Start a fresh session.
A simple workflow upgrade once Claude Code is working
Once the setup is stable, the next step is not more complexity. It is consistency. The teams and solo builders who get the most from Claude usually move from ad hoc prompts to repeatable coding workflows.
Minimal repeatable workflow
- Define the task clearly.
- Attach the right file or code-range context.
- Review diffs before applying.
- Store recurring guidance in CLAUDE.md.
This is where light AI-powered workflow automation starts to matter. Not because the tool becomes magic, but because your process becomes easier to repeat.
For teams that want a more standardized Claude Code workflow kit, AgentKit can be a useful resource for turning one-off AI usage into documented, repeatable operating patterns. The value is workflow systemization, not replacing Claude Code itself.
Frequently asked questions
What is Claude Code in VS Code?
Claude Code in VS Code is an extension that integrates Anthropic’s AI coding capabilities directly into your development environment. It allows you to submit prompts, reference files using @-mentions, and review code changes through an integrated diff view.
Do I need an API key to use Claude Code in VS Code?
No. The extension’s standard setup process uses browser-based Anthropic account authentication. You only need a paid Claude account—Pro, Team, or Enterprise—or a Claude Console account to get started without manually configuring an API key.
What is the difference between Manual, Plan, and Auto modes?
- Manual: You must approve every action.
- Plan: The AI creates a plan and waits for your approval before executing it.
- Auto: The AI edits files automatically.
bypassPermissions: Skips all confirmation prompts for maximum speed but involves greater risk.
How do I fix the missing “Spark” icon in VS Code?
Make sure you have opened an actual project folder and a specific file. If the icon still does not appear, run “Developer: Reload Window” from the Command Palette, verify that you are using VS Code 1.94.0 or later, or reinstall the extension.
Why should I use @-mentions when coding with Claude Code?
@-mentions provide the AI with precise context. By referencing specific files or line ranges—for example, @file.ts#5-10—you can significantly reduce vague or irrelevant responses and improve the accuracy of generated code.
What should I do if Claude Code is not responding?
Try the following steps in order: check your network connection, start a new conversation or session, authenticate your account again, and restart VS Code. If the issue continues, check whether you are working in a workspace with restricted permissions.
What does CLAUDE.md do in a project?
CLAUDE.md is a project instruction file that provides Claude with persistent context. It stores rules, important commands, and project structure details that you want the AI to follow consistently, reducing the need to repeat general instructions in every new session.
Read more:
- Claude Code slash commands: Essential shortcuts for CLI flow
- Connect GitHub MCP to Claude Code: Step-by-step guide
- Claude Code subagents documentation: Setup and usage guide
Conclusion
Getting Claude Code VS Code working well is usually straightforward if you follow the right order: Install the extension, sign in through the browser flow, verify it with a small test prompt, start with contained tasks, use @-mentions for better context, and choose a permission mode that matches your risk tolerance. From there, the biggest quality gains usually come from better task framing and consistent review in diff view, not from chasing complicated settings.
If you want the tool to stay useful over time, keep sessions clean, store recurring guidance in CLAUDE.md, and move gradually toward repeatable workflows. For deeper workflow standardization, use a practical checklist or explore structured resources that help operationalize Claude Code without adding unnecessary process.