Claude Code JetBrains plugin: Install, use and troubleshoot
Claude Code JetBrains plugin: Install, use and troubleshoot it correctly
The Claude Code JetBrains plugin is the official way to connect Claude Code to JetBrains IDEs, but it does not work by itself. You still need the Claude Code CLI installed first. This guide covers the shortest correct setup path: Supported IDEs, installation order, first-run usage, key settings, and the fastest fixes when the plugin appears installed but inactive.
What the Claude Code JetBrains plugin actually does
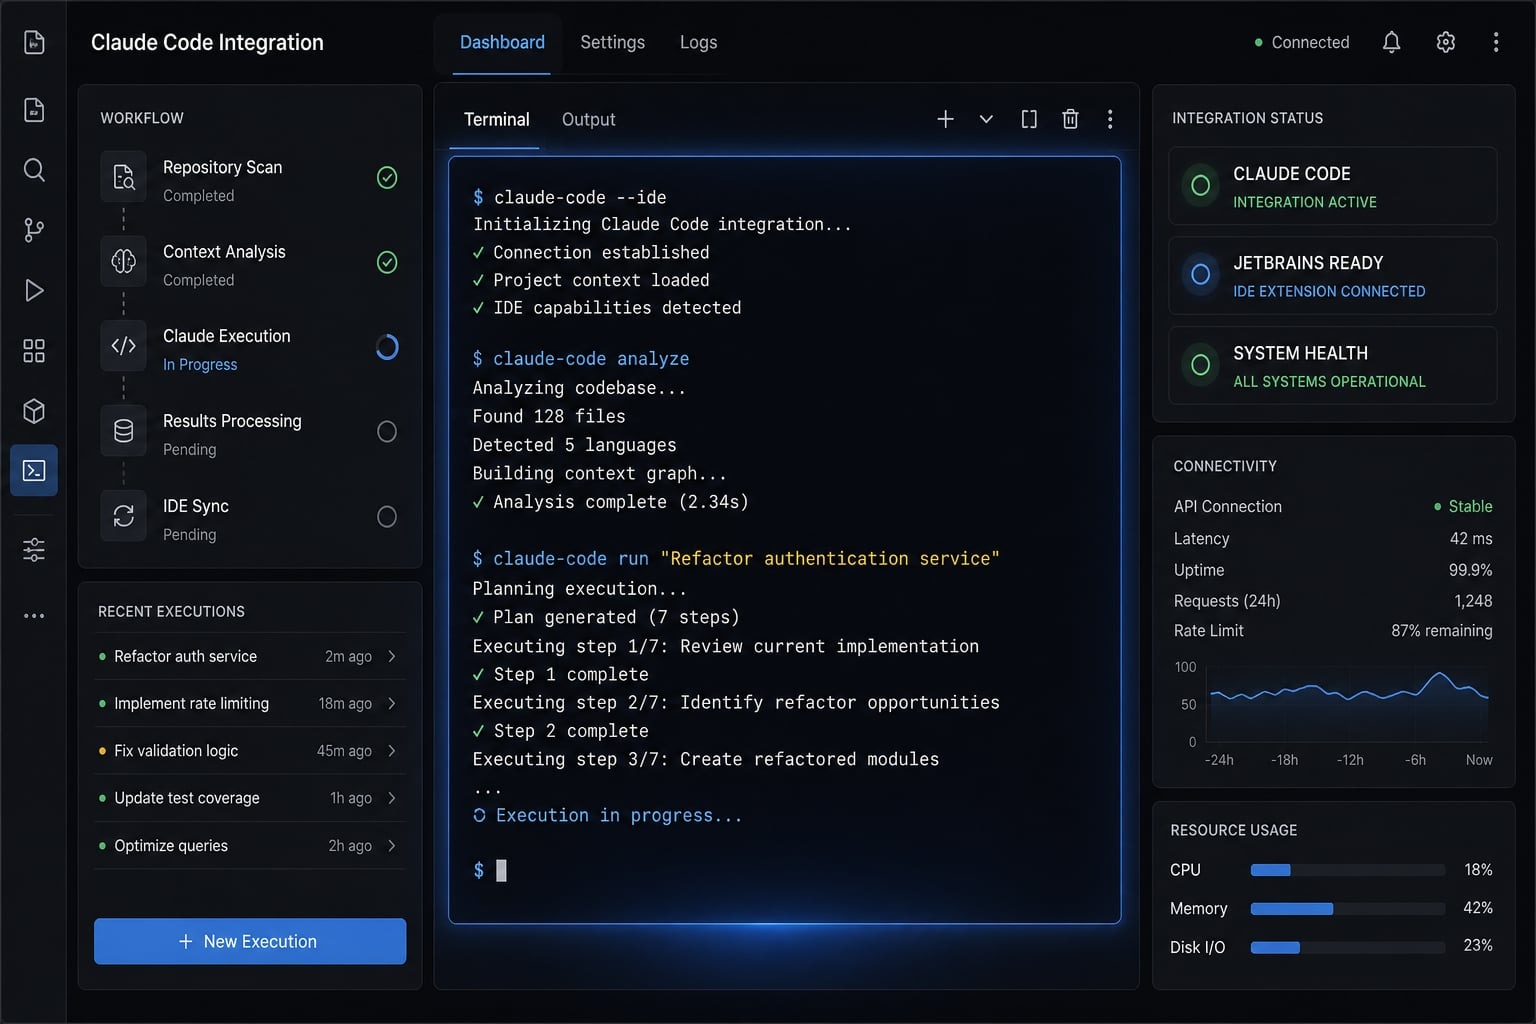
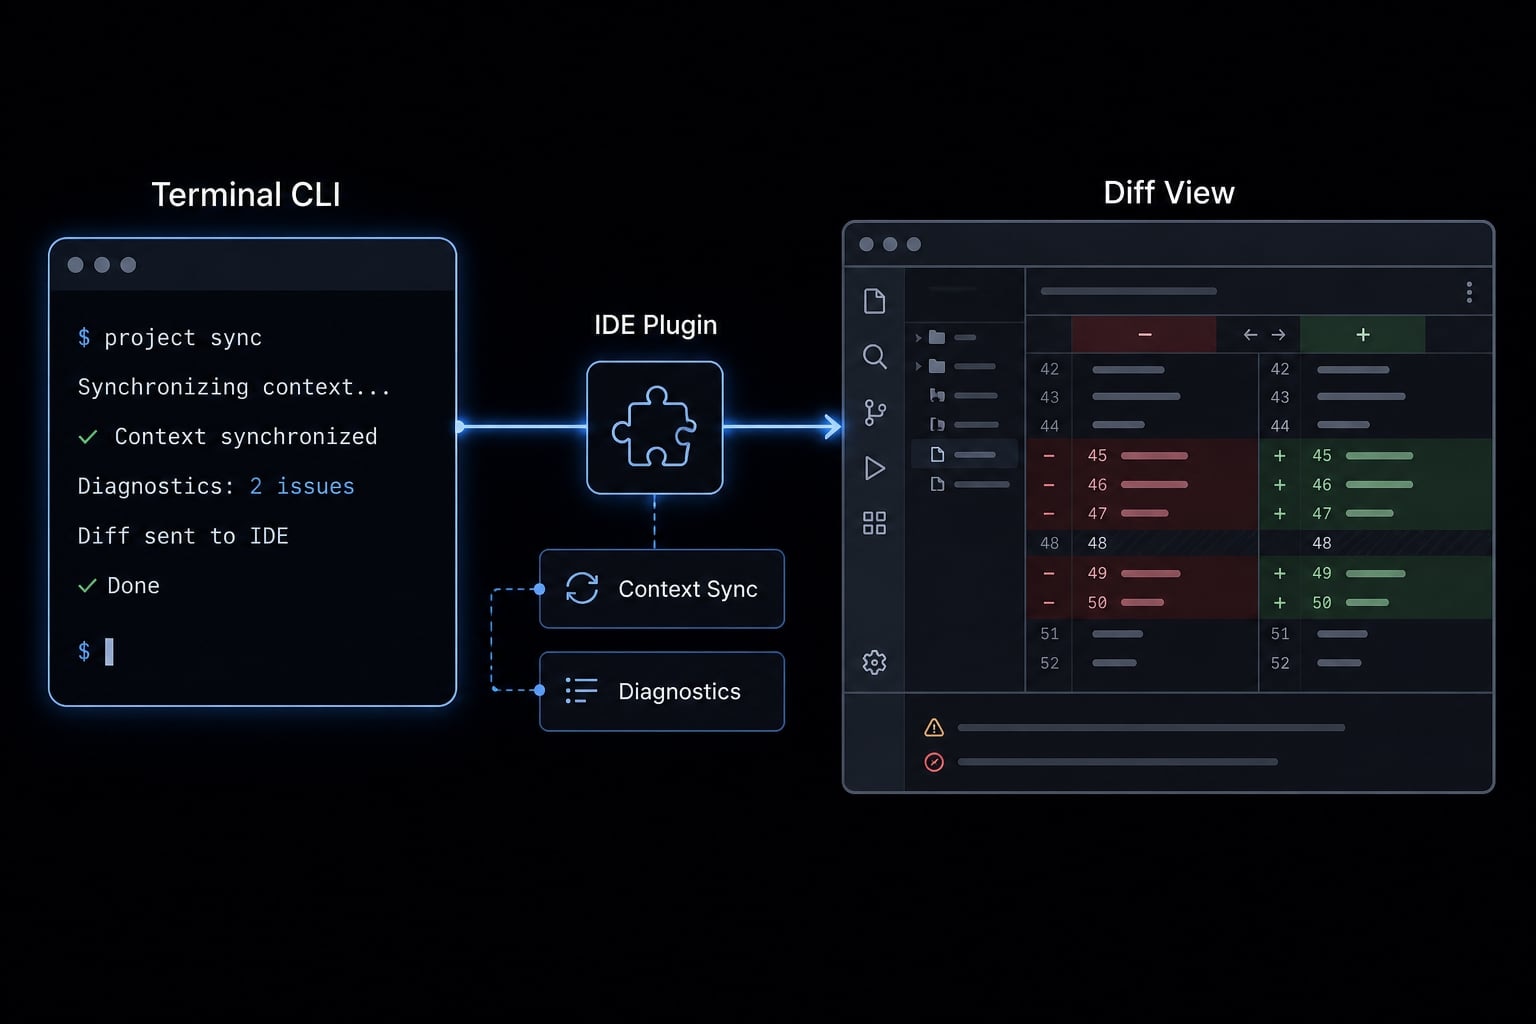
The Claude Code JetBrains plugin is the official IDE integration layer for connecting Claude Code with JetBrains editors. It does not replace the Claude Code CLI. Instead, it adds IDE-aware workflow features such as native diff viewing, active file context sharing, and tighter editor-to-terminal interaction.
That distinction matters because many users assume the plugin is the assistant itself. It is not. The plugin helps your IDE work with Claude Code more smoothly, while the CLI remains the runtime entry point.
What users get from the plugin
- Terminal integration so Claude Code can work from your JetBrains environment.
- Diff viewing inside the IDE instead of reviewing changes only in terminal output.
- Context sharing from the active tab or selected code into the Claude session.
- File reference shortcuts for inserting file paths and line references quickly.
- Diagnostics sharing so new lint or syntax issues can be surfaced after edits.
Why this matters in real workflow terms
In practice, the biggest benefit is fewer context switches. You can launch Claude from the project environment you are already using, keep review inside the editor, and reduce the back-and-forth between terminal, browser, and file tree.
The second benefit is safer review. Using the native diff viewer makes code changes easier to inspect before you accept them. It also speeds up prompting, because the active file or selection is already in scope. Even with that convenience, the rule stays the same: The plugin improves workflow, but the CLI is still required.
Supported JetBrains IDEs and prerequisites
The most common preventable mistake is installing the plugin first and only later discovering that the Claude Code CLI is missing or not detectable inside the IDE terminal. Check compatibility and prerequisites before you install anything.
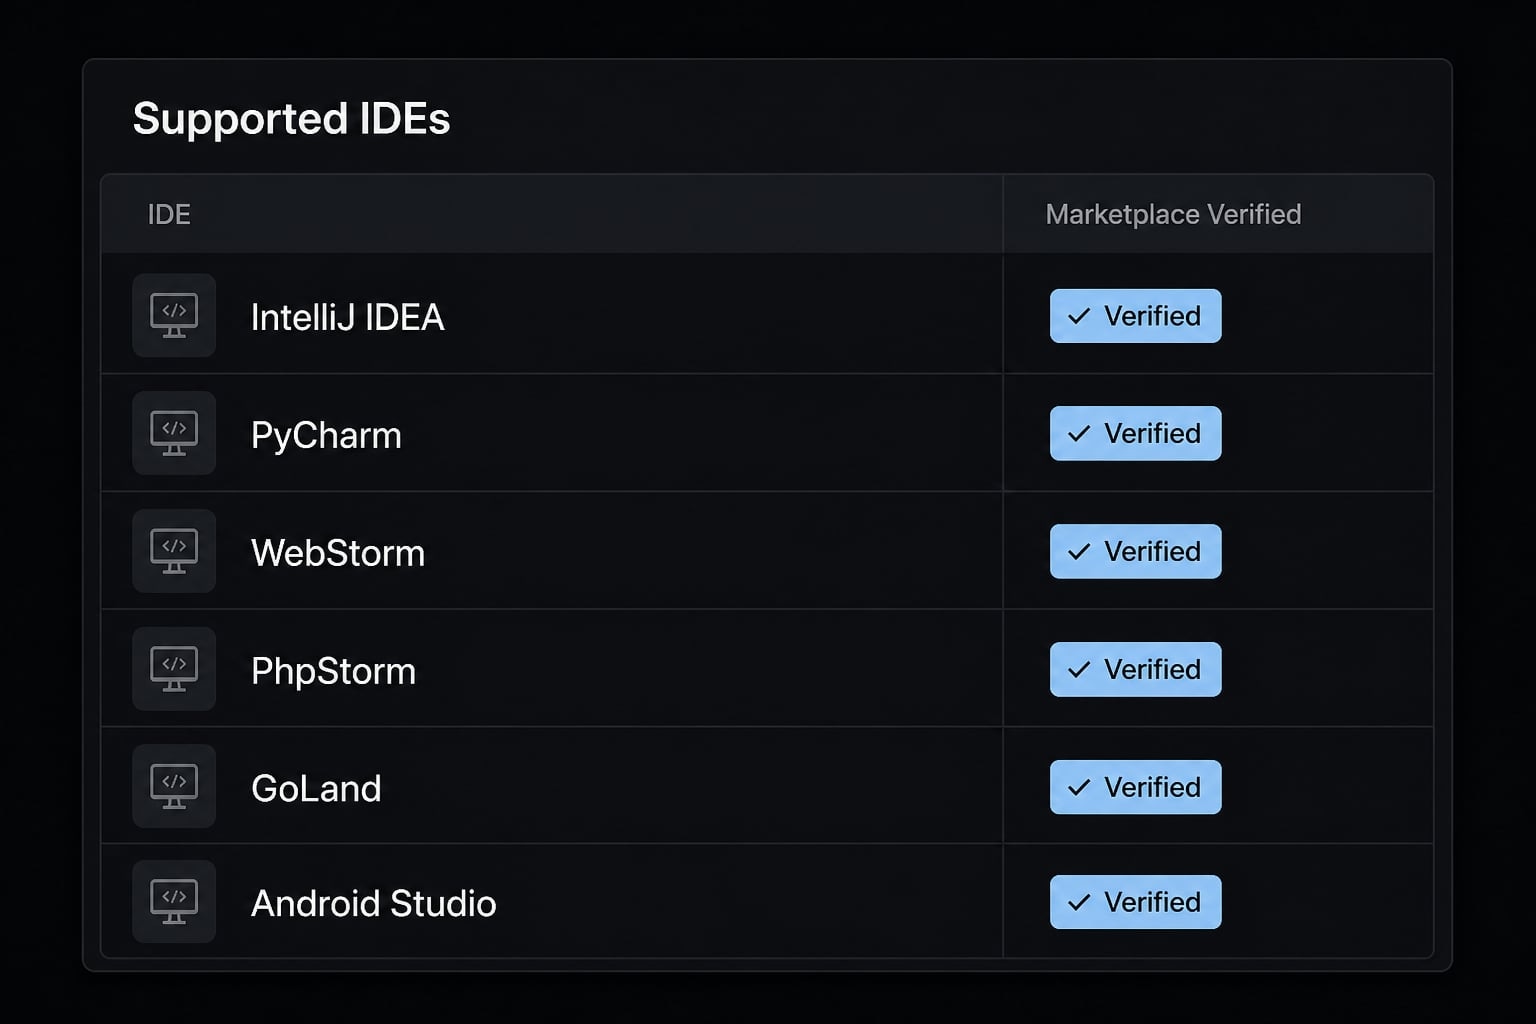
Current support covers several major JetBrains products, but availability can change over time. The safest path is to verify the current listing in the JetBrains Marketplace before rollout, especially if your team uses multiple IDE variants.
Supported IDEs
- IntelliJ IDEA
- PyCharm
- WebStorm
- PhpStorm
- GoLand
- Android Studio
Prerequisites before you install
- Install the Claude Code CLI first
- Install the JetBrains plugin second
- Restart the IDE after installation
- If needed, specify the full
claudepath in plugin settings
This setup is straightforward, but it is not one-click if the CLI is missing. In practice, most users only need the CLI installed correctly, the plugin added from Marketplace, and the command path fixed if the IDE cannot find claude.
How to install the Claude Code plugin in JetBrains
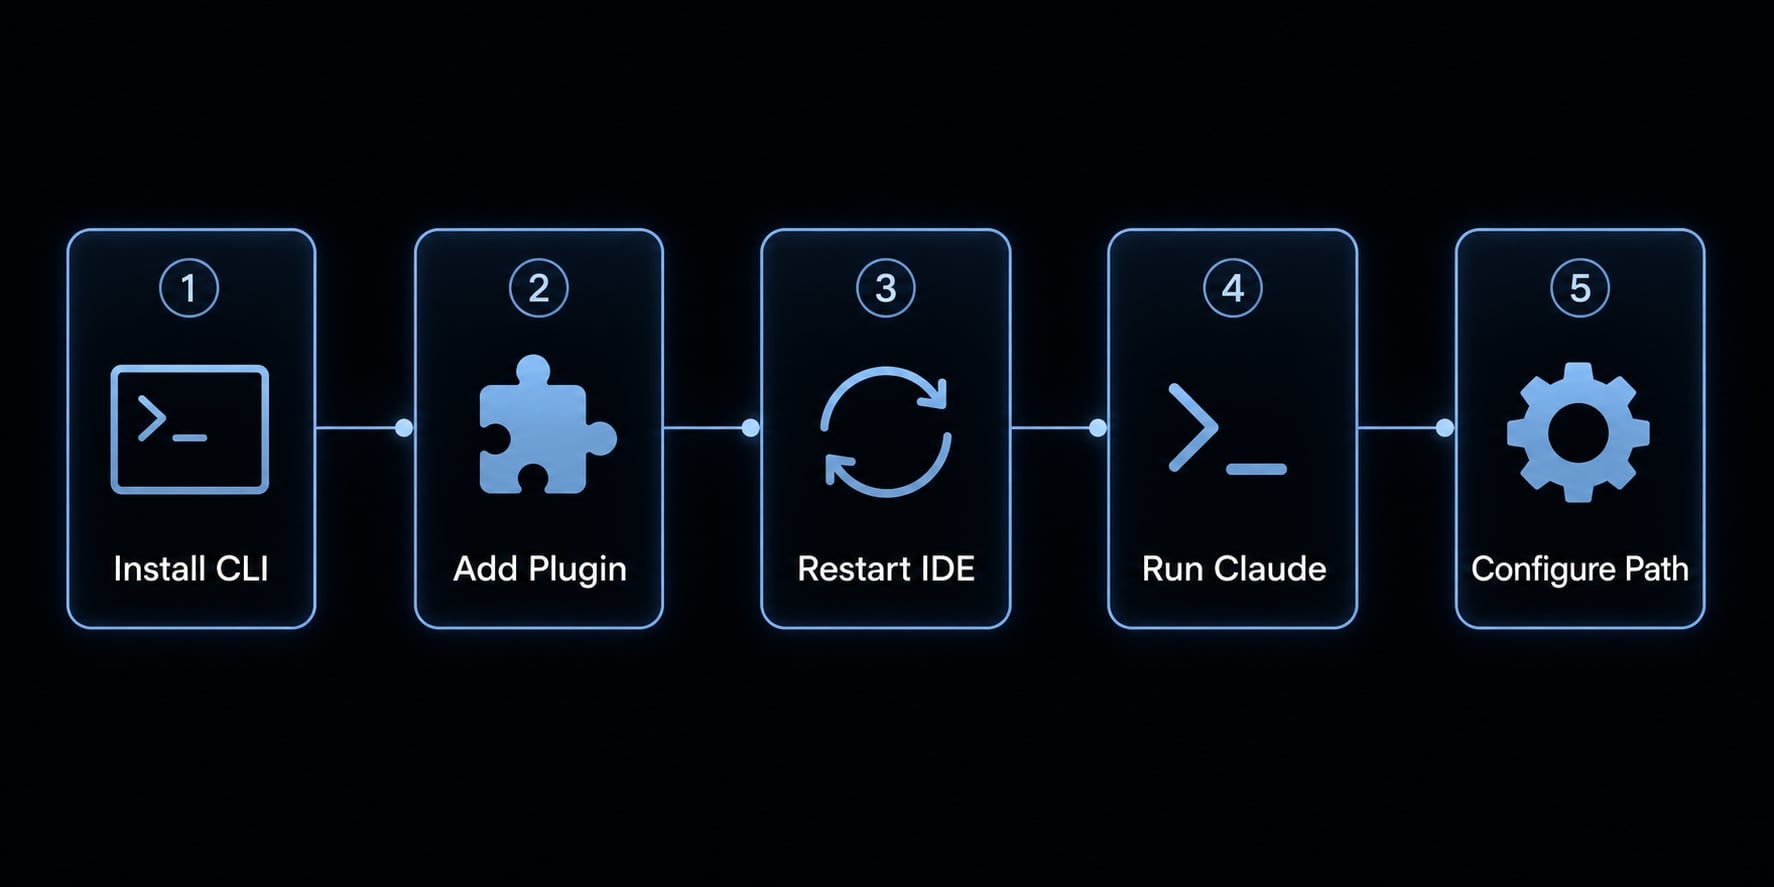
To install Claude Code in JetBrains correctly, set up the CLI first, then install the plugin from JetBrains Marketplace, and finally verify that the IDE can find the claude command.
Step 1: Install the Claude Code CLI
- Follow the official Claude Code setup path and install the CLI on your machine.
- Confirm that
claudeis callable in a terminal. - Remember that the plugin depends on this command being available. It does not bundle its own CLI.
Step 2: Install the plugin from JetBrains Marketplace
- Open your JetBrains IDE.
- Go to Settings/Preferences → Plugins.
- Search for Claude Code [Beta].
- Install the plugin and restart the IDE when prompted.
Step 3: Verify the IDE can find the Claude command
- Open the integrated terminal inside the IDE.
- Run:
claude - If you get command not found, go to the plugin settings and set the full command path manually.
Step 4: Start using the integration
- Launch Claude Code from the IDE terminal in your project.
- If your setup shows a plugin button or shortcut, you can use that as a quick entry point.
- Once connected, IDE-aware features such as diff viewing, context sharing, and diagnostics pull should activate.
The most common setup failure is not the plugin install itself. It is usually a command-path issue. If the plugin appears installed but inactive, do not reinstall everything immediately. First confirm whether the IDE can actually run claude.
Fast install summary:
- Install the Claude Code CLI.
- Install Claude Code [Beta] from JetBrains Marketplace.
- Restart the IDE.
- Run
claudein the integrated terminal and fix the command path if needed.
How to use Claude Code inside JetBrains after installation
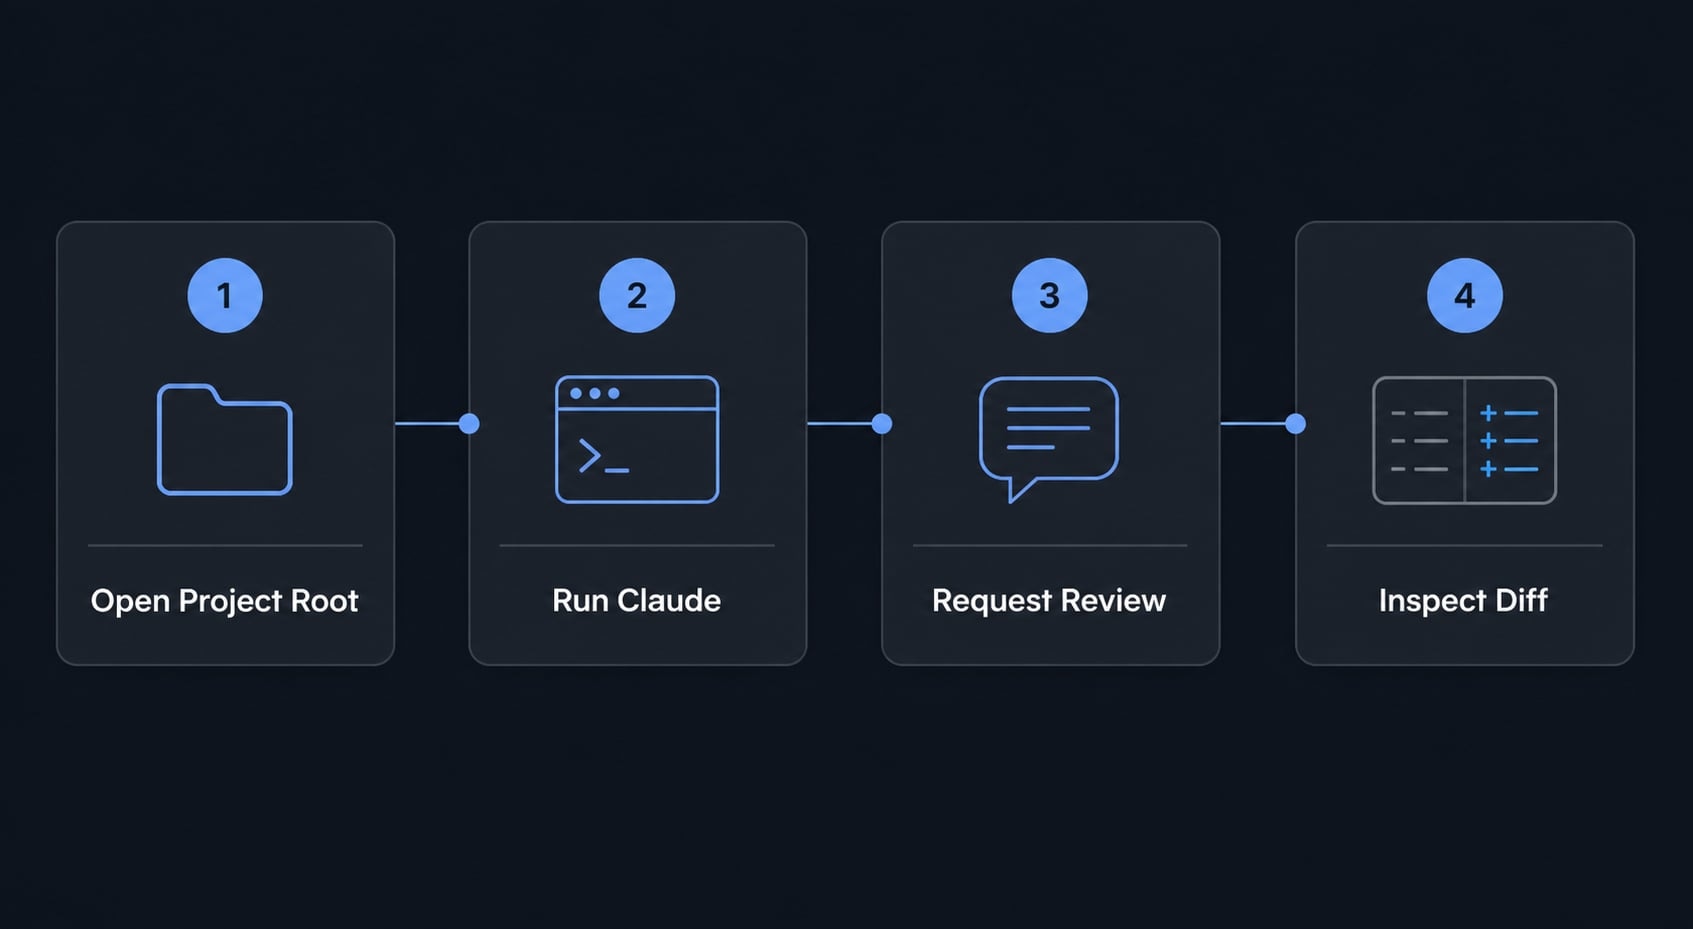
The easiest way to use Claude Code with JetBrains is to launch it from the integrated terminal in your project root. That path activates the IDE integration automatically in the most reliable way.
Launching from the IDE terminal
- Open your project in JetBrains.
- Make sure you are at the project root.
- Run
claudein the integrated terminal. - Start with a simple request such as: Review the current file, explain this error, or propose a refactor.
- Review code changes in the IDE diff viewer instead of relying only on terminal output.
A fast validation path is this: Open a file, select a function, run claude, and ask for a small edit or review. If the integration is working, Claude Code can use the active editor context and return changes you can inspect in the IDE.
Connecting from an external terminal
- Start Claude Code in an external terminal.
- Run the
/idecommand. - Attach the active session to your JetBrains IDE.
This is useful if your preferred workflow starts outside the IDE but you still want JetBrains-aware features.
Most useful first-run features
- Diff viewing inside the IDE for safer review
- Context sharing from the current selection or active file
- File reference insertion for faster prompts such as
@src/auth.ts#L1-99 - Diagnostics pull after edits so new lint or syntax issues surface in the conversation
The value here is practical, not magical. You are still driving the workflow. The plugin simply makes an AI coding assistant for JetBrains feel more native by reducing repetitive manual steps.
Configuration and Common Settings
Most users only need to touch two things: Diff mode and the Claude command path. The important detail is that CLI settings and plugin settings are separate.
Claude Code-side settings
- Run
claude. - Enter the
/configcommand. - Set Diff tool to
autoif you want diffs to open in the IDE. - Use
terminalonly if you prefer keeping diffs in terminal output.
Plugin-side settings
- Open Settings → Tools → Claude Code [Beta].
- Set the Claude command path if the IDE cannot detect
claude. - Confirm that the plugin is enabled.
If the command is not detected, set the explicit path before troubleshooting further. This is a normal setup issue, especially on machines with custom shell environments or multiple tool locations. Most users do not need advanced configuration beyond that.
Troubleshooting: When the plugin is not working
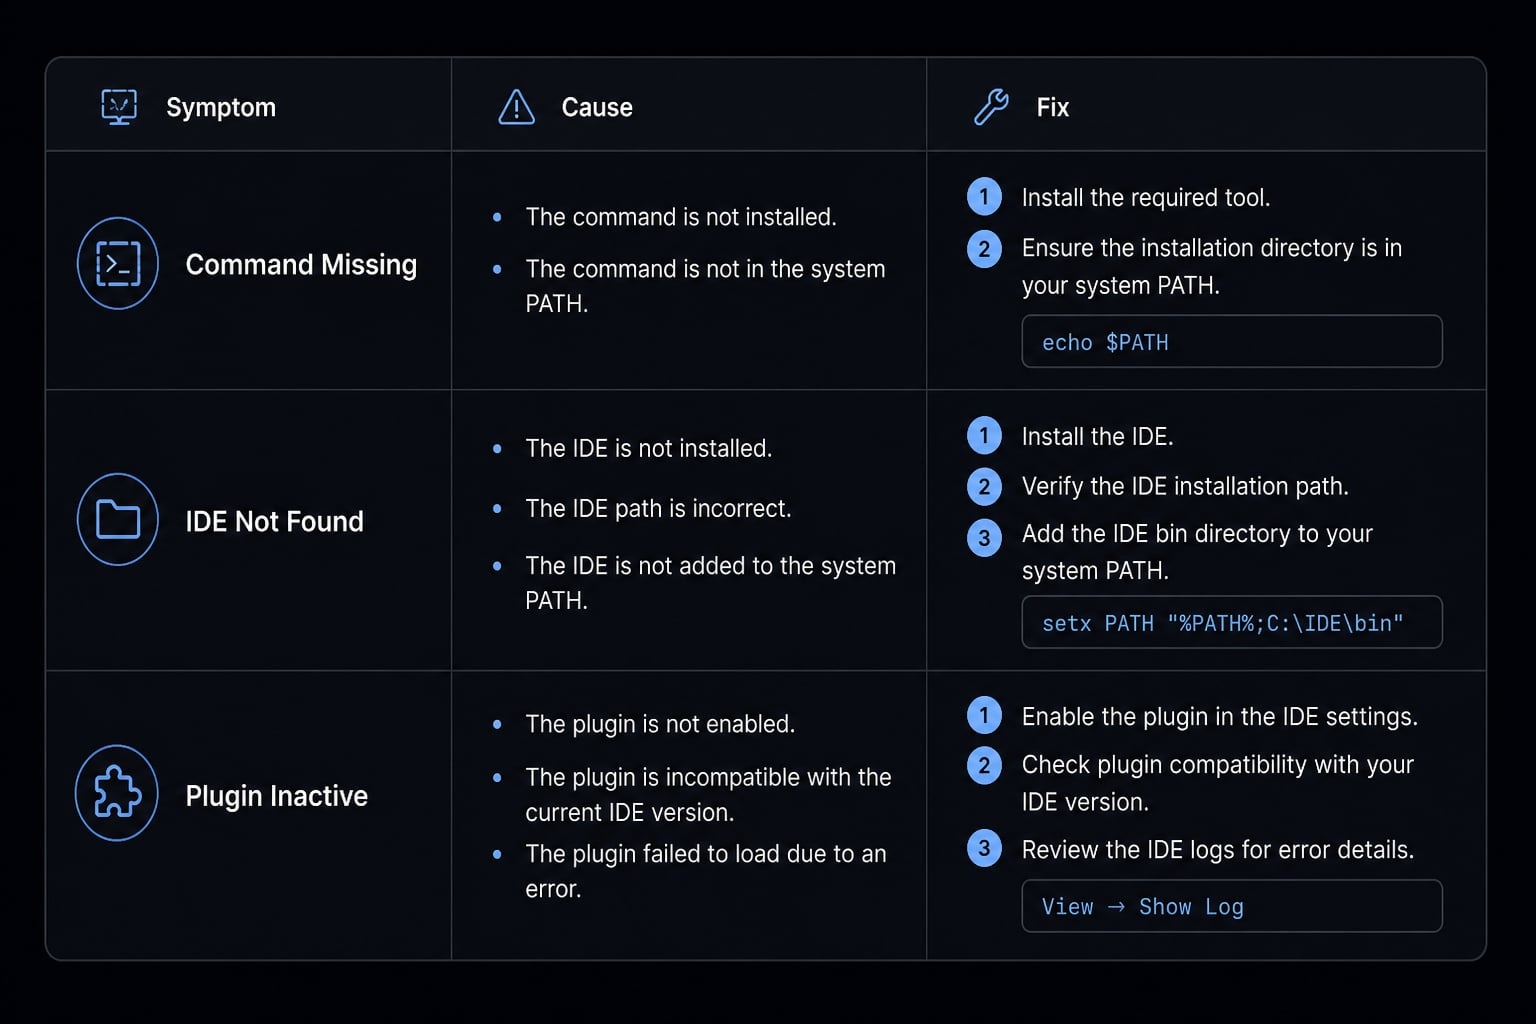
If you are searching for plugin not working, command not found, IDE not detected, or Claude Code not working in PyCharm, the fix is usually simpler than it looks. Start with the symptom, not with a full reinstall.
Symptom | Likely cause | Recommended fix |
|---|---|---|
| CLI is not installed or the IDE cannot see its path | Install the CLI first, then set the full Claude command path in plugin settings |
IDE not detected | Plugin is installed, but Claude was launched outside the expected path or session | Run |
Plugin installed but features do not activate | IDE restart was skipped, plugin disabled, or project launched incorrectly | Restart the IDE, confirm plugin is enabled, and run from the project root |
Remote JetBrains setup not working | Plugin installed on the wrong side of the remote environment | Install the plugin on the remote host through host plugin settings |
WSL setup is unstable | Connectivity issue between WSL2 and Windows host | Check firewall rules or use mirrored networking if required |
Practical troubleshooting notes:
- Test from the project root first.
- Restart the IDE after install or configuration changes.
- Do not assume the plugin bundles the CLI.
- Verify the command path before reinstalling everything.
- If the plugin appears installed but inactive, confirm whether
clauderuns in the integrated terminal. - For remote JetBrains setup, make sure the plugin lives on the correct host side.
- For WSL setup, check host-to-guest connectivity before changing unrelated settings.
In practice, most users only need three checks: Can the IDE run claude, was the IDE restarted, and are they launching from the right project directory. That resolves a large share of Claude Code JetBrains troubleshooting cases.
Security and control considerations
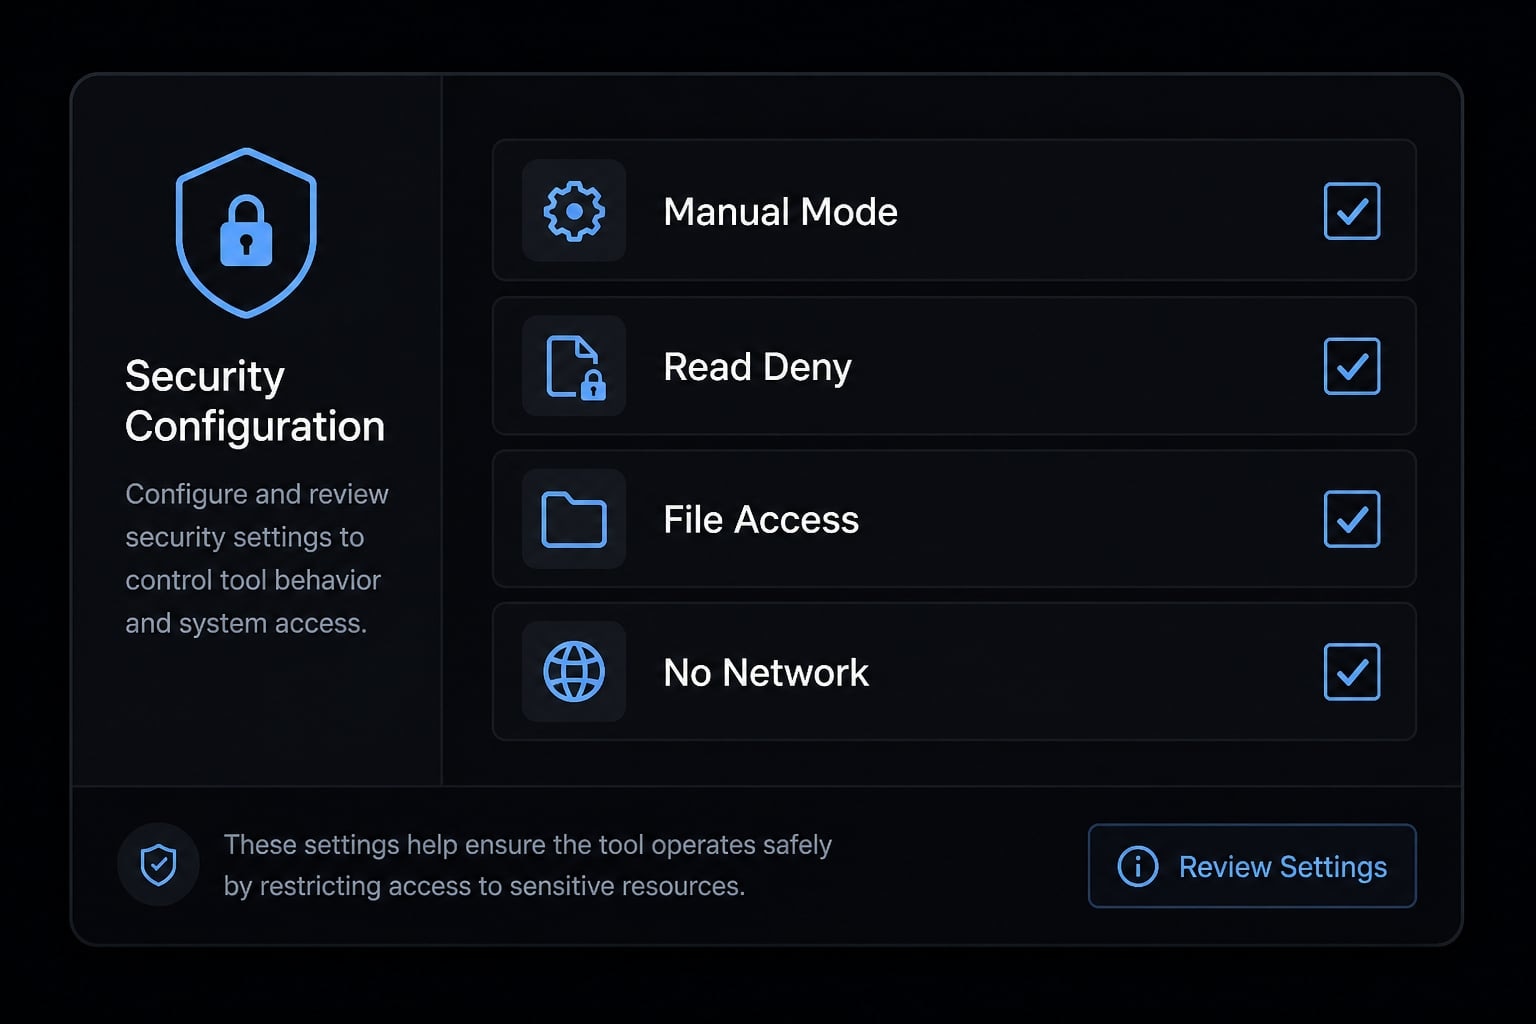
The basic security model is practical: When active, the integration uses a local MCP server with loopback authentication so the CLI can connect to the IDE session. Most individual users do not need to manage this directly, but cautious teams should still verify what Claude can access and modify.
What cautious teams should verify:
- Use Manual mode when possible for tighter edit control.
- Review which files Claude can access or modify.
- Add a read deny rule for sensitive files or directories.
- Avoid broader network exposure unless it is strictly necessary for WSL or remote scenarios.
This section does not need overthinking. The goal is not to turn setup into a compliance exercise. It is simply to keep normal developer safeguards in place: Trusted prompts, clear review, limited scope, and explicit control over sensitive files.
Why this setup fits AgentKit users
The plugin solves local IDE ergonomics. Teams still need a repeatable way to standardize AI coding workflows, reduce setup drift, and keep developer control across projects.
That is where AgentKit Engineer fits. It is not a replacement for the plugin or the CLI. It helps operationalize them with reusable workflows, consistent setup patterns, and clearer execution rules for teams that do not want every developer rebuilding the same environment from scratch.
Best-fit users:
- Solo founders using Claude Code daily and wanting a cleaner workflow
- Small product teams standardizing AI-assisted development across multiple developers
- Developers who want CLI flexibility with IDE ergonomics
- Teams that need reusable workflows without sacrificing local control
This matters because prompts alone are not a workflow. One developer can manually make the setup work. A team usually needs onboarding consistency, shared conventions, and a more controlled way to repeat what already works.
Frequently asked questions
What is the Claude Code JetBrains plugin?
The Claude Code JetBrains plugin is an official integration layer that connects the Claude Code CLI with JetBrains IDEs. It provides native features like interactive diff viewing, shared file context, and diagnostic integration, but it does not replace the Claude Code CLI itself.
Do I need to install the Claude Code CLI to use the plugin?
Yes. The plugin is an interface that runs the Claude Code CLI within your IDE’s integrated terminal. You must install the Claude Code CLI first and ensure your IDE can locate the claude command before the plugin features will function correctly.
Which JetBrains IDEs are supported by the plugin?
The plugin works with most major JetBrains IDEs, including IntelliJ IDEA, PyCharm, WebStorm, PhpStorm, GoLand, and Android Studio. You should verify current support status directly on the official JetBrains Marketplace before proceeding with your installation.
How do I fix the "command not found" error in JetBrains?
This error usually occurs when the IDE cannot locate your Claude Code installation. To fix it, verify that the CLI is installed, then open your IDE settings, navigate to Tools → Claude Code [Beta], and manually set the explicit full path to your claude executable.
Does the Claude Code plugin work with remote development?
Yes, but you must install the plugin on the remote host via the "Plugins (Host)" settings rather than your local client machine. Ensure your firewall and network settings (like WSL2 mirrored networking) allow connectivity between the CLI and the IDE.
How can I inspect code changes using the IDE's diff viewer?
After launching Claude Code in your integrated terminal, run the /config command. Set the Diff tool option to auto. Once configured, Claude Code will automatically open suggested changes in your IDE’s native diff viewer instead of displaying them in the terminal.
Is it safe to use the Claude Code plugin for sensitive projects?
Yes, provided you use proper security practices. Use Manual mode for code edits, review file access scopes, and utilize read deny rules to prevent the assistant from reading or modifying sensitive configuration files or credentials within your project directory.
Read more:
- Claude Code Windows: How to install, set up, and fix issues
- Claude Code tutorial: Set up and master your AI coding agent
- Claude Code Vue: Practical guide for AI-assisted development
Conclusion
A working Claude Code JetBrains plugin setup is straightforward when you follow the right order: install the Claude Code CLI first, install the plugin second, restart the IDE, verify the claude command, and launch from the integrated terminal in the project root. That is the shortest reliable path.
The plugin improves the JetBrains workflow with native diff review, context sharing, and editor-aware interaction, but it does not replace the CLI. If you want to make that setup reusable across developers or projects while keeping strong developer control, AgentKit Engineer is the next logical step for standardizing the workflow without adding unnecessary process overhead.