Blender MCP with Claude Code: A secure AI scripting setup guide
Blender MCP with Claude Code: Safe Setup Guide for AI-Assisted 3D Scripting
Getting blender MCP with Claude Code working is usually less about AI complexity and more about setup ambiguity. Most users are actually juggling four moving parts at once: Blender, the Blender add-on, the MCP server, and the Claude client. That is where confusion starts, especially because Blender usually needs to stay open locally for the workflow to function. This guide gives you the fastest safe path to AI-assisted 3D scripting: What the architecture means, what needs to be installed, how to connect everything step by step, what Claude can realistically help with, and how to use it without treating arbitrary script execution as low risk.
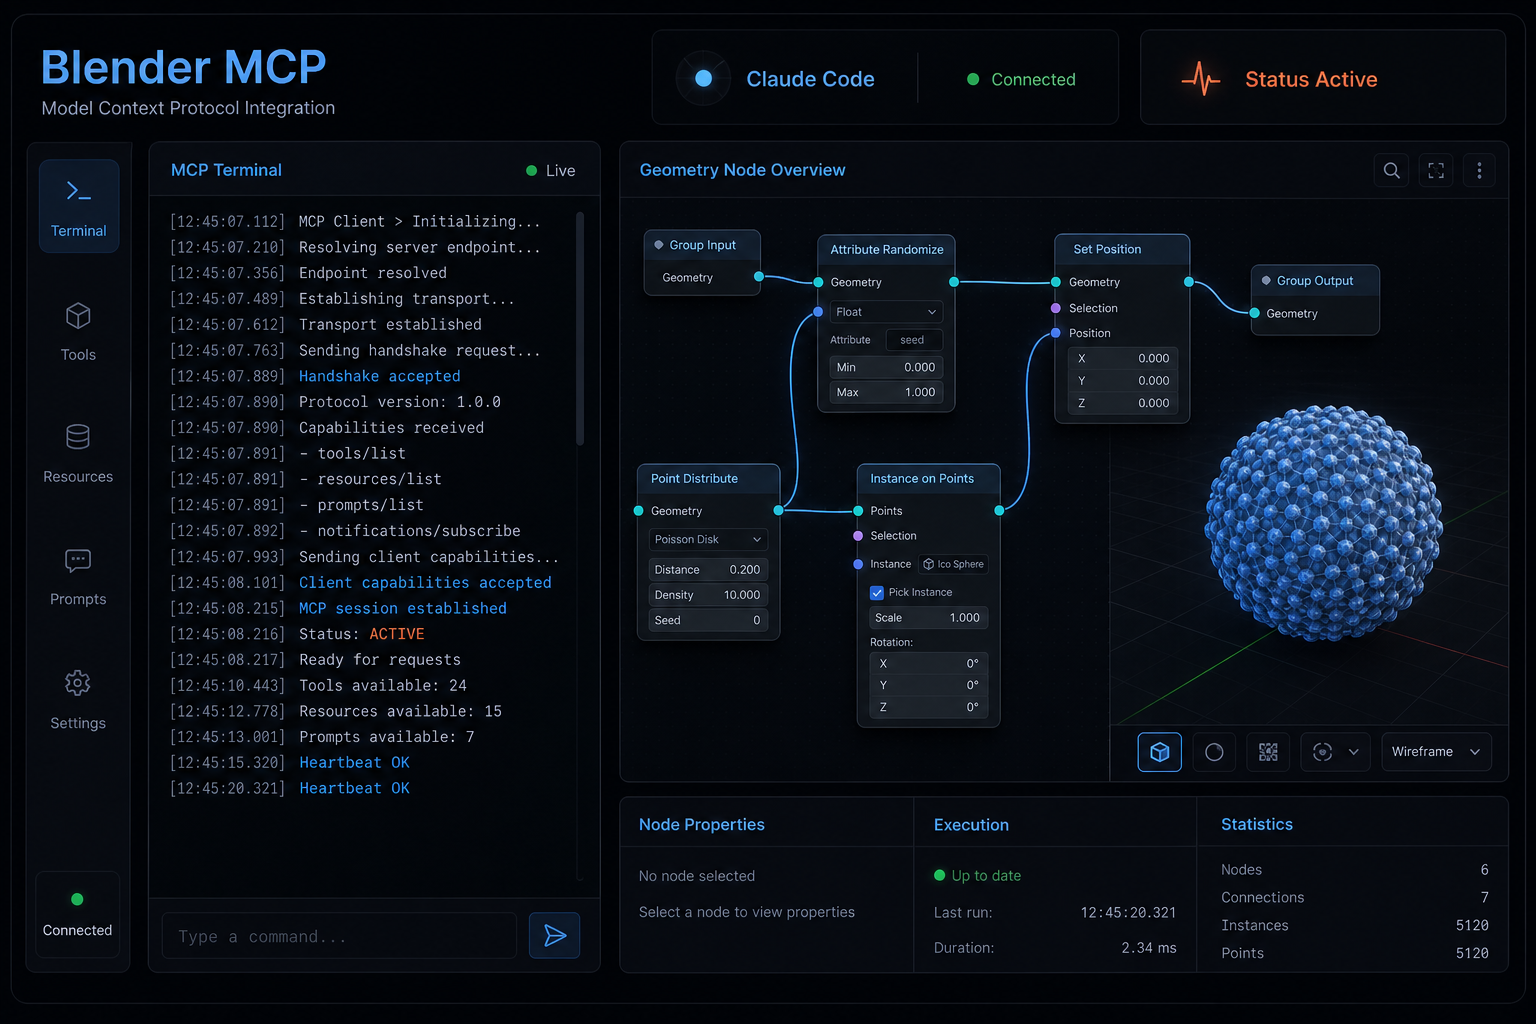
What “Blender MCP with Claude Code” Actually Means
Blender MCP is a bridge that lets Claude Code communicate with Blender through the Model Context Protocol (MCP). In practice, Claude sends requests, the MCP layer passes them to the Blender Python API (bpy), and Blender executes those actions inside the open scene.
That distinction matters. This is not Claude “inside” Blender. It is a bridge-based workflow made of separate parts:
- Claude Code acts as the client.
- Model Context Protocol acts as the communication layer.
- Blender MCP Server acts as the bridge between client and Blender.
- Blender Python API executes the actual read/write actions in Blender.
The practical value of the Blender MCP Server is not autonomous 3D creation. It is structured assistance. When configured correctly, Claude Code can inspect the current scene, explain setups, suggest or generate helper scripts, and perform repetitive operations through the Blender MCP Server using the Model Context Protocol.
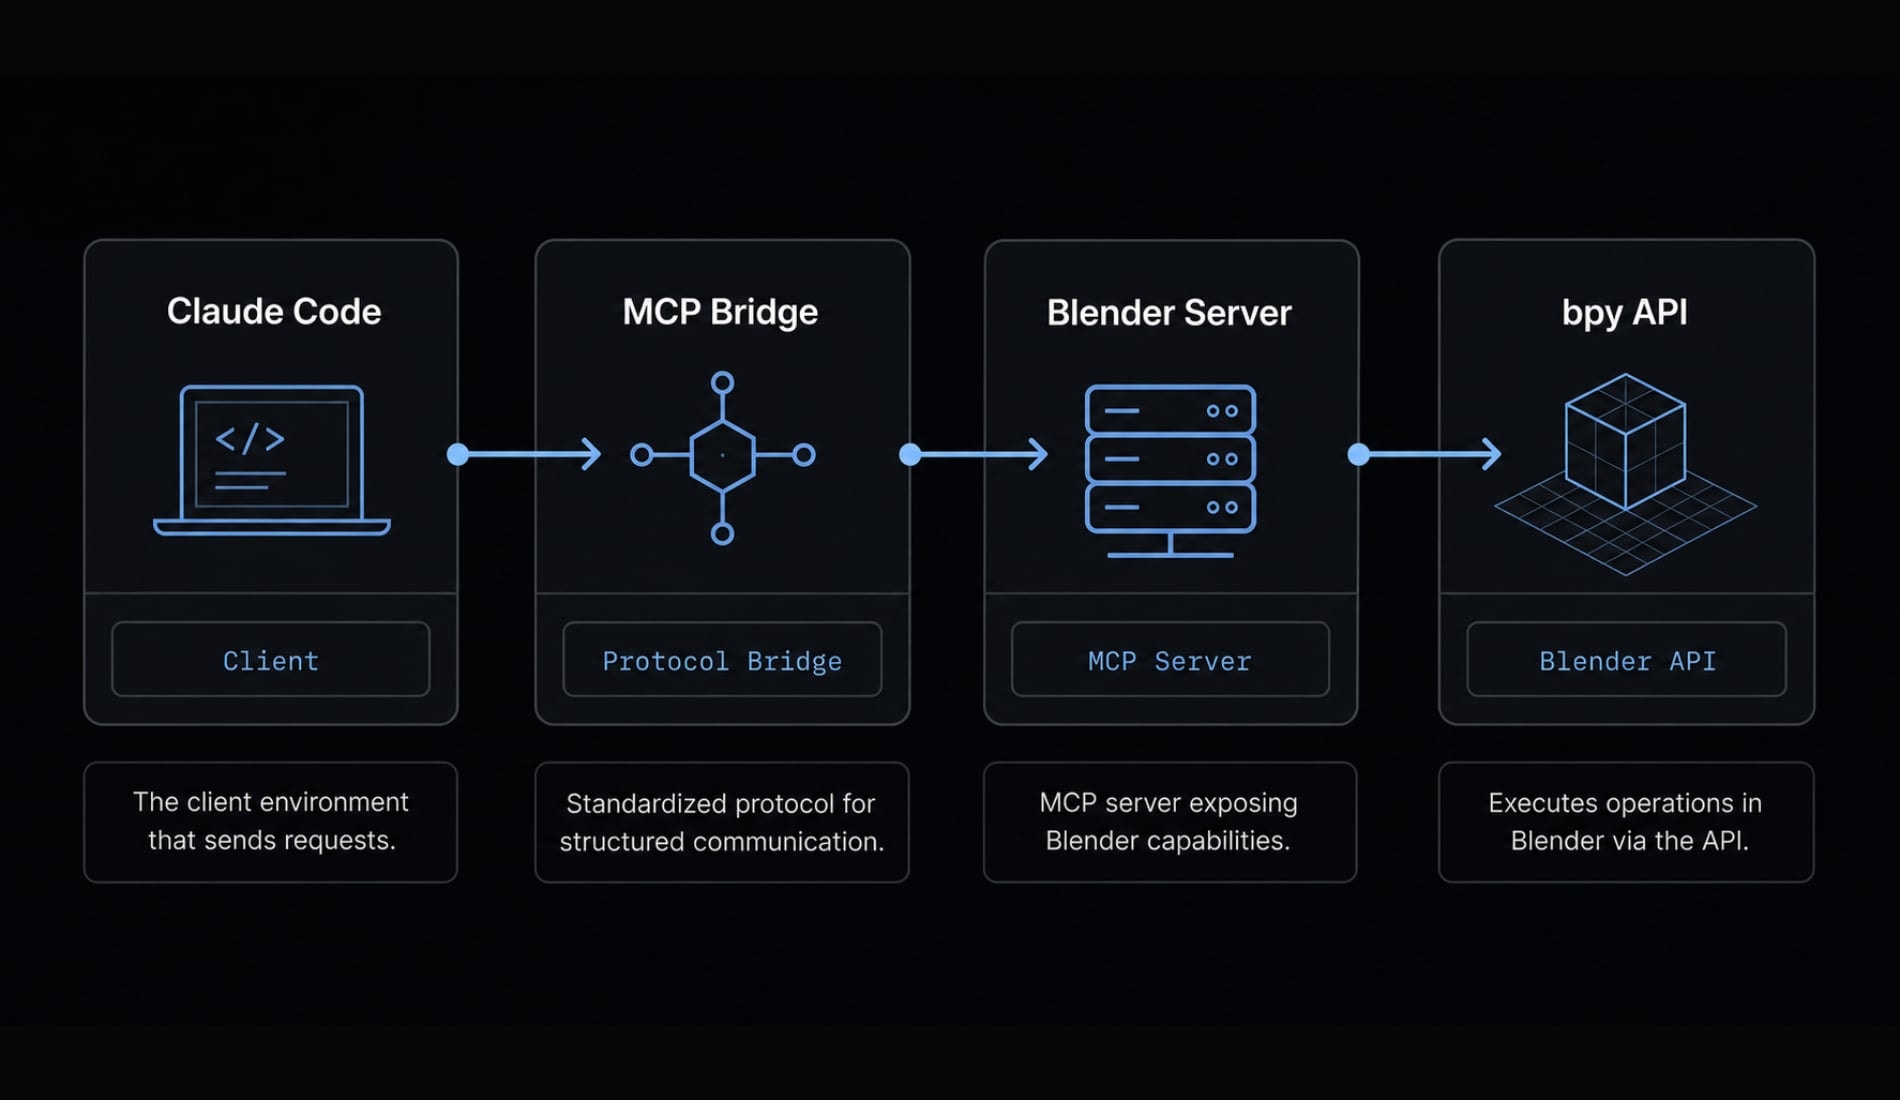
MCP is a communication layer, not “AI inside Blender”
Model Context Protocol is the transport layer that lets a client talk to external tools in a consistent way. In this workflow, Claude Code is not embedded inside Blender and does not directly “become” part of your .blend file.
Instead, Claude sends requests through MCP, the Blender MCP Server receives them, and Blender runs Python in the active local session. If Blender is not open, or the bridge is not active, Claude usually cannot inspect the scene state.
What the workflow enables - and what it does not
What it enables:
- Scene inspection and structure review.
- Data-blocks cleanup and naming checks.
- Batch edits for repetitive objects or materials.
- Helper scripts for controlled Blender Python automation.
- Explanation and documentation of node setups.
What it does not imply:
- Autonomous art direction.
- Reliable high-end modeling judgment.
- Production-perfect output by default.
- Safe changes without review.
- Strong performance on every complex scene or setup.
What you need before setup
Before you start, treat this as a local toolchain setup, not a single plugin install. The most common mistake is mixing up what runs inside Blender versus what runs outside it. A clean Claude Code setup starts with a simple checklist and a disposable file.
Blender should usually be open locally during use, and your first validation should happen on a test scene rather than a real production asset. That one decision reduces the cost of mistakes significantly.
Prerequisites checklist
You typically need:
- A compatible Blender version.
- The Blender add-on for MCP integration.
- A local MCP server package, bundle, or source-based install.
- Claude Code with MCP support.
- A disposable or duplicate test
.blendfile. - Basic permission to run local tools and inspect generated scripts.
What installs where
Component | Runs Where | Purpose |
|---|---|---|
Blender add-on | Inside Blender | Exposes the Blender-side integration and controls needed for the MCP connection |
MCP server | Outside Blender, on your local machine | Bridges client requests to Blender through the MCP layer |
Claude Code | Outside Blender, on your local machine | Sends prompts and tool requests to the MCP server |
This division matters for local execution. Prompts happen in Claude Code. Scene access happens through the MCP server. Actual changes happen in Blender through the Blender add-on and the Blender Python API.
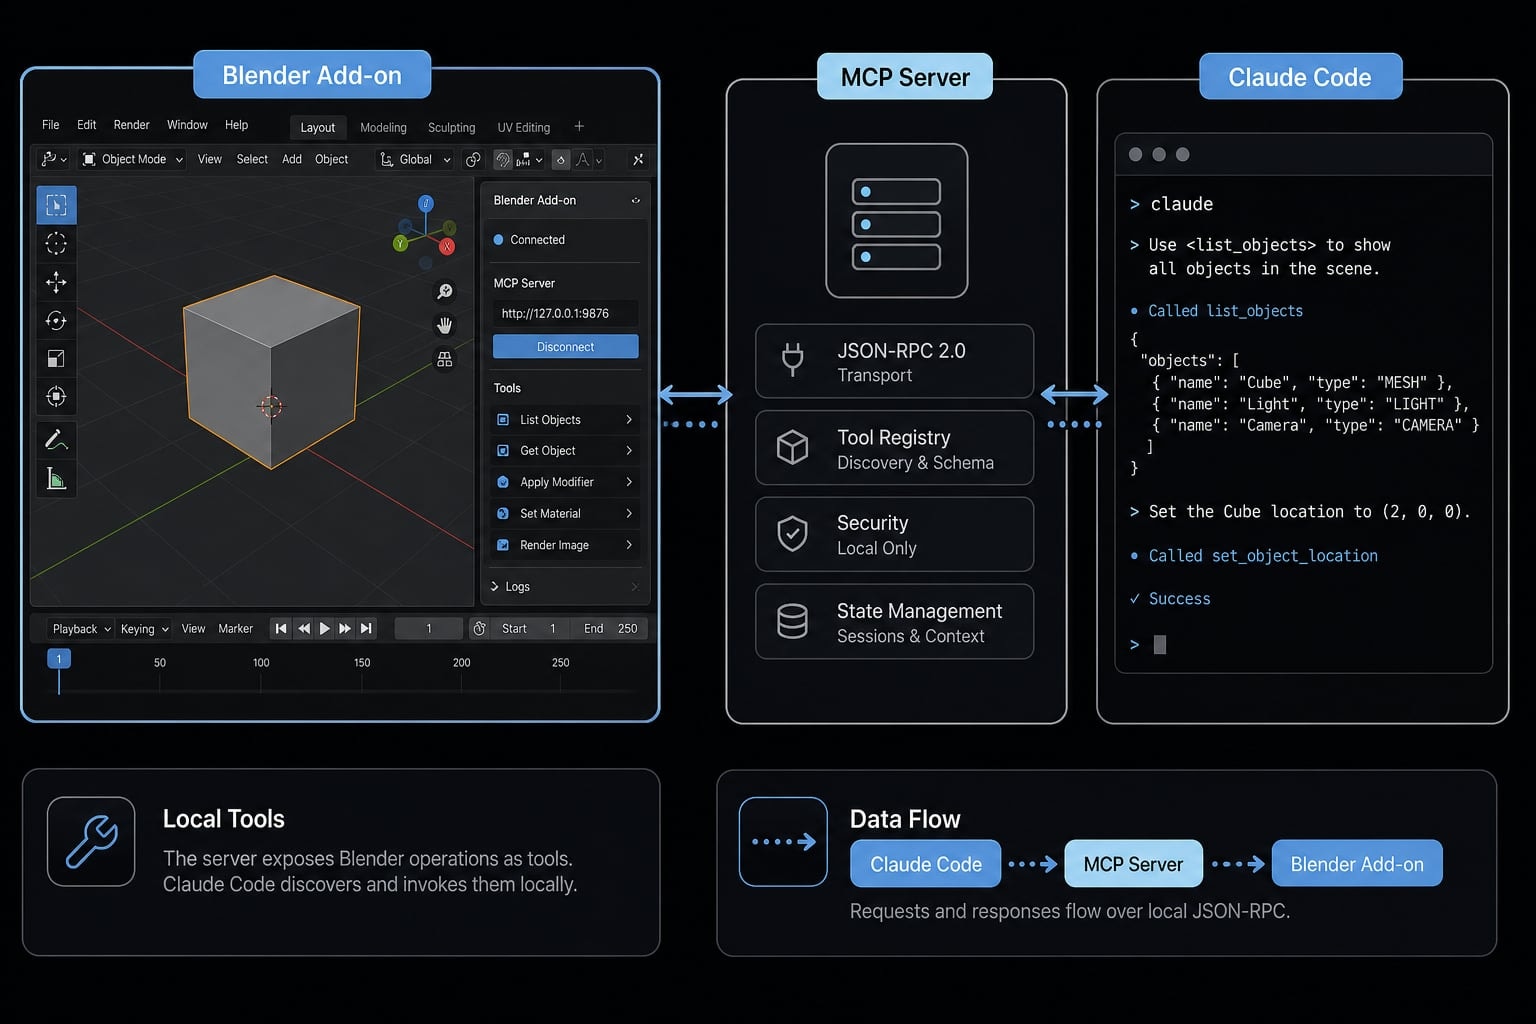
How to connect Blender MCP to Claude Code step by step
To connect Claude Code to Blender via MCP:
(1) Confirm Blender compatibility.
(2) Install the Blender MCP add-on.
(3) Enable it in Blender.
(4) Install or point Claude Code to the MCP server.
(5) Configure Claude Code for MCP.
(6) Start Blender.
(7) Start the MCP server.
(8) Verify access with a simple scene query.
This is the shortest reliable path for how to connect Claude Code to Blender via MCP without mixing unrelated instructions from different clients.
Install and enable the Blender side
- Confirm Blender compatibility: Use a Blender release that is supported by the MCP integration you plan to install. Avoid assuming every Blender version behaves the same. If the add-on documentation lists a minimum version, follow that.
- Create a test file first: Save a disposable
.blendfile before touching a real project. This gives you a safe environment for first-run validation and script review. - Install the Blender add-on: Use the official package path provided by the Blender MCP project. Depending on the distribution method, this may be:
- Install-from-disk.
- A packaged extension path.
- A drag-and-drop flow if supported by the source you are using.
- Enable the Blender add-on: After installation, open Blender preferences, find the installed add-on, and enable it. Then look for the add-on settings or MCP-related controls inside Blender.
- Locate the MCP controls: Do not assume every build exposes controls in the same place. Look for:
- Add-on preferences.
- An MCP panel.
- A start server control.
- Status indicators related to the Blender connector or MCP session.
This part of the Blender MCP setup is only the Blender-side half. At this point, Blender may be prepared, but Claude Code still cannot use it until the client side is configured as well.
Configure the Claude Code side
- Install or reference the MCP server: The next part of the Blender MCP setup is the bridge itself. Depending on the release you are using, the MCP server may be available as:
- A package install.
- A source-based setup.
- An MCP bundle if supported by the client.
- Configure the Claude Code MCP client: In your Claude Code MCP client configuration, add the Blender MCP server according to the MCP configuration format supported by Claude Code. This usually includes the server reference and any required launch or path details.
- Keep client config separate from Blender config: The Blender add-on does not replace the Claude Code MCP client configuration. One prepares Blender to accept interaction. The other tells Claude Code how to reach the MCP server.
- Do not mix Claude Desktop instructions with Claude Code instructions: This is a common source of wasted time. Some setup guides describe a Blender connector flow for Claude Desktop, where connectors may be added through a UI-driven registration path. That does not always map 1:1 to Claude Code.For Claude Code setup, follow the MCP configuration path supported by Claude Code itself. If you combine Desktop-style connector steps with Code-style MCP configuration, the result is often incomplete or inconsistent.
- Double-check paths and package references: If Claude Code cannot launch the MCP target, the problem is often not Blender. It is usually:
- A bad executable path.
- An incorrect package reference.
- An unsupported launch method.
- A mismatch between what the client expects and what the server package provides.
This split - Blender-side install plus client-side MCP config - is the core of a working Blender MCP setup.
Start the connection and verify access
- Open Blender locally: Open the test
.blendfile in Blender. For most workflows, the active Blender session needs to be running locally before scene-aware requests will work. - Start the Blender MCP Server: Use the MCP controls exposed by the add-on to start the server or enable the session bridge. Wait until Blender indicates the integration is active.
- Send a read-only test prompt from Claude Code: Good first prompts include:
- “List all objects in the currently open scene.”
- “Identify the active camera and summarize its transform.”
- “Summarize the materials used in this Blender file.”
- Confirm the response is scene-aware: Success means Claude returns information from the open Blender session rather than generic Blender advice. That is your proof that the connection is live.
A reliable rule for how to connect Claude Code to Blender via MCP is simple: Validate with read-only inspection before you ask for any edits.
Common setup mistakes to check first
- If Claude cannot see the scene, check whether Blender is open locally.
- If the server does not respond, check whether the Blender add-on is enabled.
- If the connection fails, check the path or package reference in client config.
- If behavior is inconsistent, check for version mismatch.
- If responses are generic, confirm the MCP session is actually active.
- If setup is still unclear, validate on a clean test file before using a real project.
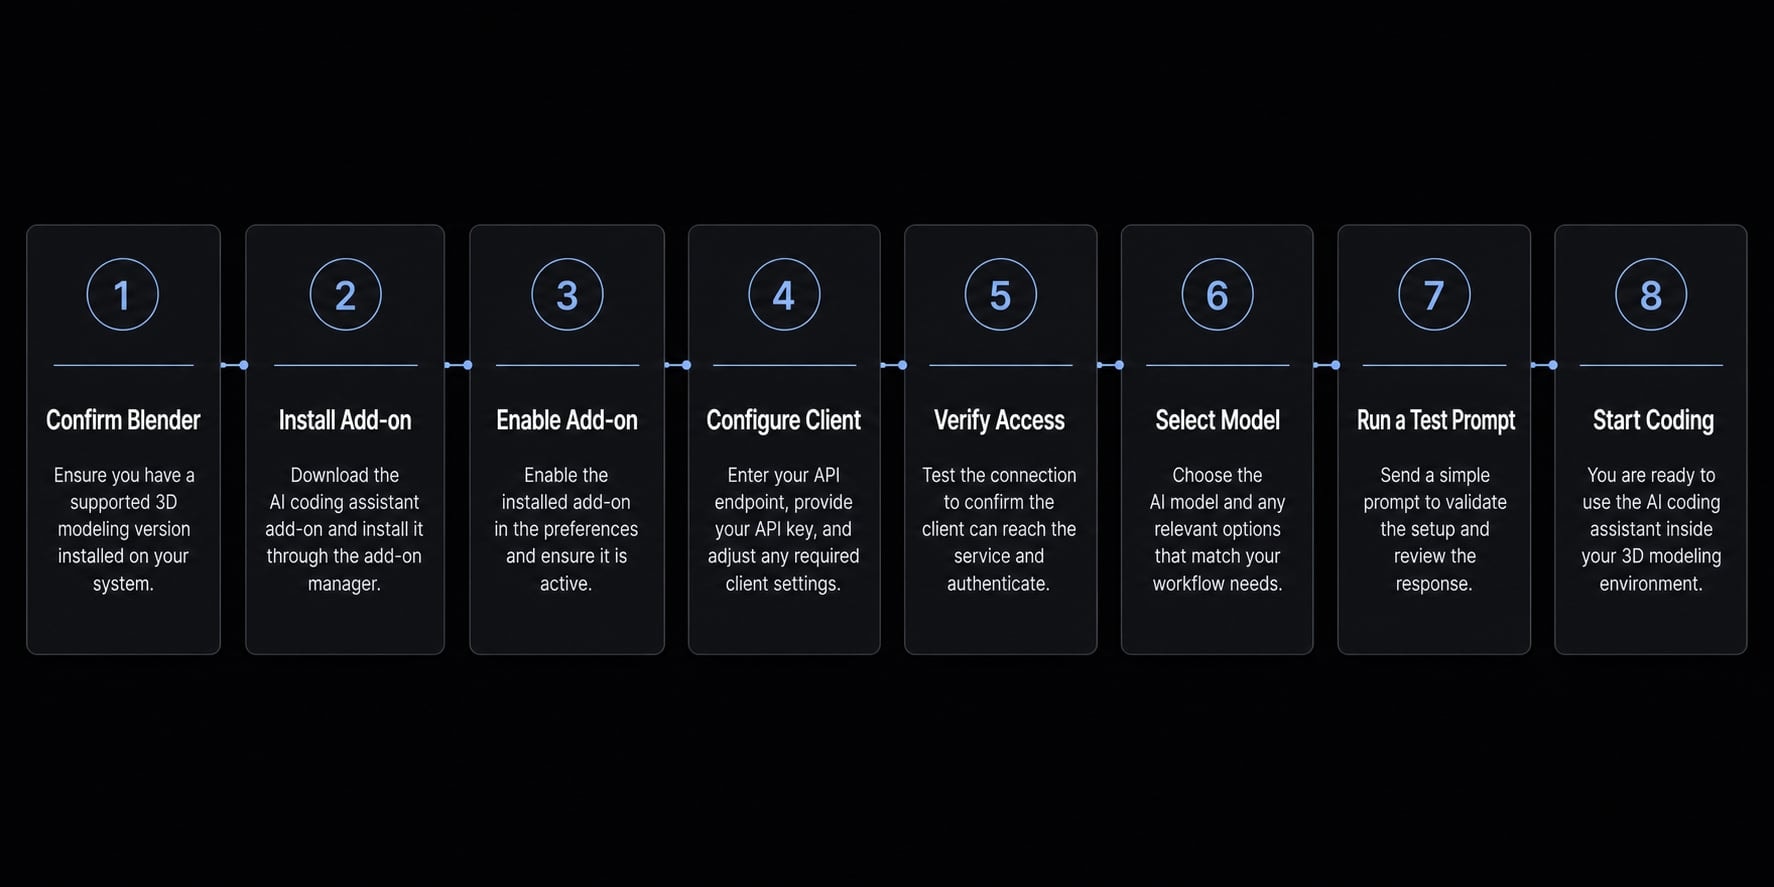
What Claude Code can realistically do in Blender
Once connected, Claude Code is most useful for tasks that are structured, inspectable, and easy to verify. In practice, that means scene analysis, repetitive edits, naming cleanup, dependency tracing, documentation, and small-scale Blender Python automation.
Analysis and cleanup tasks
Good early use cases include:
- Inspecting scene structure and object relationships.
- Reviewing naming quality across data-blocks.
- Identifying heavy meshes relative to scene usage.
- Finding material usage across objects.
- Cleaning unused or inconsistent data-blocks.
- Applying naming conventions in a controlled batch.
These tasks work well because the output is easy to audit. You can compare names, counts, materials, or object lists quickly before approving changes.
Documentation and automation tasks
A second strong category is explanation plus helper scripting:
- Explain a Geometry Nodes setup in plain English.
- Generate Geometry Nodes documentation for a node group.
- Summarize the purpose of collections, materials, or modifiers.
- Write helper scripts for repetitive object operations.
- Apply controlled Blender automation to repetitive material or transform tasks.
This is where LLM-generated code is helpful: The task is repetitive, the result can be checked quickly, and the change is reversible. It is less about artistic intelligence and more about reducing manual repetition while keeping the workflow supervised.
Where this workflow breaks down
The main limitations are not hard to understand: This workflow is strong when the task is inspectable and reversible, and weaker when the task depends on visual judgment, topology sensitivity, or many tightly coupled creative decisions.
It can support a production workflow in narrow, supervised ways, but it should not be treated as a production-safe substitute for expert Blender work across all task types.
Good fit vs poor fit
Task Type | Good Fit | Poor Fit |
|---|---|---|
Scene inspection | Yes | No issue if read-only |
Batch cleanup | Yes | Only risky if unreviewed |
Naming conventions | Yes | Low-risk when verified |
Helper scripts | Yes | Poor fit if script scope is unclear |
Material usage tracing | Yes | Limited only by scene complexity |
Complex node trees | Sometimes | Weak when graphs are dense and tightly coupled |
Rigging | Rarely | Poor fit for production-grade work |
Organic modeling | Rarely | Poor fit for artistic, topology-sensitive output |
Animation systems | Limited | Weak for production animation workflows |
Topology-sensitive edits | Limited | Poor fit when precision is critical |
Decision rule:
- Good fit when the task is inspectable and reversible.
- Poor fit when it requires deep visual judgment or many interdependent steps.
Safe usage checklist before you let Claude run Blender Python
Blender MCP is not inherently unsafe, but it can expose you to arbitrary code execution if you let an LLM run Python inside Blender without review. The safest approach is a supervised local AI workflow: use test files, inspect scripts before execution, and approve destructive actions manually.
The risk is not theoretical. If a tool can run Python against your scene, it can also rename, delete, export, overwrite, or process files in ways you did not intend. That is why the security warning belongs near the beginning of your workflow, not after setup is complete.
Minimum-safe checklist
- Work on a duplicate or disposable file first.
- Create a backup blend file before any write action.
- Use a VM, isolated workstation, or sandbox if the workflow is unfamiliar.
- Ask Claude to show the Python before execution.
- Review file paths, delete actions, export logic, and any network-related behavior.
- Save versions frequently during testing.
- Verify the result after each major step.
- Restrict early sessions to read-only inspection or reversible edits.
Safe prompt habit for real projects
A safe default instruction pattern is:
- Explain what you plan to do.
- Show the script first.
- Wait for approval before execution.
Example:
Inspect the open scene and propose cleanup actions only. Show the Python script you would run, explain any delete or rename operations, and wait for my approval before executing.
That habit is your real control layer. Arbitrary code execution becomes manageable only when human review is part of the standard workflow, not an optional extra.
Starter prompts you can use immediately
The best prompt examples start with inspection, then move to suggestions, then controlled edits. That sequence helps you verify the connection and reduce avoidable mistakes.
Read-only scene inspection
- “List all objects in the current scene and group them by collection.”
- “Give me a scene debugging summary: Active camera, light types, object counts, and material count.”
- “Which objects have the highest polygon count in this file?”
- “List all materials and the objects that use them.”
Naming and cleanup suggestions
- “Review object and material names in this file. Suggest clearer naming, but do not apply changes yet.”
- “Find inconsistent or default-style names in data-blocks and propose a cleanup plan.”
- “Suggest how to rename data-blocks to match a simple naming convention.”
Dependency tracing and debugging
- “Which objects use the material named ‘Glass_Tinted’?”
- “Identify meshes that appear heavy for their likely screen importance.”
- “Find objects that may be unused, hidden, or duplicated, and explain why.”
Geometry Nodes explanation
- “Explain the main modifier and node group on the active object in plain English.”
- “Generate Geometry Nodes documentation for the selected node group and separate overview from detailed behavior.”
Small automation helpers
- “Propose a small Blender automation script to rename selected meshes by collection prefix. Show the script first.”
- “Write a helper script to report meshes without materials. Do not execute until approved.”
These prompt examples are intentionally conservative. They let you confirm tool behavior before moving into scene edits.
Lightweight workflow example: From scene inspection to batch cleanup
A realistic Claude Code Blender example usually looks less like “build me a full scene” and more like supervised batch cleanup.
- Open a disposable test scene in Blender.
- In Claude Code, ask for scene inspection: “List object names, collections, and materials. Flag unclear names only.”
- Ask for obvious cleanup candidates: “Identify heavy meshes, duplicate-style names, or unused materials.”
- Ask for one explanation task: “Explain the active Geometry Nodes group in plain English.”
- Ask Claude to propose changes without applying them: “Suggest a cleanup plan and show the Python script first.”
- Review the script manually, especially rename, delete, export, and file-path logic.
- Approve only the parts you want to run.
- Re-check the scene after execution.
This is the safest practical workflow pattern: Inspect → explain → propose → approve → apply.
Frequently asked questions
What is Blender MCP for Claude Code?
Blender MCP is a connection protocol that allows Claude Code to communicate with Blender through its Python API. It is not a built-in AI feature but a technical bridge that enables Claude to query data, execute scripts, and automate tasks in Blender.
What do I need to install to connect Claude Code to Blender?
You will need a compatible version of Blender, the Blender MCP add-on, MCP server software, and a properly configured Claude Code connection. Test the setup with a sample Blender project to confirm its stability before using it with important project files.
How do I get started with Blender MCP?
- Install and enable the add-on in Blender.
- Set up the MCP server in your local environment.
- Configure Claude Code to recognize the MCP server.
- Open Blender and start the MCP server.
- Run a test query - for example, ask Claude to list the objects in the scene.
Is this workflow safe?
Not entirely. Because it allows Python code to be executed directly, it carries the risk of arbitrary code execution. To stay safe, always work with backup project files, ask Claude to display the code before running it, and grant execution permission only after reviewing it carefully.
Which Blender tasks does Claude Code handle well?
This workflow is best suited for:
- Analyzing scenes and inspecting data structures.
- Cleaning up object and material data-block names.
- Explaining Geometry Nodes logic.
- Automating repetitive tasks with Python scripts.
Which tasks are not suitable for Blender MCP?
Avoid using it for:
- Tasks requiring a high degree of aesthetic judgment.
- Complex sculpting or detailed topology management.
- Building sophisticated rigging and animation systems.
- Working with highly complex node trees or tasks requiring extensive manual intervention.
What should I do if the connection does not work?
Check the following in order:
- Make sure Blender is open and running.
- Verify that the add-on is enabled in Blender’s preferences.
- Confirm that the MCP server path in your Claude Code configuration is correct.
- Check compatibility between your Blender version and the related plugins.
Read more:
- Claude Code Figma MCP setup: Remote vs desktop guide
- Claude Code plugin marketplace: A guide to discover and setup
- Claude Code skills best practices: Build reusable AI workflows
Conclusion
Used correctly, Blender MCP with Claude Code is a bridge-based, supervised local AI workflow for working with Blender more efficiently - not a replacement for expert 3D judgment. Its best use cases are scene analysis, naming cleanup, dependency tracing, documentation, and repetitive helper scripting that you can verify quickly.
The next smart step is simple: Validate the connection on a test .blend, try the starter prompts above, and use the safety checklist before allowing any write action. If the first session works in read-only mode, expand gradually into reversible automation rather than jumping straight to destructive edits.