How to learn vibe coding: A beginner’s step-by-step guide
Generating code is often easier than knowing whether it works. If you are wondering how to learn vibe coding, start with a small project you can personally inspect rather than an ambitious application that you cannot explain. Advanced programming knowledge is not required to begin, but reviewing and testing AI-generated code are essential parts of the work.
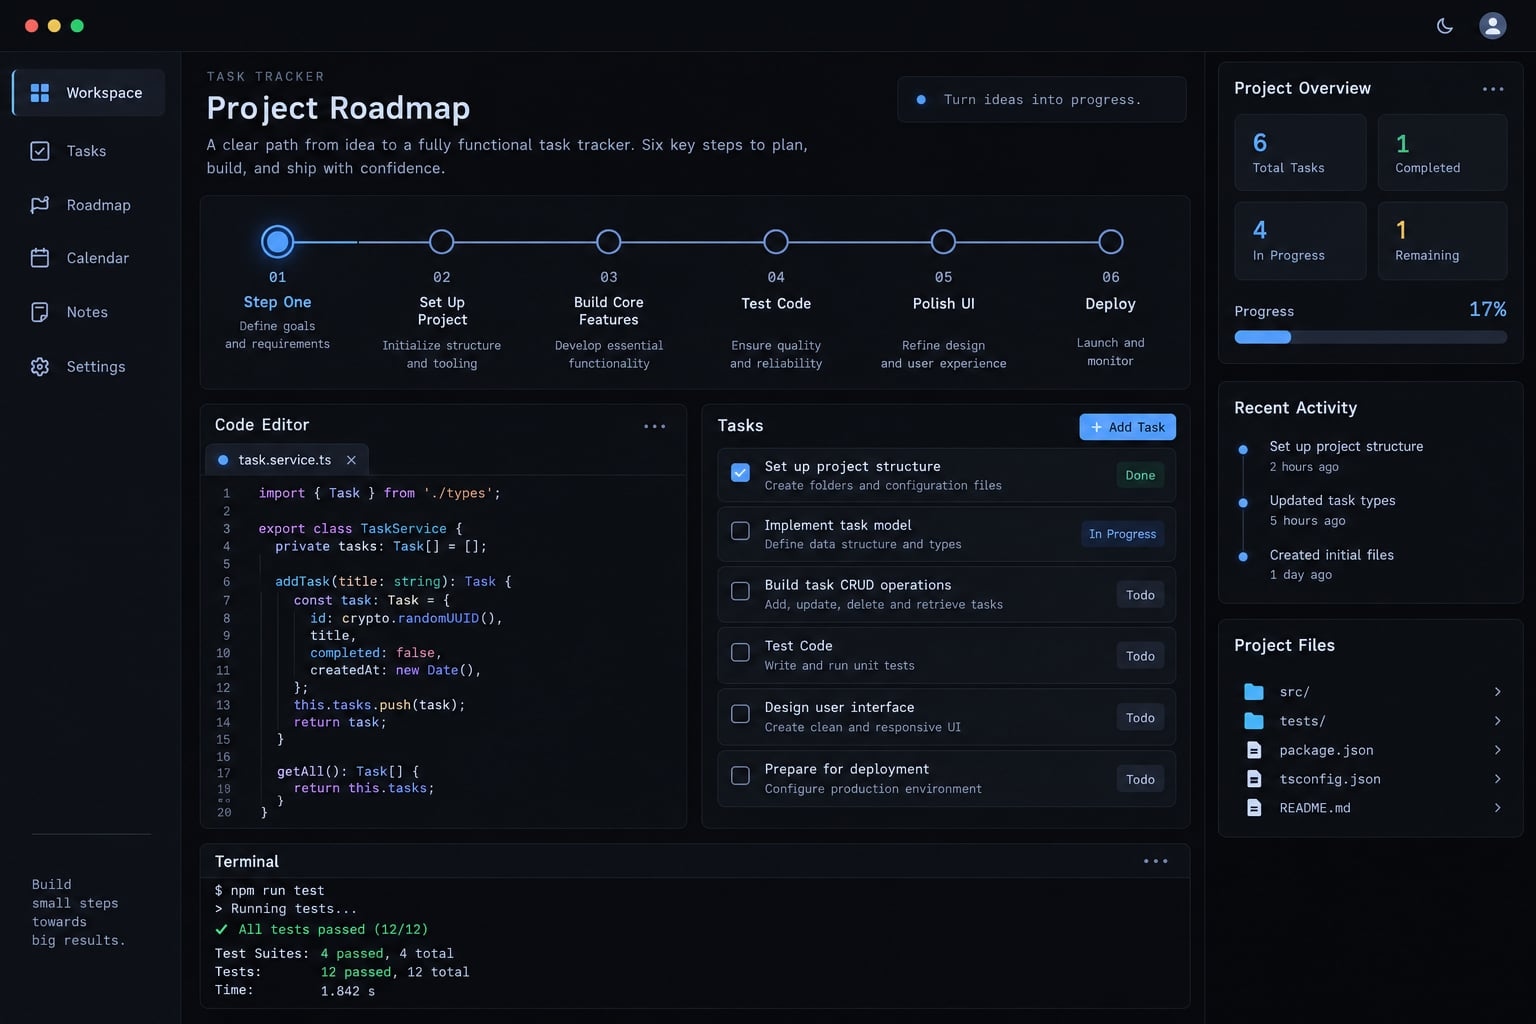
This guide introduces a manageable approach on how to learn vibe coding through AI-assisted development: choose one tool, follow six steps, and build a personal work-task tracker. Along the way, you’ll learn to describe requirements, check behavior, investigate failures, and restore a working version. The goal is not simply to generate an application. It is to understand enough to remain in control.
What vibe coding is and what it is not
Vibe coding is a way of building software primarily through natural-language instructions to an AI tool. The tool generates or edits code, and the user runs the result, describes desired changes, and repeats the process. How closely the user examines the underlying code varies considerably between workflows.
Andrej Karpathy popularized the term in early 2025 describing a hands-off approach to AI-generated code. His early description emphasized accepting changes without closely engaging with the code-not disciplined engineering review.
This guide recommends a more cautious learning method. It combines conversational building with safeguards from broader AI-assisted development: explicit requirements, focused edits, observable tests, and recoverable checkpoints.
Traditional coding vs. vibe coding:
Dimension | Traditional coding | Vibe coding |
|---|---|---|
Primary input | Code written directly | Natural-language requests |
Main skill emphasis | Programming and implementation | Specifying intent and evaluating output |
Development cycle | Write, run, debug | Request, inspect, refine |
AI’s role | Optional assistance | Primary code generation |
Human responsibility | Correctness and ownership | Correctness and ownership |
Main risk | Implementation mistakes | Accepting misunderstood changes |
Traditional developers also use natural-language tools. Conversely, AI-heavy workflows still require programming judgment, especially when failures affect other people. What matters is whether someone can explain the relevant behavior, verify the requirements, and recognize when qualified help is necessary.
What you need before you start
Choose one primary tool for your first learning cycle. Prepare:
- One small project idea.
- Access to project files, a runnable preview, and error messages.
- A way to save and restore changes.
- Fictional sample data.
- Basic awareness of credentials and tool permissions.
The task tracker needs a frontend, the interface you interact with. It does not need a backend, which runs server-side behavior, or a database, which provides structured persistent storage. Logs are messages that help explain what happened when something fails.
Choose a tool that matches your starting point
AI coding tools overlap across categories. Treat these examples as starting points, not rankings; check current official documentation for your chosen interface and plan.
Category | Examples | Suitable starting point | Trade-off to verify |
|---|---|---|---|
Browser-based builders | Bolt, Replit Agent | Minimal local setup | File access, logs, restoration |
UI-focused generators | v0 | Starting from an interface | Code export and project setup |
AI-native editors | Cursor | Working directly with files | Local setup and approval controls |
IDE assistants | GitHub Copilot | An existing code editor | Supported modes and permissions |
Terminal-based agents | Comfort with text commands | Command execution and file permissions |
UI-focused tools may also support backend work. Browser-based tools do not necessarily hide code or infrastructure.
Before choosing, ask:
- Can you run and inspect the project?
- Can you find errors and changed files?
- Can you restore a working state?
Set up four basic safeguards
- Establish version control: A recorded change history (like Git) that helps restore earlier code.
- Keep credentials out of prompts: Use appropriate platform secret storage or server-side configuration.
- Use synthetic data: Never use real customer or personal sensitive records.
- Keep the project small: Build replaceable prototypes before attempting complex systems.
Environment variables are not automatically private when exposed to browser code. This exercise needs no secret keys.
A Six-step roadmap for learning vibe coding
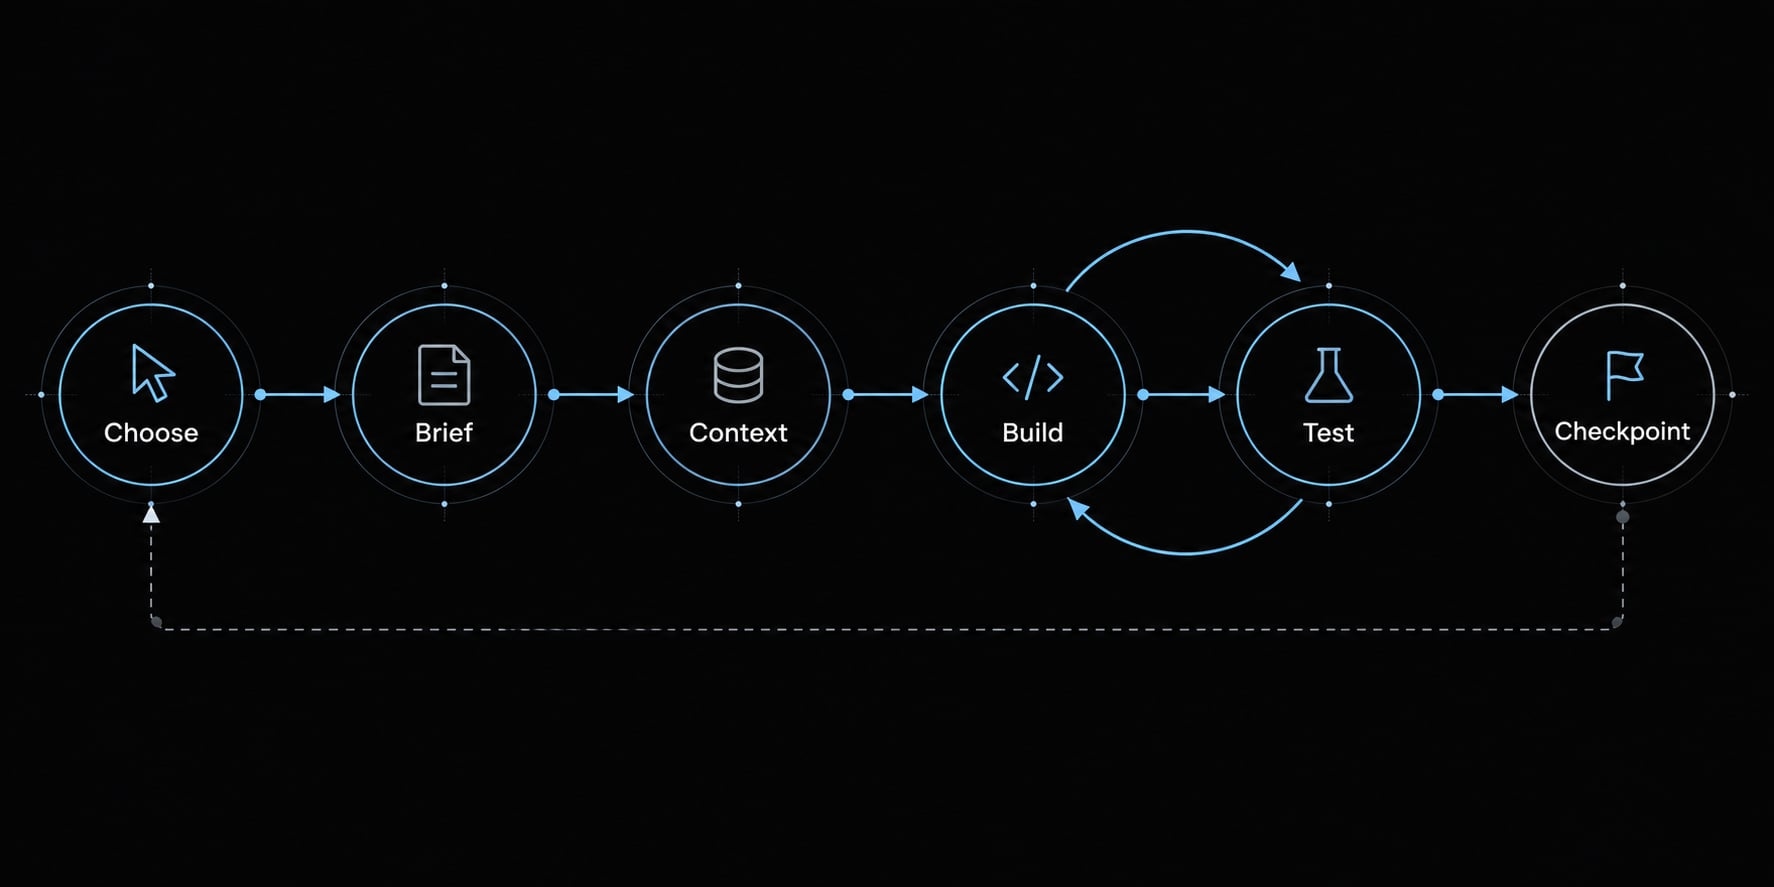
Use this vibe coding workflow for each small, verifiable improvement:
- Choose a small project.
- Write a project brief.
- Provide persistent project context.
- Build one feature at a time.
- Test, explain, and debug.
- Save a working checkpoint.
Step 1 - Choose a small, verifiable project
Choose one user, one main workflow, and low-risk data. For example: "A founder records personal work tasks and marks them complete." Exclude payments, sensitive records, and complex permissions.
Deliverable and milestone: A one-sentence purpose you can explain without adding several unrelated workflows.
Step 2 - Write a one-page project brief
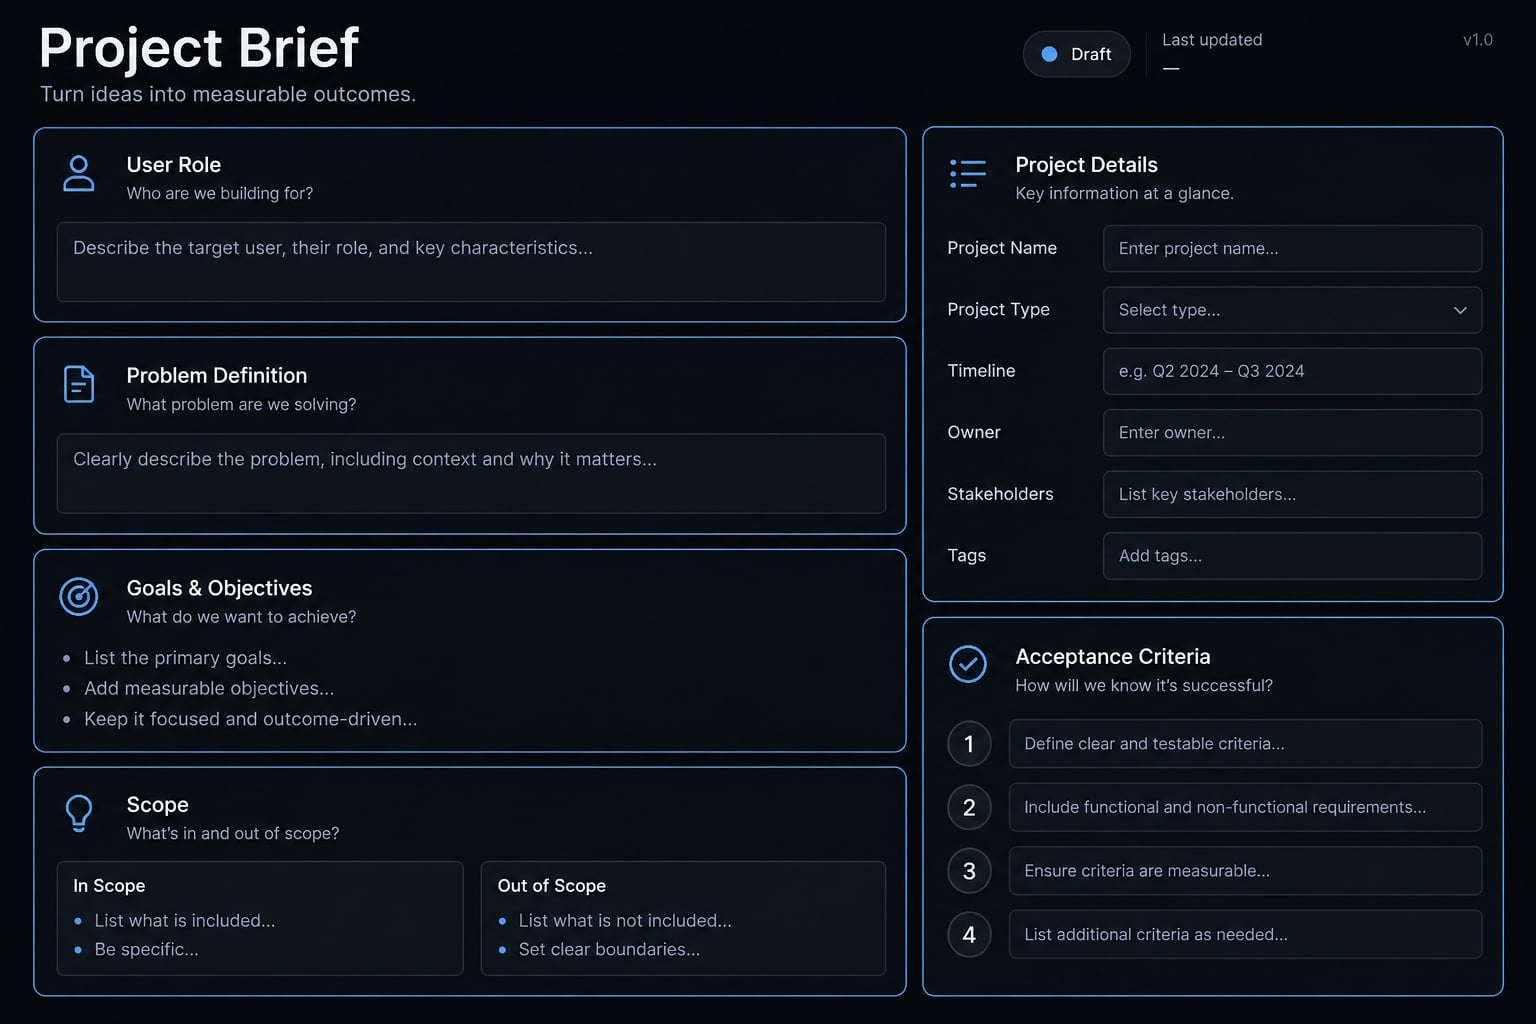
Write the requirements before requesting code. Acceptance criteria are observable conditions that define whether a feature works.
Use this reusable template:
- User: Who uses it?
- Problem: What needs solving?
- Main workflow: What actions happen?
- Required screens: What must be visible?
- Data: What information is stored?
- Excluded features: What stays out?
- Acceptance criteria: What must pass?
Planning prompt:
Review this brief before writing code. Ask about unclear requirements, identify missing acceptance criteria, and propose small implementation stages. Wait for approval before generating code.
The brief prevents assumptions from becoming unwanted features.
Deliverable and milestone: A completed brief whose requirements you can turn into checks.
Step 3 - Give the AI persistent project context
Save approved requirements as project notes the tool supports. Examples include AGENTS.md, CLAUDE.md and tool-specific rules; these are not universal conventions.
Use a compact rule set:
- Reuse the existing stack-the project’s current technologies.
- Keep edits within approved scope.
- Ask before adding a dependency, an external package, or making broad changes.
- Explain changed files.
- Never hard-code secrets.
- Run available checks and report failures honestly.
Persistent context reduces repeated explanation, but instructions do not guarantee compliance. Inspect changes and use permission controls.
Deliverable and milestone: A supported instructions file you can locate, explain, and update.
Step 4 - Build one small feature at a time
Use atomic prompting: request one focused change rather than an entire application.
Weak request:
Make the task tracker better.
Improved request:
The tracker currently displays tasks. Add a title input and Add button. Reject blank or whitespace-only titles. Preserve the layout and existing behavior. Verify valid and invalid submissions. Summarize the plan before editing and explain changed files afterward.
Structure each request around:
- Current context.
- Requested change.
- Constraints.
- Acceptance criteria.
- Verification method.
Focused requests make iterative refinement easier to inspect. They do not guarantee the agent leaves unrelated files untouched. Review its change summary against the actual files.
Deliverable and milestone: One inspectable change that solves the requested problem without an unnecessary rewrite.
Step 5 - Test, explain and debug every change
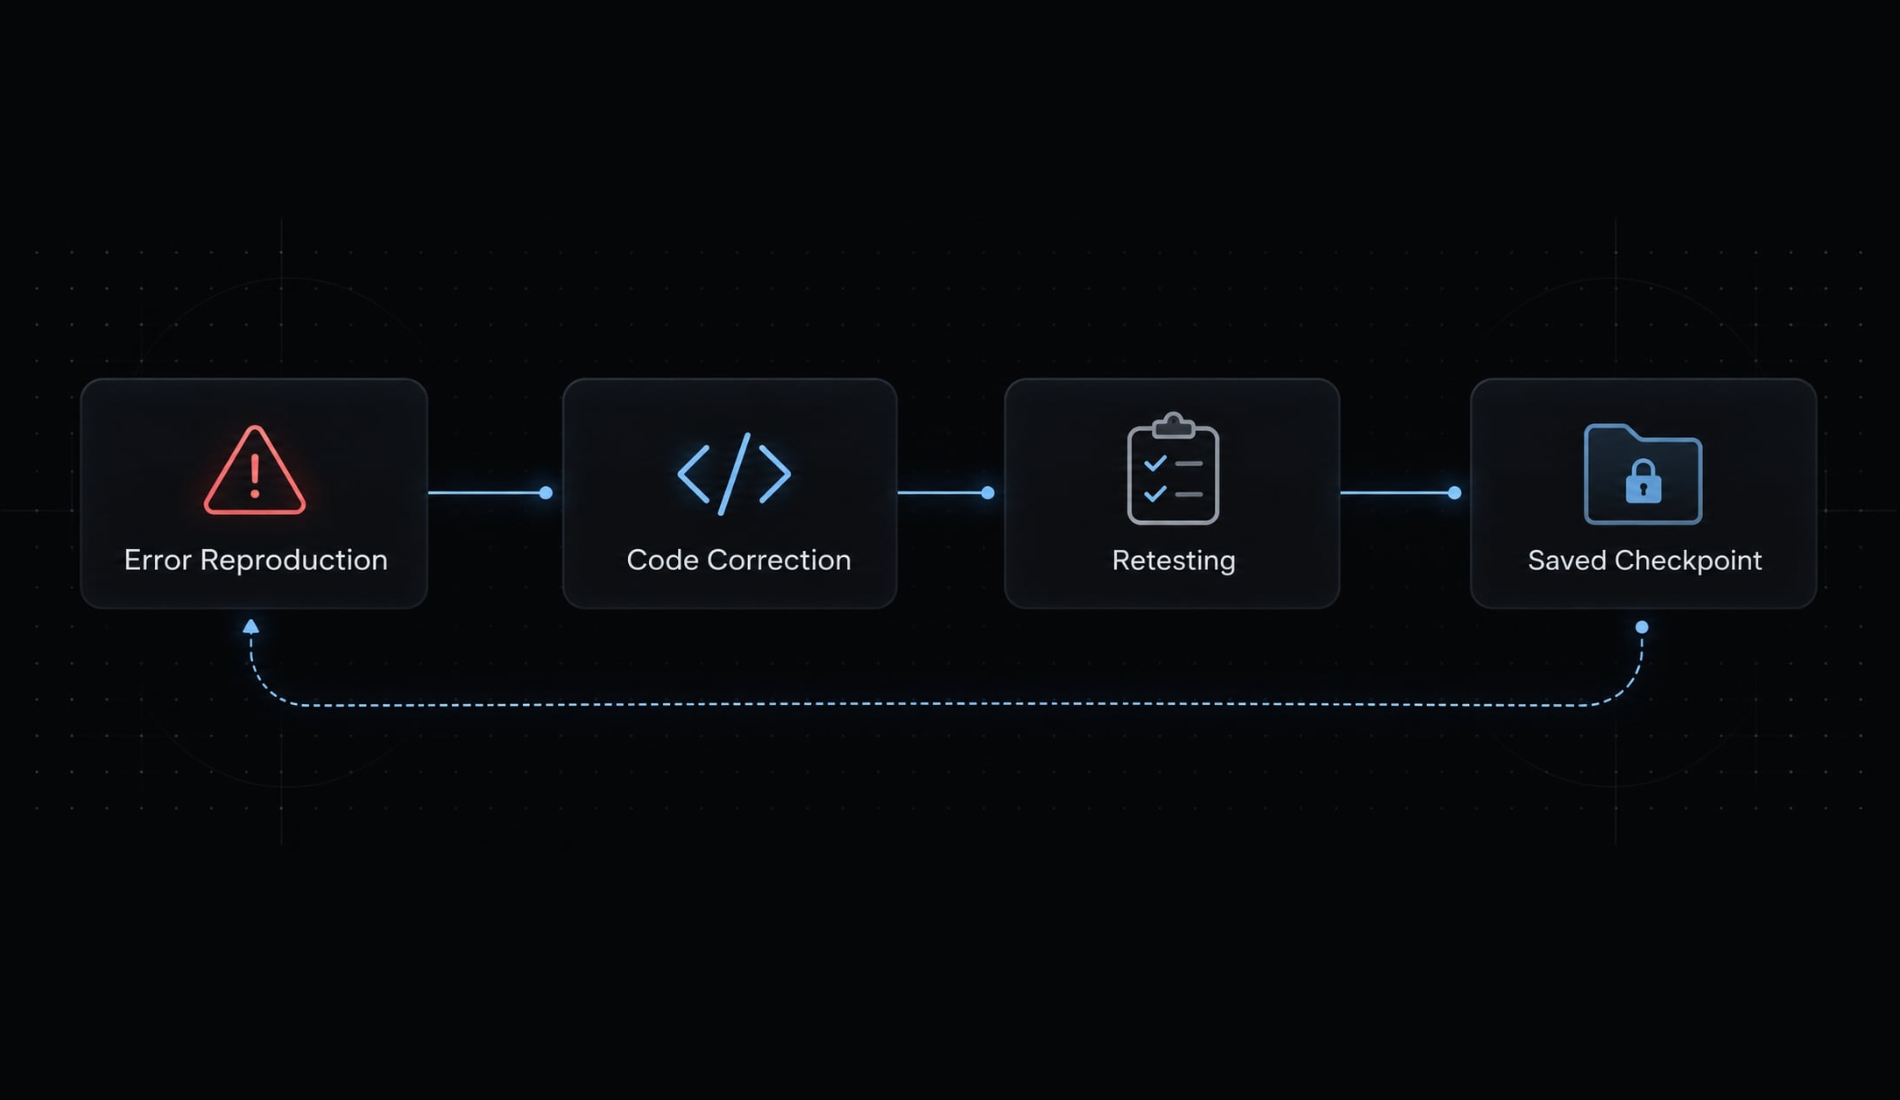
Run the feature yourself, then:
- Compare behavior with the requirements.
- Reproduce any failure.
- Capture relevant errors.
- Request a likely cause and minimal correction.
- Retest new and existing behavior.
Debugging prompt:
Expected: [behavior]. Observed: [behavior]. Reproduction steps: [steps]. Relevant sanitized error: [message]. Explain the likely cause and propose the smallest correction. Identify affected files, verification steps, and remaining risks. Avoid unrelated edits.
Preserve useful diagnostic context, but remove credentials, tokens, customer data, and identifying details before sharing logs.
A regression occurs when a change breaks existing behavior. An error disappearing does not prove correctness.
Deliverable and milestone: A failure record, an explained correction, and a successful retest you personally observed.
Step 6 - Save a working checkpoint and reflect
After each verified feature, save a checkpoint with a descriptive label, such as “Task completion survives refresh.”
In Git, a commit records selected changes. Official Git documentation explains commits and restoration; platform history may provide different recovery behavior.
Record the failure, useful request, and concept learned. If patches cause cascading failures, preserve anything needed and restore the last verified version.
Start fresh conversations with an updated brief and status summary. Restoring code does not automatically restore external data.
Deliverable and milestone: A working checkpoint you can restore and a change you can explain.
Build your first project - A simple task tracker
This is an illustrative practice exercise, not a tested walkthrough. Build a single-user personal work-task tracker for fictional founder or marketing tasks. It is a learning application, not a secure team system.
Use browser local storage for persistence, meaning data remains after the page reloads. MDN Web Docs’ Window.localStorage documentation describes this browser storage mechanism and its scope.
Local storage does not provide account-based access or automatic cross-device synchronization. Clearing browser data can remove saved tasks. Do not store sensitive company or customer records.
Define the minimum project scope
Required:
- Display tasks.
- Add a title.
- Mark a task complete.
- Delete one task.
- Preserve tasks after refresh.
Excluded: Accounts, collaboration, notifications, payments, analytics, and integrations.
Acceptance criteria
- Blank and whitespace-only titles are rejected.
- Completed tasks look different.
- Task titles and completion states survive refresh.
- Deleting one task leaves other tasks unchanged.
Your first vibe coding project is deliberately narrow. Filters, due dates, and visual polish can wait until the core behavior is understood.
Build the project in four stages
Stage | Requested outcome | Verification |
|---|---|---|
1. Interface | Task list, title input, action controls | Labels and controls are visible |
2. Core behavior | Add, complete, delete | Each action affects the intended task |
3. Browser-local persistence | Save and reload task state | Titles and completion survive refresh |
4. Validation and feedback | Reject invalid titles; show useful errors | Blank input produces no task |
Starter prompt:
Plan a single-user personal task tracker. Start with the interface only: task list, title input, Add button, completion control, and delete control. Use fictional tasks. Exclude authentication, a backend database, and extra features. Propose the simplest approach and wait for approval.
Iteration prompt:
Preserve the approved layout. Implement adding a task title and reject blank or whitespace-only input. Leave other behavior unchanged. Explain modified files and give verification steps before moving on.
Illustrative failure scenario: Tasks appear correctly but disappear after refresh. A possible cause is that tasks exist only in temporary application memory. Ask the tool to inspect loading and saving before changing anything. Then retest addition, completion, deletion, and refresh-not just the disappearing task.
Record expected behavior, observed behavior, and pass or fail for every check. “The agent said it worked” is not an observed result.
Define “Finished” before adding more features
Finish when all acceptance criteria pass, you can identify the main files, and a working checkpoint exists. Confirm that no secrets or real customer data are present.
The runnable preview must match the behavior you checked. Public hosting is optional; it is not required to complete this exercise.
Use AI as a coding tutor not just a code generator
To truly understand generated code, adopt the Predict → Run → Explain → Modify → Retest learning loop:
- Predict: What should change on screen before running the code?
- Run: Execute the application and observe actual behavior.
- Explain: Ask the AI to explain which functions controlled the change.
- Modify: Make one small manual adjustment.
- Retest: Verify both existing and new functionality.
Ask these questions after every generated change
- What user problem does this change solve?
- Which files and functions control it?
- Why this approach, and is there a simpler option?
- What could fail, and how can I test it?
- What concept should I learn to review it confidently?
Explanation prompt:
Explain this change using the task tracker as an example. Identify the relevant files and functions. Trace what happens after a click, distinguish facts from assumptions, and suggest one small exercise I can verify myself.
Try changing “Add” to “Add task.” Predict whether this should affect stored tasks. Inspect the change, then confirm adding and refreshing still work.
Skills to learn in context
Concept | Project connection |
|---|---|
Variables and data types | Task titles and completion state |
Conditions | Rejecting empty titles |
Functions | Add, complete, and delete actions |
Components | Reusable interface elements, if used |
Browser storage | Preserving tasks after refresh |
Git and tests | Recovering changes and checking behavior |
Learn APIs-interfaces between software systems-and databases later, when a project actually needs them. Do not expand the toolchain merely to make the exercise look more advanced.
Test AI-generated code before you trust it
A working preview demonstrates only the behavior observed. It does not establish security or production readiness.
Before accepting AI-generated code:
- Check the expected workflow.
- Try blank, repeated, and unusual inputs.
- Refresh and confirm saved state.
- Check a narrow mobile viewport.
- Inspect relevant errors and changed files.
- Check for exposed secrets.
- Verify a usable recovery point.
Prototype vs. Production-ready application
Dimension | Learning prototype | Production application |
|---|---|---|
Objective | Learn and demonstrate | Serve users reliably |
Testing | Focused acceptance checks | Risk-based testing across workflows |
Data | Synthetic, replaceable | Governed according to sensitivity |
Authentication | Unneeded for this exercise | Required when access and data demand it |
Security | Limited exposure, basic safeguards | Risk assessment and appropriate controls |
Monitoring | Manual observation | Operational visibility and response |
Recovery | Working code checkpoint | Tested code and data recovery |
Maintenance | Learning-driven changes | Ongoing ownership and updates |
Production readiness depends on context. Automated scans and tests reduce specific risks; they do not prove vulnerabilities are absent. A passing test establishes only the condition it checks.
Common beginner mistakes to avoid
- Entire app in one prompt → Build small features.
- Unexplained code → Request explanations and inspect behavior.
- Unrelated edits → Restrict scope and review changed files.
- Unnecessary dependencies → Ask why each package is needed.
- Endless patches → Restore a verified checkpoint.
- Exposed credentials → Use appropriate secret storage.
- Preview-only checking → Test invalid inputs and failure states.
- Sensitive deployment without review → Involve qualified help.
- Constant tool switching → Learn one repeatable workflow.
If a real credential is exposed, deleting it is insufficient. Revoke or rotate it and assess possible misuse, consistent with OWASP’s Secrets Management Cheat Sheet.
When to involve an experienced developer
Seek qualified code review for:
- Sensitive data, payments, or financial records.
- Complex permissions or critical company integrations.
- Legal, privacy, or regulated requirements.
- Important behavior you cannot explain or test, or recurring fixes that create new failures.
Some situations also require security, privacy, or legal specialists. Human approval is meaningful only when the reviewer understands what they are approving.
Frequently asked questions
What is vibe coding?
Vibe coding is a modern software development approach where the primary interface is natural language. Instead of writing manual syntax, developers use AI agents to generate, execute, and iterate on code, focusing on system architecture and logic rather than line-by-line implementation.
How does vibe coding differ from traditional coding?
Traditional coding emphasizes memorizing syntax, manual boilerplate, and line-by-line debugging. Vibe coding shifts the focus to articulating user flows, managing AI agent instructions, and error-driven iteration, where the human acts as an orchestrator reviewing and refining AI-generated output.
What are the essential safeguards for vibe coding?
To build safely, always maintain project history with version control, keep sensitive credentials out of prompts, use synthetic sample data, and keep projects small enough to verify. Never assume AI-generated output is secure or production-ready without independent testing.
Which tools are best for a beginner?
Beginners should start with browser-based builders like Lovable or Bolt.new, which handle deployment and infrastructure automatically. As you gain experience, transition to AI-native code editors like Cursor or terminal-based agents like Claude Code to manage more complex, multi-file projects.
How do I learn without becoming dependent on AI?
Use the "Predict, Run, Explain, Modify, Retest" learning loop. Before running a change, predict what it will do, then ask the AI to explain the logic. Finally, perform small modifications yourself and verify that both existing and new features function as expected.
What should I do if my AI-generated app breaks?
Do not ask the AI to "fix it" indefinitely. First, reproduce the error, capture the log, and ask for the cause. If the agent enters a loop of failing patches, revert to your last known working Git checkpoint and refine your instructions before trying again.
Is vibe coding production-ready?
Not by default. Vibe coding is excellent for prototyping, but production-ready applications require rigorous security audits, proper authentication, environment variable management, and professional review. Use vibe coding to build your understanding, but involve experienced developers for sensitive company or customer data.
Read more:
- 7 practical vibe coding examples: Build apps faster with AI
- Spec-driven vibe coding: A smarter way to build with AI
- Vibe coding threat model: Secure AI-assisted development guide
Conclusion
The practical answer to how to learn vibe coding is to build a repeatable process, not collect increasingly elaborate prompts. Define a small outcome, write testable requirements, provide project context, and request focused changes. Run each change yourself, investigate failures, and preserve a working checkpoint.
Complete one task tracker before expanding its scope. You should be able to explain its main behavior, demonstrate its acceptance checks, and restore an earlier working version. Those abilities matter more than generating additional features.
Keep human control through understanding, permission boundaries, and verification. For your next practice session, write the tracker brief, build only its interface, and inspect the result before authorizing the next stage.